The Ultimate 4-Ingredient Chocolate Peanut Butter Crunch Bars
Introduction: A Nostalgic, No-Bake Dream
There is a specific kind of magic that happens when rich, melty chocolate meets the satisfying, airy crunch of puffed rice cereal. It immediately transports us back to childhood, tearing open the wrapper of a classic crispy chocolate candy bar at the grocery store checkout. But as we grow older, our palates evolve. We crave that same nostalgic crunch, but we want higher-quality ingredients, a touch more depth, and perhaps a hit of savory salt to balance the sweetness.
Enter these spectacular 4-Ingredient Chocolate Peanut Butter Crunch Bars. This recipe takes that beloved childhood treat and gives it a grown-up, gourmet twist using just a handful of pantry staples. By melting high-quality chocolate with creamy peanut butter, we create a fudge-like binder that coats every single crispy rice cereal piece. A final sprinkle of flaked sea salt elevates the entire bar from a simple sweet to an absolutely addictive, sweet-and-salty masterpiece. Best of all? It requires zero baking, takes about ten minutes to throw together, and is virtually foolproof.
Why You Will Be Obsessed With This Recipe
If you are looking for a dessert that delivers maximum reward for minimum effort, this is it. Here is why these crunch bars will become your go-to treat:
- Incredibly Simple: With only four standard ingredients, you likely already have everything you need sitting in your pantry right now. No last-minute grocery store runs required.
- No-Bake Perfection: Perfect for hot summer days when you refuse to turn on the oven, or busy holidays when oven space is at a premium. The refrigerator does all the hard work for you.
- Kid-Friendly to Make and Eat: This is a fantastic recipe to make with children. There is no raw flour, no eggs, and it involves lots of fun stirring. Plus, it’s guaranteed to be a hit in any lunchbox.
- The Sweet and Salty Balance: The addition of peanut butter adds a nutty depth, while the flaky sea salt cuts through the richness of the chocolate, ensuring the bars are never cloying.
- Highly Customizable: This recipe acts as a brilliant base. You can easily adapt it for different dietary needs or flavor preferences by swapping the type of chocolate or the nut butter.
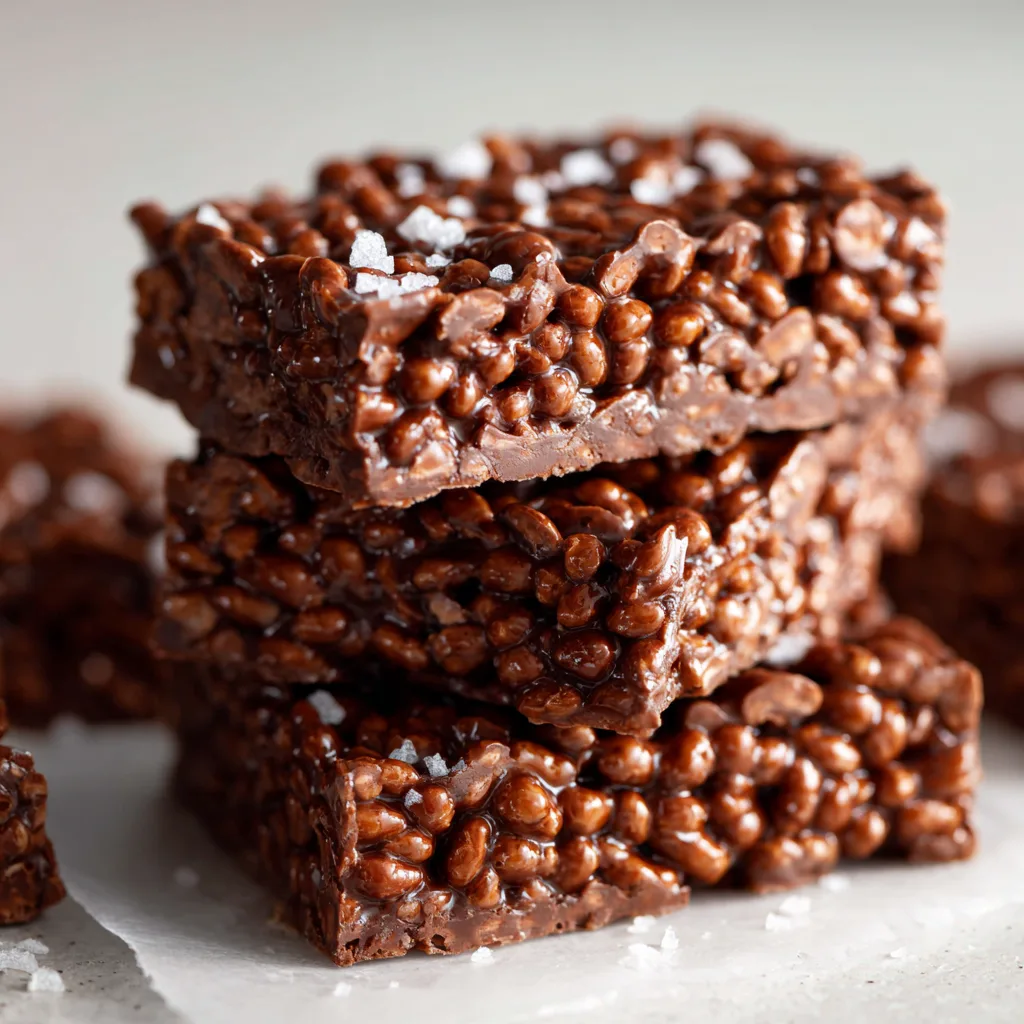
A Deep Dive into the 4 Simple Ingredients
Because there are only four ingredients in this recipe, the quality of each one matters. Here is what you need to know:
1. Chocolate Chips
This is the foundation of your crunch bar. The image calls for 1 1/2 cups, and the choice of chocolate is entirely up to you. Semi-sweet chocolate chips offer the best middle ground—rich enough to be decadent, but sweet enough to satisfy. If you prefer a darker, more sophisticated bar, use 60% or 72% dark chocolate chips. Milk chocolate will yield a much sweeter bar that closely mimics commercial candy bars.
2. Peanut Butter
Peanut butter serves a dual purpose here: it adds a wonderful, roasted nuttiness that pairs flawlessly with chocolate, and it softens the chocolate just enough so that when the bars set in the fridge, they don’t become rock-hard and impossible to bite. You want a standard, creamy peanut butter (like Jif or Skippy). Natural peanut butters that require stirring can sometimes be too oily and prevent the bars from setting up perfectly.
3. Rice Krispies (Puffed Rice Cereal)
This provides the essential, airy crunch. Make sure your cereal is fresh! Stale cereal will completely ruin the texture of these bars. Standard Rice Krispies work best, but you can use any brand of crispy puffed rice cereal.
4. Flaked Sea Salt
Do not skip this! A delicate sprinkle of flaked sea salt (like Maldon) on top of the wet chocolate before it sets is the secret to making these bars taste like they came from a high-end confectionary. The large flakes provide tiny bursts of salinity that amplify the chocolate and peanut butter flavors.
Essential Ingredients List
- Chocolate Chips: 1 1/2 cups (Semi-sweet or milk chocolate preferred)
- Peanut Butter: 1/3 cup (Creamy, standard processed peanut butter)
- Rice Krispies: 1 cup (Crispy rice cereal)
- Flaked Sea Salt: A generous pinch, for finishing
Step-by-Step Instructions for No-Bake Success
Ready to make the easiest dessert of your life? Follow these simple steps.
- Prepare Your Pan: Line an 8×8-inch or 9×5-inch loaf pan (depending on how thick you want your bars) with parchment paper. Leave an overhang on two sides; this creates a “sling” that will make it incredibly easy to lift the set bars out of the pan later.
- Melt the Base: In a medium-sized, microwave-safe bowl, combine the 1 1/2 cups of chocolate chips and the 1/3 cup of creamy peanut butter. Microwave on 50% power in 30-second increments. After each 30 seconds, remove the bowl and stir well. Repeat this process until the mixture is completely smooth and glossy. Do not overheat, or the chocolate will seize and become grainy! Alternatively, you can melt them together using a double boiler on the stove over low heat.
- Add the Crunch: Remove the melted chocolate and peanut butter mixture from the heat. Pour in the 1 cup of Rice Krispies. Using a rubber spatula, gently fold the cereal into the chocolate. Keep folding until every single piece of cereal is thoroughly coated.
- Spread and Press: Transfer the mixture into your parchment-lined pan. Use your spatula to spread it out into an even layer, pressing down lightly to pack it into the corners. You want it somewhat compact so the bars hold together well when cut.
- The Salty Finish: While the chocolate is still wet and shiny, sprinkle your flaked sea salt evenly over the top.
- Chill to Set: Place the pan in the refrigerator for at least 30 to 45 minutes, or until the chocolate is completely firm to the touch.
- Slice and Serve: Once fully set, use the parchment paper sling to lift the block out of the pan and onto a cutting board. Using a large, sharp knife, slice into thick rectangles or small bite-sized squares. Enjoy!
4-Ingredient Chocolate Peanut Butter Crunch Bars
Ingredients
Equipment
Method
- Line an 8×8-inch or 9×5-inch pan with parchment paper, leaving an overhang on the sides for easy removal.
- In a microwave-safe bowl, combine the chocolate chips and peanut butter.
- Microwave on 50% power in 30-second intervals, stirring well after each, until the mixture is completely smooth and melted. Do not overheat.
- Remove from the microwave and gently fold in the Rice Krispies cereal until every piece is evenly coated in the chocolate mixture.
- Transfer the mixture to the prepared pan. Use a spatula to spread it evenly and press it down gently into the corners.
- Sprinkle the flaked sea salt evenly over the top of the wet chocolate.
- Place the pan in the refrigerator and chill for 30 to 45 minutes, or until completely set and firm.
- Use the parchment paper overhang to lift the bars out of the pan. Cut into rectangles or squares using a sharp knife and serve.
Notes
Pro Tips for the Best Crunch Bars
- The Double Boiler Method: If you are prone to burning chocolate in the microwave, opt for a double boiler. Place a heat-proof bowl over a pot of barely simmering water (ensure the water doesn’t touch the bottom of the bowl) and melt the chocolate and peanut butter gently.
- Clean Cuts: For perfectly clean slices without cracking the chocolate, run your large chef’s knife under hot water, wipe it completely dry with a towel, and then make your cuts while the knife is warm.
- Scale it Up: This recipe easily doubles. Simply use a 9×13-inch pan if you are doubling the ingredients to feed a crowd.
Delicious Variations to Try
This recipe is highly adaptable. Try these fun swaps to mix things up:
- Allergy-Friendly: Swap the peanut butter for sunflower seed butter (SunButter) to make these completely nut-free. Ensure your chocolate chips and cereal are certified allergen-free.
- White Chocolate Macadamia: Use white chocolate chips, cashew or almond butter, and fold in a 1/4 cup of finely chopped macadamia nuts along with the cereal.
- S’mores Crunch: Toss in a 1/2 cup of mini marshmallows and a handful of crushed graham crackers along with the rice cereal.
Storage and Freezing Instructions
Refrigerator Storage: Because these bars contain peanut butter which softens the chocolate, they are best stored in the refrigerator. Place them in an airtight container with layers separated by wax or parchment paper. They will keep perfectly in the fridge for up to two weeks (if they last that long!). You can eat them cold or let them sit at room temperature for 5 minutes before eating.
Freezer Storage: These bars freeze beautifully! Wrap individual bars tightly in plastic wrap, then place them in a freezer-safe zip-top bag. They will stay fresh in the freezer for up to 3 months. Enjoy them straight from the freezer for an extra-crispy, cold treat!
Conclusion
You truly cannot beat a dessert that requires only four ingredients, zero baking, and satisfies both chocolate and crunchy cravings simultaneously. These Chocolate Peanut Butter Crunch Bars are a testament to the fact that sometimes the simplest recipes are the absolute best. Whether you are whipping them up for a quick weeknight treat, adding them to a holiday cookie tray, or making them with kids on a rainy afternoon, they are guaranteed to vanish quickly. Grab your mixing bowl and get ready to enjoy your new favorite no-bake dessert!