Irresistible Cheesy Mashed Potato Puffs
There is a universal truth in the culinary world: it is nearly impossible to make exactly the right amount of mashed potatoes. Whether you are hosting a grand holiday feast, a Sunday family dinner, or just prepping a cozy weeknight meal, you inevitably end up with a container of leftover mashed potatoes staring back at you from the refrigerator. While reheating them in the microwave is certainly an option, they rarely retain their original fluffy glory. This is where culinary ingenuity comes into play. Enter the ultimate solution to your leftover dilemma: Cheesy Mashed Potato Puffs.
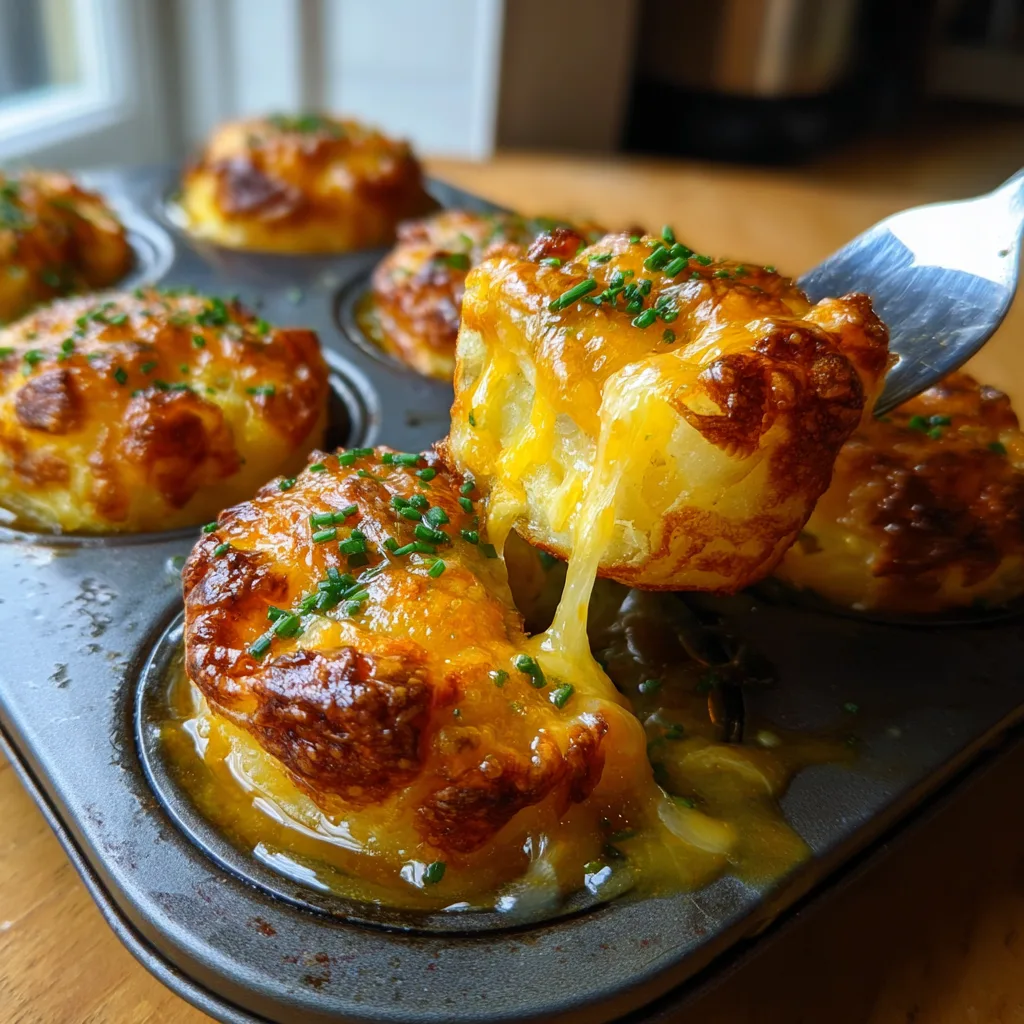
These delightful, golden-brown savory muffins transform cold, dense leftover potatoes into an elegant, deeply comforting side dish or appetizer. By combining your chilled mash with a binding egg, a generous handful of sharp cheddar cheese, and a sprinkle of fresh chives, you create a dish that is arguably better than the original mashed potatoes themselves. Baked in a standard muffin tin, these puffs develop a beautifully crispy, cheese-encrusted exterior while maintaining a soft, pillowy, melt-in-your-mouth interior. They are portion-controlled, incredibly kid-friendly, and look sophisticated enough to serve at your next dinner party. Let us explore exactly how to master this brilliant recipe and elevate your side-dish game forever.
Why You Will Fall in Love with Potato Puffs
The magic of these cheesy potato cups lies in the brilliant contrast of textures. Traditional mashed potatoes are monolithic—they offer one smooth texture throughout. However, when you bake that same potato mixture in a hot muffin tin, culinary alchemy occurs. The edges that touch the metal pan caramelize and crisp up, aided by the natural fats in the cheese and whatever butter or cream was already in your leftover mash. The top gets broiled into a bubbly, golden crust. Meanwhile, the inside remains steamy, fluffy, and tender.
Beyond texture, convenience is a massive factor. These puffs require only four primary ingredients, most of which you probably already have in your kitchen right now. They take mere minutes to assemble, making them an ideal, stress-free addition to a busy weeknight dinner. Furthermore, they are inherently portable. Unlike a dollop of loose potatoes on a plate, these individual puffs can be easily packed into school lunchboxes, taken to potlucks, or served as finger food at casual gatherings.
Lastly, they are the ultimate “blank canvas” recipe. While sharp cheddar and chives provide a classic, universally appealing flavor profile, you can easily customize the base to accommodate whatever ingredients you need to use up in your fridge. The versatility of this dish ensures that you will never tire of making it.
The Secret to the Perfect Puff: The Ingredients
To achieve the perfect structural integrity and flavor, you must understand the role of each ingredient in this incredibly simple recipe.
The Chilled Mashed Potatoes: The temperature of your potatoes is the most critical factor here. You must use chilled, leftover mashed potatoes straight from the refrigerator. If you attempt to make these with warm, freshly mashed potatoes, the mixture will be far too loose and wet. Cold potatoes have had time for their starches to retrograde and firm up, allowing them to hold their shape when scooped and baked. Any type of mashed potato works—whether they were made with Yukon golds, Russets, or red potatoes, and whether they are perfectly smooth or a bit chunky.
The Large Egg: The egg acts as the crucial binding agent. Without it, your potatoes would simply heat up and melt into a shapeless puddle in the muffin tin. The proteins in the egg coagulate as they bake, providing structure and lift to the puff, holding the cheese and potato starches together in a neat, muffin-like package.
The Shredded Cheddar Cheese: Cheese serves a dual purpose here: flavor and texture. Sharp cheddar cuts through the heavy starchiness of the potato with a bright, tangy, salty bite. When mixed into the potato, it melts into gooey pockets. When sprinkled on top, it creates a crisp, golden-brown crust. Always try to grate your own cheese from a block if possible; pre-shredded bagged cheeses contain anti-caking agents that prevent them from melting as smoothly.
The Fresh Chives: A pop of green not only makes the dish visually stunning but also cuts the richness of the cheese and potato. Chives offer a mild, delicate onion flavor that complements the potato perfectly without overpowering it. If you do not have chives, green onions (scallions) are an excellent substitute.
Ingredients List
- – 3 cups chilled mashed potatoes (leftovers work best!)
- – 1 large egg, lightly beaten
- – 1 cup shredded cheddar cheese, divided use
- – Fresh chopped chives (to taste, about 2-3 tablespoons)
- – Optional: salt, black pepper, or garlic powder to taste (depending on how seasoned your original mashed potatoes were)
- – Non-stick cooking spray or softened butter (for greasing the muffin tin)
Step-by-Step Instructions
Creating these delightful side dishes is incredibly straightforward, but following the proper technique ensures they slide right out of the pan with perfectly intact crispy edges.
- Preheat and Prepare: Start by preheating your oven to 400°F (200°C). A hot oven is essential for getting those crispy, golden edges. Generously grease a standard 12-cup muffin tin with non-stick cooking spray or rub the cups down with softened butter. Do not skimp on the greasing, as potatoes love to stick to metal pans.
- Combine the Base Ingredients: In a large mixing bowl, add your 3 cups of cold, chilled mashed potatoes. If they are very stiff from the fridge, use a sturdy wooden spoon or a potato masher to break them apart slightly. Pour in the lightly beaten egg, 1/2 cup of the shredded cheddar cheese (reserve the other half for topping), and half of your chopped chives.
- Mix Thoroughly: Stir the mixture together until the egg is completely and evenly incorporated into the potatoes. You should not see any streaks of yellow egg. If your original mashed potatoes were under-seasoned, now is the time to add a pinch of salt, some freshly cracked black pepper, or a dash of garlic powder.
- Portion into the Tin: Using a cookie scoop or a large spoon, divide the potato mixture evenly among the cups of your prepared muffin tin. You should get about 8 to 10 puffs depending on how generously you fill them. Gently press the mixture down into the cups so it is compact, and smooth out the tops slightly.
- Top with Cheese: Sprinkle the remaining 1/2 cup of shredded cheddar cheese evenly over the tops of each potato puff. This will create that irresistible, crispy cheese crown.
- Bake to Perfection: Place the muffin tin in the preheated oven and bake for 20 to 25 minutes. You are looking for the cheese on top to be melted, bubbling, and deeply golden brown, and the edges of the puffs to look crispy and pulling slightly away from the sides of the tin.
- Cool and Garnish: Remove the pan from the oven. This is a crucial step: let the puffs rest in the muffin tin for at least 5 to 10 minutes before trying to remove them. This resting period allows them to set up and firm up. If you try to remove them while boiling hot, they will fall apart. After resting, run a butter knife around the edges and gently lift them out. Garnish with the remaining fresh chopped chives and serve warm.
Cheesy Mashed Potato Puffs
Ingredients
Equipment
Method
- Preheat oven to 400°F (200°C). Generously grease a standard 12-cup muffin tin with non-stick cooking spray.
- In a large bowl, combine the cold mashed potatoes, beaten egg, 1/2 cup of the cheddar cheese, and half of the chives. Mix well.
- Season with salt and pepper to taste, depending on how seasoned your original mashed potatoes were.
- Scoop the potato mixture evenly into the prepared muffin cups, pressing down slightly to compact them.
- Sprinkle the remaining 1/2 cup of cheddar cheese evenly over the tops of the puffs.
- Bake for 20-25 minutes until the cheese is melted and deeply golden, and edges are crispy.
- Let rest in the pan for 5-10 minutes to firm up before gently removing with a knife. Garnish with remaining chives.
Notes
Expert Tips for the Best Results
To guarantee success every single time you make these, keep these professional kitchen tips in mind.
Assess Your Leftovers: Not all mashed potatoes are created equal. If your leftover mashed potatoes were exceptionally creamy, thin, or heavily loaded with butter and milk, your puffs might be too wet. If the mixture feels sloppy after adding the egg, stir in a tablespoon or two of all-purpose flour or grated parmesan cheese to help bind the moisture and tighten the batter.
The Broiler Trick: If your puffs have baked for 25 minutes and are heated through, but the cheese on top hasn’t achieved that dark, crispy golden color you desire, simply flip your oven to the “Broil” setting for the last 1 to 2 minutes of cooking. Watch them like a hawk, as the broiler can take them from perfect to burnt in seconds.
Use a Silicone Muffin Pan: If you struggle with food sticking to your bakeware, consider using a silicone muffin pan instead of a traditional metal one. You will still need to give it a light spray, but the flexible silicone allows you to easily pop the puffs out from the bottom without using a knife, ensuring perfect, unbroken shapes every time.
Delicious Variations to Try
These puffs are highly adaptable. Once you master the base recipe, try these incredible flavor variations to keep your family guessing!
Loaded Baked Potato Puffs: Emulate the flavors of a classic loaded baked potato. Fold in 1/4 cup of crispy, crumbled bacon bits and substitute the cheddar with a blend of cheddar and Monterey Jack. Serve them with a side of cold sour cream for dipping.
Garlic Parmesan and Herb: For a more sophisticated flavor profile that pairs wonderfully with Italian dishes or roasted chicken, skip the cheddar. Instead, use 3/4 cup of freshly grated Parmesan cheese. Add a teaspoon of garlic powder and swap the chives for freshly chopped rosemary and thyme.
Spicy Jalapeño Popper Puffs: Give your side dish a kick! Fold in 2 tablespoons of finely diced pickled or fresh jalapeños and 2 tablespoons of softened cream cheese into the potato mixture. Top with Pepper Jack cheese instead of cheddar. These make an incredible game-day appetizer.
Serving Suggestions
Because they are essentially portable mashed potatoes, these cheesy puffs pair beautifully with virtually any main course that normally calls for a potato side.
They are phenomenal alongside a perfectly seared ribeye steak or a juicy pork chop, absorbing the savory pan sauces on the plate. They make a fun and interactive side dish for classic meatloaf, offering a modern twist on the traditional meat-and-potatoes dinner.
If you are serving them as an appetizer or party snack, presentation is key. Arrange them on a nice wooden serving board and provide dipping sauces. They go wonderfully with a dollop of sour cream, a drizzle of hot sauce, a side of ranch dressing, or even a robust garlic aioli.
Storage and Freezing Guidelines
If you somehow have leftovers of your leftovers, these puffs store surprisingly well.
Refrigerator Storage: Allow the baked puffs to cool completely to room temperature. Transfer them to an airtight container and store them in the refrigerator for up to 4 days. To reheat, avoid the microwave, which will make them soggy. Instead, place them on a baking sheet and pop them in a 350°F (175°C) oven or an air fryer for 5-8 minutes until warmed through and re-crisped.
Freezing Instructions: These are excellent for meal prep! You can freeze them either before or after baking. To freeze after baking, let them cool completely, flash freeze them on a baking sheet until solid, and then transfer to a freezer-safe bag for up to 2 months. Reheat directly from frozen in a 350°F oven for 15-20 minutes. If freezing before baking, scoop the mixture into the muffin tin, freeze the whole tin until solid, pop the frozen pucks out into a bag, and bake them from frozen (adding 5-10 minutes to the baking time).
Frequently Asked Questions
Can I use instant mashed potatoes for this recipe?
Yes, you absolutely can! Just prepare the instant mashed potatoes according to the package directions, but perhaps use slightly less liquid than called for so they remain thick. You must chill the instant potatoes completely in the refrigerator before mixing in the egg and cheese.
Why did my potato puffs fall apart when I took them out of the pan?
This usually happens for one of two reasons: either the muffin tin wasn’t greased sufficiently, causing the sides to stick and tear, or you didn’t let them rest. The resting period of 5-10 minutes after baking is non-negotiable. It allows the egg and melted cheese to set up and solidify the structure of the puff.
Can I make these in a mini muffin tin for bite-sized appetizers?
Definitely! Mini potato puffs make incredible party hors d’oeuvres. Simply reduce the baking time to about 12-15 minutes, keeping an eye on them so they don’t burn. The ratio of crispy edge to soft center will be much higher, which is arguably the best part!
Never let a bowl of leftover mashed potatoes go to waste again. With just an egg, some cheese, and a muffin tin, you can create these Cheesy Mashed Potato Puffs that are guaranteed to steal the show at your next meal. Enjoy the crispy edges, the fluffy centers, and the endless compliments from your family and guests.