Gooey Cinnamon Roll Bars
Cinnamon Roll Bliss Bars: The Ultimate Gooey, Glazed Dessert Recipe
Let’s be honest: we all crave the warm, gooey, comforting embrace of a fresh-from-the-oven cinnamon roll. But we don’t always crave the work—the kneading, the rising, the proofing, the rolling. What if you could capture that exact feeling of “bliss” in an easy, no-fuss, shareable dessert bar? Enter: Cinnamon Roll Bliss Bars.
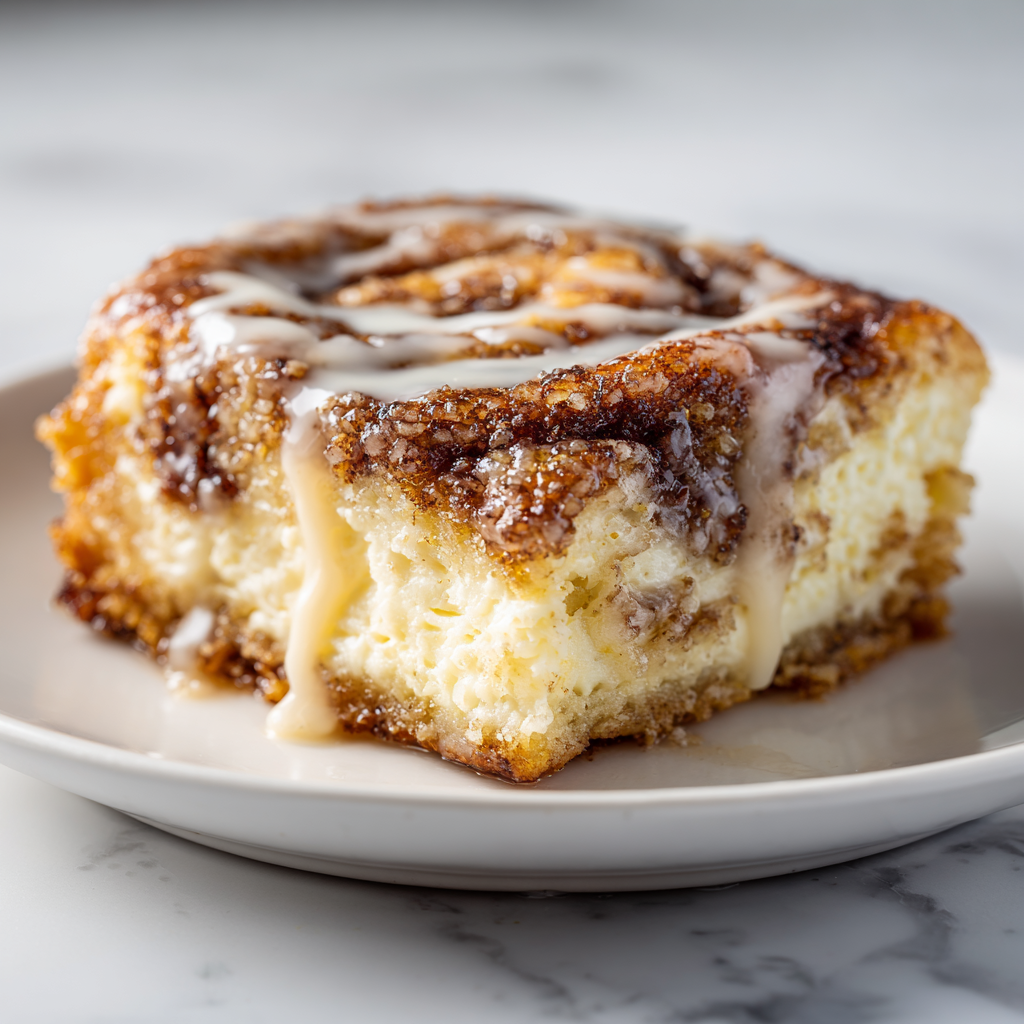
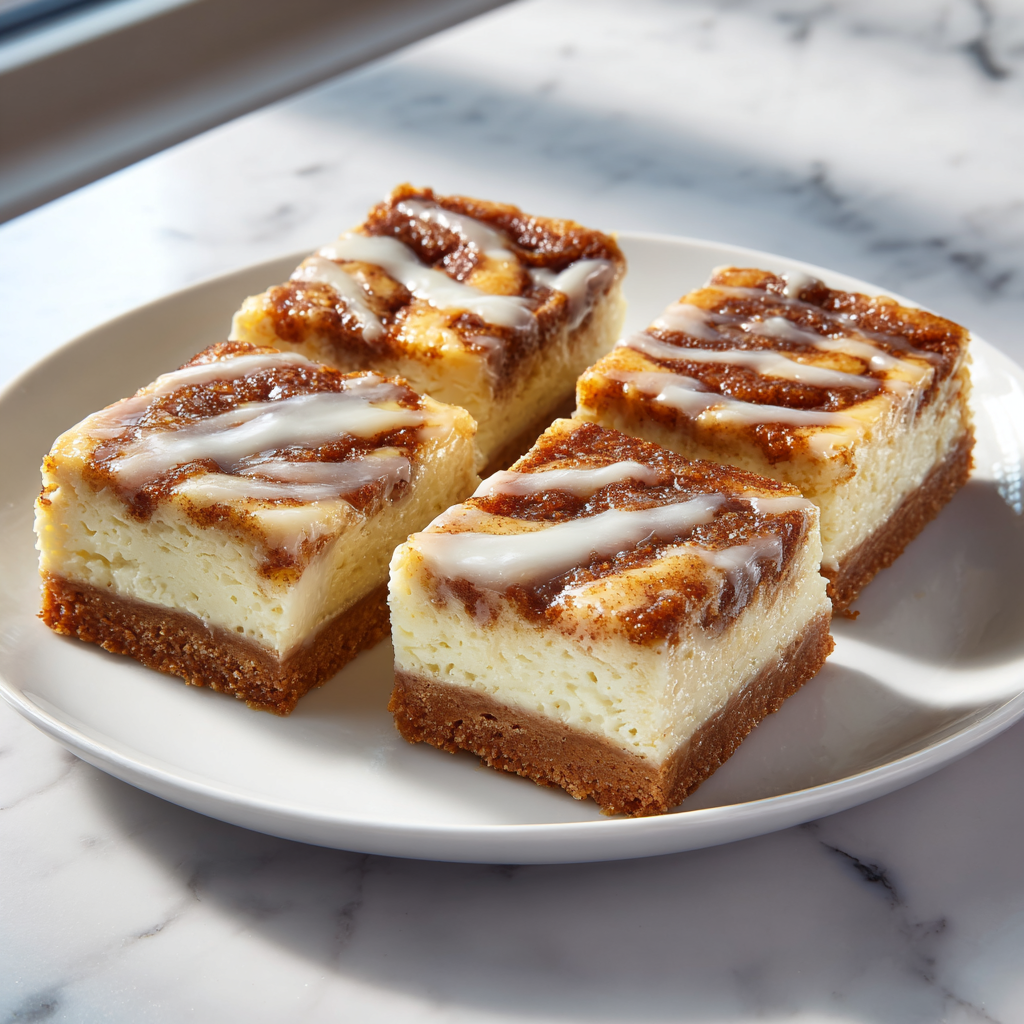
These bars are the perfect marriage between a soft, buttery crust, a rich and tangy cheesecake filling, and a decadent, caramelized cinnamon-sugar swirl. As if that weren’t enough, they’re finished with a sweet vanilla glaze that seeps into every nook and cranny.
This is the dessert you bring to a potluck to become a legend. It’s the treat you bake for a weekend brunch, a holiday gathering, or just a Tuesday night when you deserve something truly special. They deliver all the flavor of a gourmet cinnamon roll with the simple, straightforward method of a classic dessert bar. Get ready to find your new favorite sweet treat.
⭐ Why You Will Be Obsessed With These Bars
This recipe isn’t just popular; it’s a game-changer for dessert lovers. Here’s why you’ll find yourself making it again and again.
- All the Flavor, None of the Fuss: This recipe skips the yeast, kneading, and rising time entirely. You get the iconic cinnamon-sugar and cream cheese frosting (in bar form!) without the complex, time-consuming process of traditional cinnamon rolls.
- The Perfect Texture Trio: These bars are a journey in every bite. You start with the soft, buttery crust, move to the ultra-creamy and smooth cheesecake filling, and finish with the sweet, slightly crunchy, gooey cinnamon swirl on top. The final glaze ties it all together.
- Insanely Versatile: While perfect as-is, these bars are a blank canvas. Add toasted pecans, drizzle them with caramel, or use brown butter in the glaze. They are just as at home at a baby shower as they are at a football-watching party.
- Make-Ahead Champions: These bars are arguably better the next day. They slice beautifully once fully chilled, making them the ideal make-ahead dessert. This frees up your time right before serving, which is a lifesaver when hosting.
- Looks and Tastes Gourmet: The beautiful cinnamon swirl and professional-looking glaze make these bars look like they came from a high-end bakery. Only you will know how simple they were to throw together.
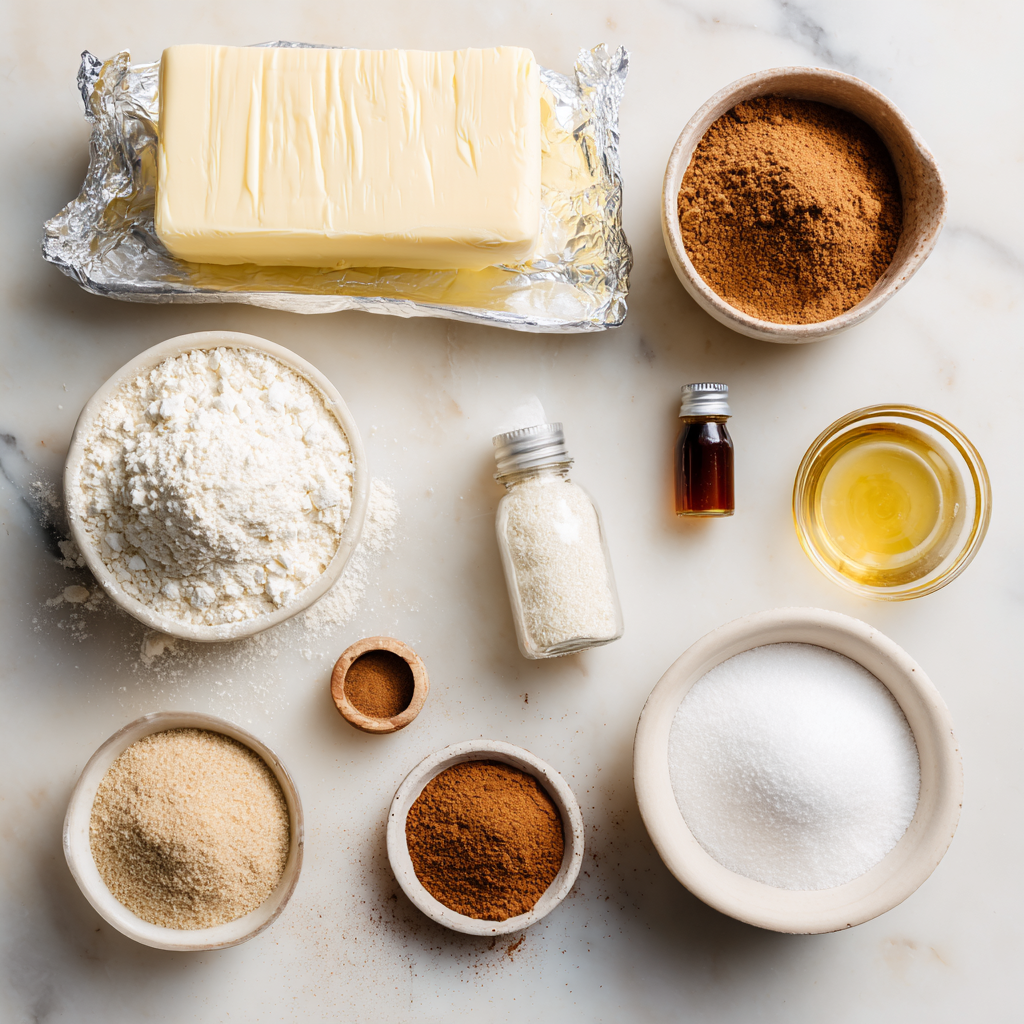
🛒 Ingredients
This recipe uses simple pantry staples to create its three distinct, delicious layers.
For the Crust:
- Unsalted Butter: 1/2 cup (1 stick), melted
- All-Purpose Flour: 1 1/2 cups
- Granulated Sugar: 1/4 cup
- Salt: 1/4 teaspoon
For the Cream Cheese Filling:
- Cream Cheese: 8 oz block, fully softened to room temperature
- Granulated Sugar: 1/2 cup
- Large Egg: 1, room temperature
- Vanilla Extract: 1 teaspoon
- Salt: 1/4 teaspoon
For the Cinnamon Swirl Topping:
- Unsalted Butter: 1/4 cup (1/2 stick), melted
- Brown Sugar: 1/2 cup, packed
- Ground Cinnamon: 2 teaspoons
- All-Purpose Flour: 1 tablespoon (this helps thicken it)
For the Vanilla Glaze:
- Powdered Sugar: 1 cup
- Milk: 2-3 tablespoons (or heavy cream for richness)
- Vanilla Extract: 1/2 teaspoon
🧑🍳 Step-by-Step Instructions
Follow these steps for perfect, gooey, layered bliss bars.
Step 1: Prepare the Crust
- Preheat & Prep: Preheat your oven to 350°F (175°C). Line an 8×8 inch square baking pan with parchment paper, leaving some overhang on the sides to act as “handles.” This is key for easy removal.
- Mix Crust: In a medium bowl, combine the 1 1/2 cups of flour, 1/4 cup granulated sugar, and 1/4 teaspoon salt. Pour in the 1/2 cup of melted butter and mix with a fork until a crumbly, soft dough forms.
- Press Crust: Dump the dough into your prepared pan. Use your fingers or the back of a spoon to press it firmly and evenly into the bottom of the pan to form the crust.
- Par-Bake: Bake the crust for 12-15 minutes, until it’s just set and the edges are very lightly golden. Set it aside while you prepare the filling.
Step 2: Make the Cream Cheese Filling
- Beat Cream Cheese: In a large bowl, add the 8 oz of softened cream cheese. Using a hand mixer (or a stand mixer), beat on medium speed for 1-2 minutes until it’s completely smooth and free of lumps.
- Add Sugar & Wet Ingredients: Add the 1/2 cup of granulated sugar and 1/4 teaspoon salt, and beat again until combined. Add the room temperature egg and 1 teaspoon of vanilla extract. Mix on low speed just until the egg is incorporated. Do not overmix!
- Pour: Pour this cream cheese mixture evenly over your warm, par-baked crust and spread it into a smooth layer.
Step 3: Add the Cinnamon Swirl
- Mix Topping: In a small bowl, whisk together the 1/2 cup melted butter, 1/2 cup brown sugar, 2 teaspoons cinnamon, and 1 tablespoon of flour until it forms a smooth, thick paste.
- Dollop & Swirl: Drop small spoonfuls of the cinnamon mixture all over the top of the cream cheese filling. Use a butter knife or a small offset spatula to gently swirl the cinnamon topping into the cream cheese layer. Don’t overmix—you want to see distinct ribbons of cinnamon and cream cheese.
Step 4: Bake the Bars
- Bake: Place the pan back into the 350°F (175°C) oven. Bake for 25-30 minutes. The edges will look set and slightly puffed, and the center should be almost set (it will have a very slight jiggle, but not be liquid).
- Cool Completely: This is the most important part! Remove the pan from the oven and let it cool on a wire rack for at least 1 hour at room temperature. Then, transfer the pan to the refrigerator to chill for at least 3-4 hours, or preferably overnight. The bars must be cold to set properly and to be cut cleanly.
Step 5: Glaze and Serve
- Remove & Cut: Once fully chilled, use the parchment paper handles to lift the entire block of bars out of the pan. Place it on a cutting board.
- Make Glaze: In a small bowl, whisk the 1 cup of powdered sugar, 2 tablespoons of milk, and 1/2 teaspoon of vanilla. Add more milk, 1/2 teaspoon at a time, until you reach a thick but pourable consistency.
- Drizzle & Serve: Drizzle the glaze all over the top of the bars. You can do this before or after cutting. For the cleanest cuts, run a large, sharp knife under hot water and wipe it dry between each cut. Cut into 9 or 12 squares.
💡 Tips for Dessert Bar Perfection
Want bakery-quality results? Follow these pro-tips.
- Room Temperature is Non-Negotiable: For the filling, your cream cheese and egg must be at room temperature. Cold cream cheese is the #1 enemy of a smooth cheesecake filling—it will be lumpy, guaranteed. Softened cream cheese blends perfectly with the sugar.
- Don’t Overmix the Egg: Once you add the egg to the cream cheese filling, mix on low speed just until it’s combined. Overmixing incorporates too much air, which can cause the cheesecake layer to puff up excessively in the oven and then crack and sink as it cools.
- Patience is a Virtue (The “Chill” Step): Do not, under any circumstances, try to cut these bars while they are warm. The cream cheese filling needs hours in the refrigerator to set up into a firm, dense, and creamy bar. Trying to cut them early will result in a soupy, delicious mess.
- The Parchment Paper Sling: Don’t skip the step of leaving parchment paper “handles.” It’s the only way to lift the bars out of the pan cleanly without destroying the first piece.
- The Secret to Clean Cuts: For those perfect, sharp-edged squares you see in photos, the trick is a hot knife. Fill a tall glass with hot water. Dip a large, sharp knife into the water, wipe it completely dry with a paper towel, and make one cut. Repeat this process (dip, wipe, cut) for every single cut. It’s tedious, but it works flawlessly.
🔄 Delicious Variations & Substitutions
These bars are a wonderful starting point for your own creativity.
- Add Toasted Nuts: For a classic cinnamon roll feel, add 1/2 cup of finely chopped toasted pecans or walnuts. You can either mix them into the cinnamon swirl mixture or sprinkle them on top before baking.
- Brown Butter Glaze: Elevate the flavor by browning your butter for the glaze. Melt 2-3 tablespoons of butter in a small saucepan until it smells nutty and has brown flecks. Let it cool slightly, then mix it into your powdered sugar along with the milk and vanilla.
- Caramel Drizzle: Instead of (or in addition to) the vanilla glaze, drizzle the finished bars with a high-quality jarred caramel sauce.
- Shortcut Crust: If you’re in a real hurry, you can use a tube of refrigerated crescent roll dough (the seamless sheet is best) as the crust. Press it into the pan and proceed with the recipe (no par-baking needed). It will give a softer, doughier base.
🧊 Storage & Make-Ahead Instructions
These bars are ideal for making in advance.
- To Store: Because of the cream cheese filling, these bars must be stored in an airtight container in the refrigerator. They will last for up to 5 days. They are delicious served cold, right from the fridge, or you can let them sit out for 15-20 minutes to take the chill off.
- To Make Ahead: The best way to make these ahead is to bake them completely and chill them overnight. The next day, simply remove, glaze, cut, and serve.
- To Freeze: Yes, these bars freeze beautifully! For best results, freeze them without the glaze. Cut the chilled, un-glazed bars into squares and place them on a baking sheet. Flash-freeze for 1 hour, then wrap each bar tightly in plastic wrap and place them in a freezer-safe bag or container. They will last for up to 3 months.
- To Thaw: Thaw the frozen bars overnight in the refrigerator. Once fully thawed, whip up a fresh batch of glaze and drizzle them before serving.
💬 Conclusion: Your New Go-To Dessert Bar
These Cinnamon Roll Bliss Bars are the answer to all your sweet, comforting cravings. They pack the soul-warming flavor of a classic cinnamon roll into an easy-to-make, easy-to-share, and easy-to-love dessert bar. The combination of the buttery crust, the tangy and rich cream cheese filling, and the sweet-spicy cinnamon swirl is, in a word, blissful.
Bake a batch for your next get-together, a special weekend breakfast, or just to treat yourself. This is one recipe that is guaranteed to disappear fast and have everyone asking for the recipe.