Crispy Breakfast Potatoes
The Ultimate Crispy Breakfast Potatoes: A Skillet Masterclass
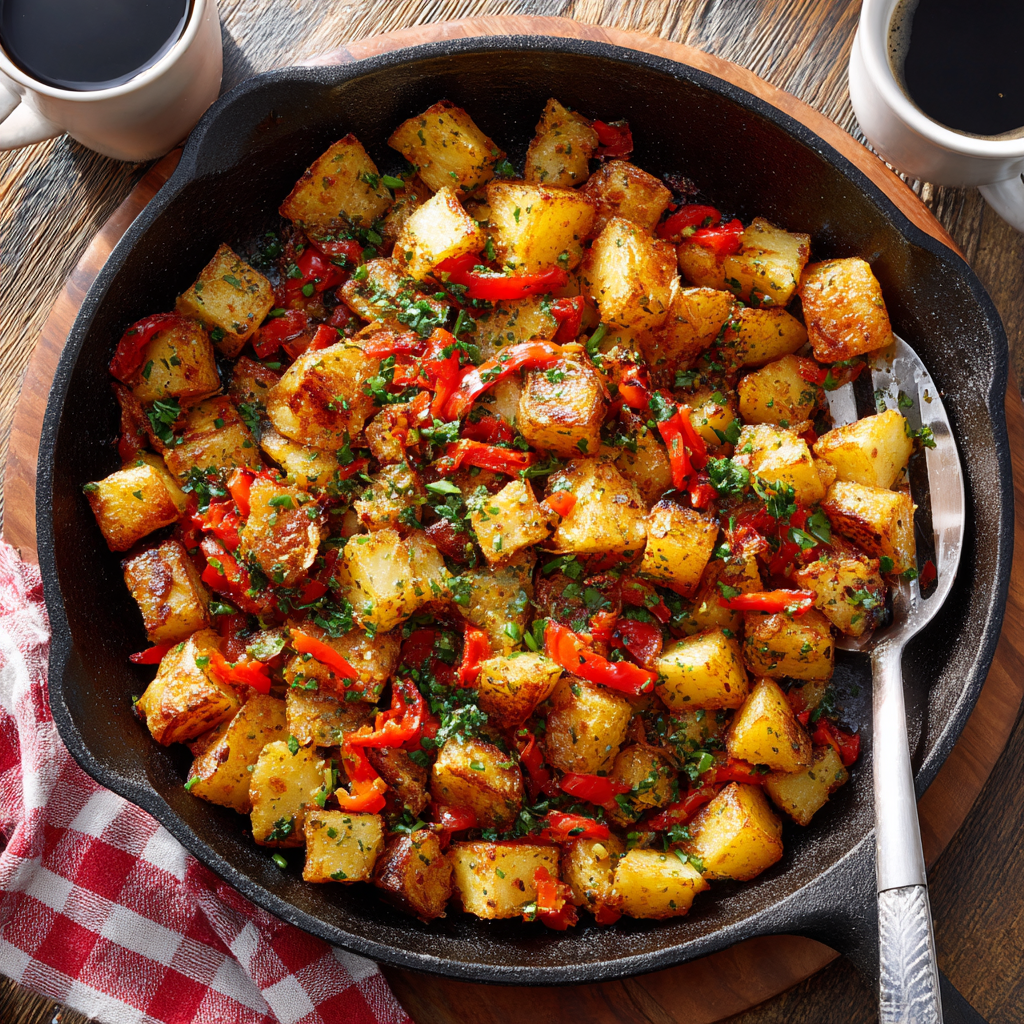
Let’s be honest: the best part of any diner breakfast isn’t the eggs or the toast; it’s the potatoes. There is something undeniably comforting about a plate of perfectly cooked Breakfast Potatoes—golden-brown and shatteringly crisp on the outside, yet fluffy and tender on the inside, seasoned with savory herbs and mixed with sweet caramelized onions and peppers. It’s the side dish that steals the show.
Yet, recreating that restaurant-quality crunch at home can be frustratingly elusive. Too often, homemade breakfast potatoes end up soggy, greasy, or burnt on the outside while remaining raw in the middle. The struggle is real, but the solution is simpler than you think. The secret isn’t a fancy deep fryer; it’s a combination of the right potato, a two-step cooking process, and a trusty cast iron skillet.
In this comprehensive guide, we are going to unlock the secrets to making the absolute best breakfast potatoes you’ve ever tasted. We will cover the importance of par-boiling (and why you shouldn’t skip it!), how to choose the best fat for flavor and crispiness, and the golden rule of frying: do not stir too often. Get your skillet ready, because your brunch game is about to level up significantly.
Why This Recipe is a Game-Changer
This isn’t just another recipe for home fries; it’s a technique that guarantees success. Here is why this method works perfectly:
- The Texture Contrast: By par-boiling the potatoes first, we ensure the insides are fully cooked and fluffy. The subsequent pan-frying then focuses solely on creating that irresistible crispy crust.
- Flavor Infusion: We don’t just relying on salt and pepper. A blend of paprika, garlic powder, and the sweetness of sautéed peppers and onions creates a robust, savory flavor profile.
- One-Pan Magic: While there is a boiling step, the rest of the cooking happens in one skillet, minimizing cleanup and maximizing flavor development as the potatoes cook in the same fat as the aromatics.
- Versatility: This recipe is a fantastic foundation. Once you master the base, you can add cheese, bacon, sausage, or any herbs you have on hand.
Selecting the Best Potato for the Job
The type of potato you choose will dictate the final texture of your dish.
Yukon Golds: These are our top choice. They have a medium starch content and a naturally buttery flavor. They hold their cube shape well after boiling but still get nice and fluffy inside. Their thin skin also means peeling is optional (we love the rustic look of skin-on potatoes!).
Russets: These high-starch potatoes will give you the fluffiest interior. However, they can sometimes fall apart during the par-boiling stage if you aren’t careful, and their thicker skin usually requires peeling.
Red Potatoes: While they hold their shape perfectly, they are low in starch and tend to be waxier and creamier rather than fluffy. They won’t get quite as crispy as Yukons or Russets.
The Secret Weapon: Par-Boiling
This is the step most people skip to save time, and it’s the number one reason for lackluster potatoes. Par-boiling (partially boiling) the potato cubes in salted water does three crucial things:
- It seasons the potato from the inside out.
- It kick-starts the cooking process so the center is tender by the time the outside is browned.
- Most importantly, it roughens up the exterior surface of the potato cubes, creating more surface area to crisp up in the hot fat.
Pro Tip: After draining the par-boiled potatoes, give them a gentle shake in the colander. This creates a starchy “fuzz” on the outside that fries up into an unbelievably crunchy crust.
Ingredients List
The Main Components:
- Potatoes: 2 lbs Yukon Gold or Russet potatoes, washed and cut into 3/4-inch cubes (peeling is optional for Yukons).
- Red Bell Pepper: 1 medium, seeded and diced into 1/2-inch pieces.
- Yellow Onion: 1 medium, diced into 1/2-inch pieces.
The Cooking Fats:
- Vegetable Oil (or other high-heat oil like canola or avocado): 3 tablespoons, divided.
- Unsalted Butter: 2 tablespoons, for flavor.
The Seasonings:
- Salt: 1 teaspoon for the boiling water, plus more to taste.
- Black Pepper: ½ teaspoon, freshly ground.
- Smoked Paprika: 1 teaspoon (adds a lovely smoky flavor and color).
- Garlic Powder: ½ teaspoon.
Garnish:
- Fresh Parsley or Chives: 2 tablespoons, finely chopped.
Step-by-Step Instructions
Step 1: Par-Boil the Potatoes
Place the potato cubes in a large pot and cover them with cold water by about an inch. Add 1 teaspoon of salt. Bring the pot to a boil over high heat. Once boiling, reduce the heat to medium and cook for just 5-7 minutes. You want them to be barely fork-tender but not falling apart.
Drain the potatoes thoroughly in a colander and let them sit for 5 minutes to steam dry. This drying step is crucial; moisture is the enemy of crispiness.
Step 2: Sauté the Aromatics
While the potatoes are drying, heat 1 tablespoon of oil in a large cast iron skillet (or heavy-bottomed non-stick pan) over medium heat. Add the diced onion and red bell pepper. Cook, stirring occasionally, for about 5-7 minutes until they are softened and beginning to brown. Remove the veggies from the skillet and set them aside on a plate.
Step 3: Crisp the Potatoes
Wipe out the skillet if there are any blackened bits. Add the remaining 2 tablespoons of oil and the butter to the skillet and increase the heat to medium-high. Once the butter is melted and sizzling, carefully add the dried potatoes in a single layer. **Do not overcrowd the pan.** If your pan isn’t big enough, cook them in two batches.
Now, here is the hard part: **Do not touch them.** Let them cook undisturbed for at least 4-5 minutes. You want a solid, golden crust to form on the bottom layer.
Step 4: Flip and Season
Once the bottom is beautifully browned, use a spatula to flip the potatoes. Continue cooking for another 5-8 minutes, turning occasionally, until they are browned and crispy on most sides.
In a small bowl, mix the smoked paprika, garlic powder, black pepper, and about ½ teaspoon of salt. Sprinkle this seasoning blend over the potatoes and toss to coat. We add the spices now so they don’t burn during the high-heat searing process.
Step 5: Combine and Serve
Add the cooked onions and peppers back into the skillet with the potatoes and toss everything together. Let it cook for one more minute to heat everything through. Taste and add more salt or pepper if needed.
Remove from the heat, garnish generously with fresh chopped parsley or chives, and serve piping hot right from the skillet.
Expert Tips for Success
The Right Pan Matters
A well-seasoned cast iron skillet is the absolute best tool for this job. It retains heat incredibly well and provides a naturally non-stick surface that encourages even browning. A large stainless steel pan is a good second choice.
Don’t Fear the Fat
To get crispy potatoes, you need enough fat to conduct the heat to the potato’s surface. Don’t skimp on the oil and butter. The combination gives you the high smoke point of oil with the delicious flavor of butter.
Patience is a Virtue
We will say it again: stop stirring! Every time you move the potatoes, you interrupt the caramelization process. Let the pan do the work.
Variations and Add-Ins
- The Meat Lover: Cook chopped bacon or breakfast sausage in the skillet first, remove it, and then use the rendered fat to cook the potatoes. Stir the meat back in at the end.
- Cheesy Potatoes: In the last minute of cooking, sprinkle shredded cheddar or Gruyère cheese over the top and cover the pan with a lid just until melted.
- Spicy Kick: Add a diced jalapeño along with the bell peppers, or add a pinch of cayenne pepper to the seasoning mix.
- Cajun Style: Swap the paprika and garlic powder for a tablespoon of your favorite Cajun seasoning blend.
Storage and Reheating
These potatoes are best enjoyed immediately. However, leftovers can be stored in an airtight container in the refrigerator for up to 3 days.
To reheat: Avoid the microwave, which will make them soggy. Instead, reheat them in a skillet with a little oil over medium heat until crispy again, or pop them in an air fryer at 400°F for 5-8 minutes.
Final Thoughts
Mastering these Crispy Breakfast Potatoes will make you the hero of weekend brunch. It’s a simple technique that yields incredible results, turning humble ingredients into something crave-worthy and satisfying. So ditch the frozen bag of hash browns and give this method a try. Once you hear that satisfying crunch, you’ll never go back.
Enjoy your breakfast feast!
The Ultimate Crispy Breakfast Potatoes
Ingredients
Equipment
Method
- Place potato cubes in a pot, cover with cold water, add 1 tsp salt. Boil for 5-7 minutes until barely fork-tender.
- Drain potatoes well in a colander and let them steam dry for 5 minutes.
- Heat 1 tbsp oil in a large skillet over medium heat. Sauté onion and bell pepper until soft (5-7 mins). Remove and set aside.
- Add remaining 2 tbsp oil and butter to the skillet on medium-high heat. Add dried potatoes in a single layer.
- Cook undisturbed for 4-5 minutes to form a crust. Flip and cook for another 5-8 minutes until crispy on all sides.
- Sprinkle paprika, garlic powder, salt, and pepper over potatoes and toss to coat.
- Add the cooked onions and peppers back to the pan, toss to combine, and heat through.
- Garnish with fresh herbs and serve hot.