Garlic Butter Smash Burgers
The Ultimate Guide to Garlic Butter Smash Burgers: Crispy, Juicy, and Unforgettable
There is a distinct difference between a regular backyard barbecue burger and a true Garlic Butter Smash Burger. The former is often thick, sometimes dry, and can lack that textural contrast that makes food exciting. The latter? It is a masterpiece of texture and flavor physics. Imagine a patty with edges so crispy they shatter like glass, a center that remains impossibly juicy, and a flavor profile elevated by the rich, aromatic luxury of homemade garlic butter. This isn’t just a sandwich; it is an experience.
The smash burger has taken the culinary world by storm for a reason. By pressing the meat onto a screaming hot surface, you maximize the Maillard reaction—that chemical process that turns browned food into pure flavor. When you pair that technique with salty, savory bacon, gooey American cheese, and a crown of whipped garlic butter, you create a dish that rivals the best diners and gourmet burger joints in the world. Whether you are cooking for a game day crowd, a family Friday night, or just treating yourself to something spectacular, this guide will walk you through every single step to perfection.
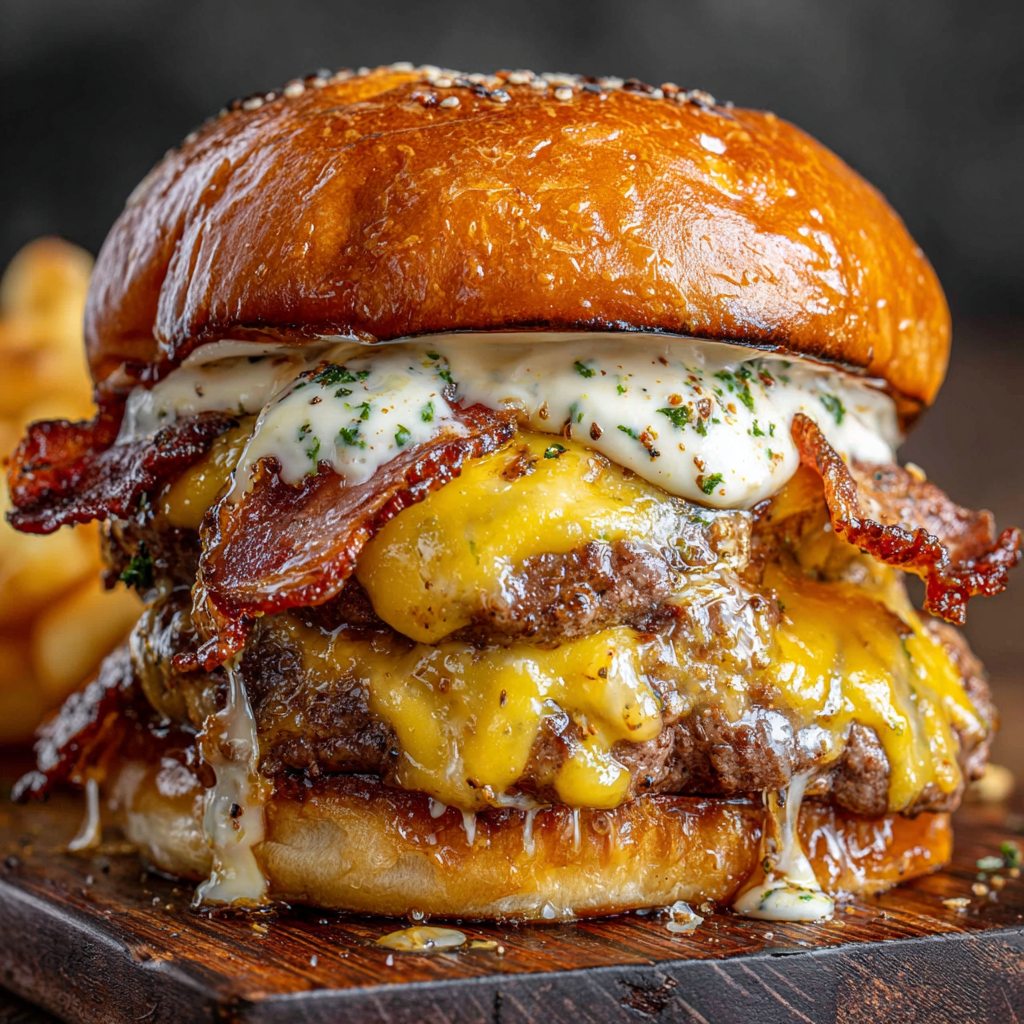
Why This Recipe Works
You might wonder, “Why go through the trouble of smashing the meat? Why not just buy pre-formed patties?” The answer lies in the crust-to-meat ratio. A thick patty has a small surface area relative to its volume. A smash burger increases that surface area exponentially. Every nook and cranny of the jagged edges catches heat, caramelizing into a deep, savory beef jerky-like texture that contrasts beautifully with the soft, pillowy bun.
Furthermore, the Garlic Butter is the secret weapon here. Beef and garlic are best friends, but incorporating the garlic into a butter compound ensures that the flavor coats the palate with every bite. The fat from the butter carries the garlic flavor into the crevices of the meat and the pores of the bun, creating a cohesive flavor bomb that ketchup and mustard simply cannot achieve on their own.
The Science of the Smash
To master the Garlic Butter Smash Burger, you must understand the technique. You are not pressing the juices out; you are pressing the flavor in. When you smash the cold beef ball onto the hot iron, the proteins seize up immediately, locking the moisture inside the thin patty while the exterior undergoes rapid browning. Because the cooking time is so short (often less than 2 minutes per side), the interior doesn’t have time to dry out.
Temperature Control: You need heat. High heat. A cast-iron skillet or a flat-top griddle is non-negotiable here. Non-stick pans cannot handle the heat required to get that lacy crust without damaging the coating. You want the pan to be smoking slightly before the meat hits it.
Ingredients Needed
The beauty of this recipe lies in its simplicity. Use high-quality ingredients for the best results.
For the Garlic Butter:
- ½ cup unsalted butter, softened to room temperature
- 3 cloves fresh garlic, minced very finely (or grated)
- 1 tbsp fresh parsley, finely chopped
- ½ tsp sea salt
- ¼ tsp black pepper
For the Burgers:
- 1 lb (450g) Ground Beef (Crucial: Use 80% lean / 20% fat. Do not use lean beef; you need the fat for the crust and juiciness)
- 4 Brioche Buns (soft, slightly sweet, and sturdy enough to hold the juices)
- 4 slices American Cheese (nothing melts better; save the aged cheddar for a cheese board)
- 8 slices Bacon, cooked until crispy
- Salt and freshly cracked black pepper
- 1 tbsp Neutral Oil (vegetable, canola, or grapeseed) for the pan
Optional but Recommended Toppings:
- Thinly sliced pickles
- Caramelized onions
- A smear of mayonnaise on the bottom bun to protect it from soggy juices
Step-by-Step Instructions
Follow these steps closely. The cooking process happens fast, so mise en place (having everything ready) is essential.
Phase 1: The Prep
- Make the Garlic Butter: In a small bowl, mash the softened butter, minced garlic, parsley, salt, and pepper together with a fork until well combined. Set this aside. It needs to be spreadable.
- Prep the Meat: Take your cold ground beef and divide it into 4 equal portions (for single patties) or 8 portions (for double smash burgers, which are recommended). Gently roll them into loose balls. Do not pack them tight. Keep them loose to allow for better smashing. Keep them cold until the moment they hit the pan.
- Cook the Bacon: Fry your bacon strips until they are crispy. Drain them on paper towels and set aside.
- Toast the Buns: Spread a little of your garlic butter on the cut sides of the brioche buns. Toast them in a skillet over medium heat until golden brown. Set aside.
Phase 2: The Smash
- Heat the Pan: Place your cast-iron skillet or griddle over high heat. Let it get very hot. Add a small splash of neutral oil and wipe it around carefully.
- Smash: Place the beef balls into the hot skillet. Leave plenty of room between them (do this in batches if necessary). Immediately—and I mean immediately—take a heavy spatula or a burger press and smash the ball flat. You want it thin, less than half an inch.
- Season: Heavily season the top of the smashed patties with salt and pepper.
- Sear: Let them cook undisturbed for about 2–3 minutes. Look for the edges to become deep dark brown and “lacy.”
- Flip and Cheese: Scrape firmly under the patty to ensure you keep that crust attached to the meat, then flip. Immediately place a slice of American cheese on half of the patties. If making doubles, stack a non-cheesed patty on top of a cheesed patty, or cheese them all—your call!
- Finish: Cook for just 1 minute more until the cheese is fully melted.
Phase 3: Assembly
- Base: Take your bottom bun (maybe with a layer of mayo).
- The Stack: Place your hot, cheesy burger patties on the bun.
- The Crunch: Top with the crispy bacon strips.
- The Crown: Take a generous spoonful of the remaining Garlic Butter and smear it over the top patty or the underside of the top bun. The residual heat will melt it into a glorious sauce.
- Serve: Cap it with the top bun and serve immediately while hot and dripping.
Expert Tips for Success
1. Cold Meat, Hot Pan: This is the golden rule. If the fat in the meat is warm before it hits the pan, it will render out too quickly, leaving you with a dry burger. Keep the meat in the fridge until the second you are ready to cook.
2. Use the Right Tools: A flimsy plastic spatula won’t work. You need a stiff metal spatula to scrape the caramelized crust off the pan. If you don’t have a burger press, you can use the bottom of a heavy saucepan (put a piece of parchment paper between the pan and the meat to prevent sticking).
3. Don’t Overcrowd: If you put too many patties in the pan at once, the temperature of the pan drops, and the meat steams instead of searing. Steamed meat is gray and sad. Seared meat is brown and delicious.
4. The Cheese Factor: While you might prefer sharp cheddar or Swiss, American cheese contains sodium citrate, which allows it to melt without breaking into oil. For the classic smash burger texture, American is king.
Creative Variations
Once you have mastered the classic Garlic Butter Smash Burger, try these twists:
- The Truffle Shuffle: Add a few drops of white truffle oil to your garlic butter and swap the American cheese for Fontina or Gruyère.
- The Spicy Kick: Mix diced jalapeños or a dash of cayenne pepper into the garlic butter. Top the burger with Pepper Jack cheese.
- The Breakfast Smash: Add a sunny-side-up egg on top of the bacon. The yolk mixes with the garlic butter for an incredibly rich sauce.
- The Oklahoma Style: Before smashing the meat, place a handful of thinly sliced onions on the beef ball. Smash the onions into the meat. They will caramelize as the beef cooks.
What to Serve With Smash Burgers
Since the burger is rich and savory, you want sides that offer texture or acidity to cut through the fat.
Shoestring Fries: Thin, crispy fries seasoned with rosemary salt are a classic pairing. The crunch matches the crispy edges of the burger.
Onion Rings: Beer-battered onion rings offer a sweet contrast to the salty bacon and beef.
Pickle Slaw: A vinegar-based coleslaw (no mayo) can help cleanse the palate between bites.
A Cold Lager: If you enjoy beer, a crisp, cold lager or pilsner cuts through the richness of the garlic butter perfectly.
Storage and Reheating
Let’s be honest—you probably won’t have leftovers. But if you do, store the patties separately from the buns to prevent sogginess.
To Reheat: Do not microwave! The crust will turn soft. Instead, reheat the patties in a hot skillet for 1 minute per side, or place them in an air fryer at 350°F for 3 minutes. Re-toast the buns fresh.
Final Thoughts
Cooking is an act of love, and few things say “I love you” (or “I love myself”) like a homemade Garlic Butter Smash Burger. It is messy, it is loud, and it is unapologetically delicious. By controlling the ingredients and mastering the smash technique, you are creating food that creates memories.
So, grab your skillet, crank up the heat, and get ready to make the best burger of your life. The drive-thru will never taste the same again.
Garlic Butter Smash Burgers
Ingredients
Equipment
Method
- In a small bowl, mix softened butter, minced garlic, parsley, salt, and pepper. Set aside.
- Divide cold ground beef into 4-8 loose balls. Do not pack tightly. Keep cold.
- Fry bacon in a skillet until crispy. Remove and drain on paper towels.
- Lightly toast brioche buns with a smear of the garlic butter. Set aside.
- Heat a cast-iron skillet over high heat until very hot. Add a splash of oil.
- Place beef balls in skillet and immediately smash flat with a heavy spatula to under 1/2 inch thickness.
- Season heavily with salt and pepper. Sear undisturbed for 2-3 minutes until crust forms.
- Scrape under patties to keep crust intact, flip, and immediately top with cheese.
- Cook 1 minute until cheese melts. Stack patties if making doubles.
- Assemble burgers on buns with bacon and an extra smear of garlic butter. Serve hot.