Marry Me Raspberry Chocolate Mousse Cups
Marry Me No Bake Raspberry Chocolate Mousse Cups: The Ultimate Love Language
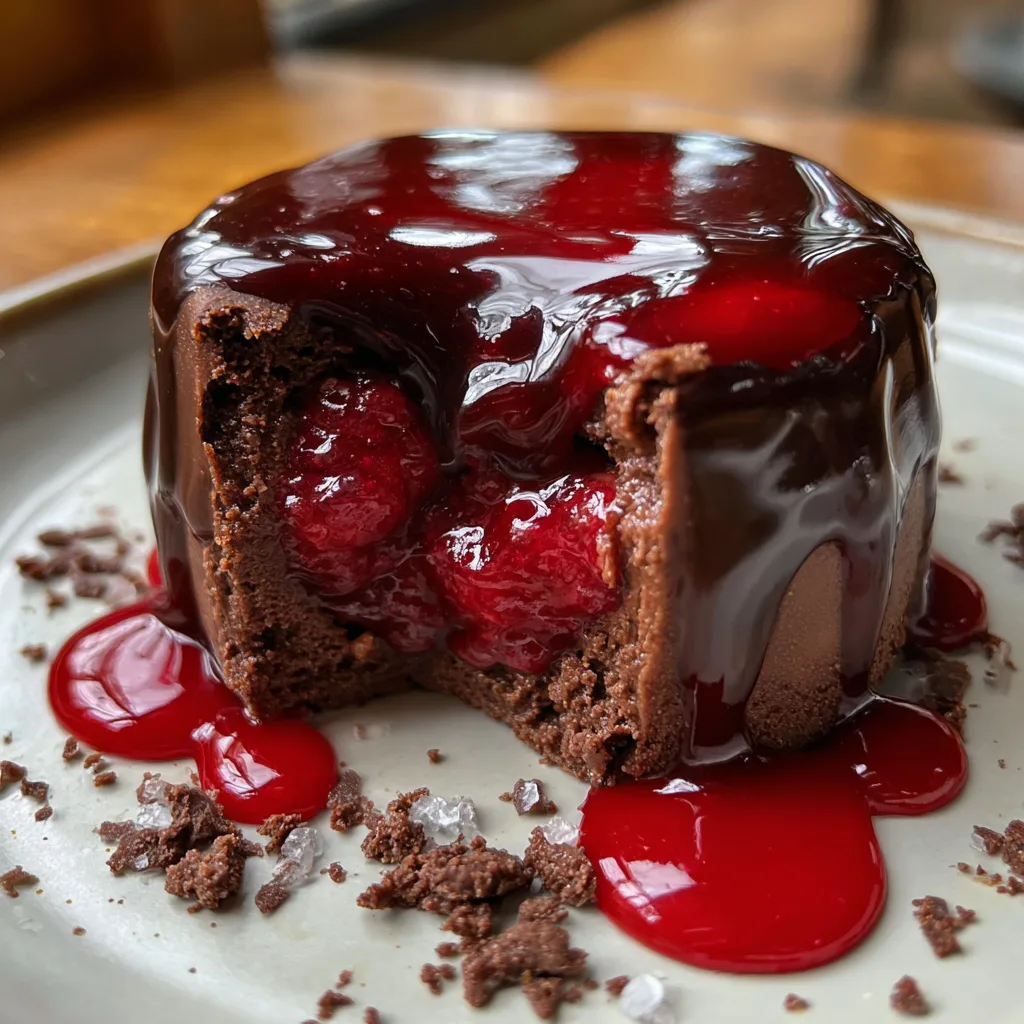
There are desserts that satisfy a craving, and then there are desserts that change the trajectory of your evening. These Marry Me No Bake Raspberry Chocolate Mousse Cups fall squarely into the latter category. Imagine a crisp, dark chocolate shell giving way to a cloud-like chocolate mousse, all crowned with a tart, glossy raspberry compote that cuts through the richness like a dream. It is refined, messy, indulgent, and ridiculously easy to make without ever turning on your oven.
The “Marry Me” moniker isn’t just a catchy internet trend; it promises a flavor profile so persuasive it might just elicit a proposal (or at least a very enthusiastic request for seconds). Whether you are prepping for a romantic Valentine’s Day dinner, a special anniversary, or simply treating yourself because you deserve gourmet chocolate on a Tuesday, this recipe delivers high-impact visuals with low-stress effort.
Why This Recipe Will Win Your Heart
We often associate impressive chocolate desserts with complicated tempering processes, water baths, and hours of baking. This recipe strips away the intimidation factor while keeping the “wow” factor high. Here is why this is about to become your go-to special occasion treat:
- Texture Contrast: The snap of the hard chocolate shell against the velvety smooth mousse and the jammy, wet raspberry topping creates a sensory masterpiece.
- No-Bake Ease: Perfect for hot summer days or when your oven is occupied with the main course. The fridge and freezer do all the heavy lifting here.
- Balanced Sweetness: The use of dark chocolate and fresh raspberries ensures the dessert isn’t cloyingly sweet. The flakey sea salt on top provides that crucial savory edge that makes chocolate taste more like itself.
- Portion Control: Making individual cups means no messy slicing. Everyone gets their own perfect little parcel of joy.
The Three Layers of Perfection
To understand the magic of this dish, we need to break down its architecture. It is built on three pillars of flavor:
1. The Chocolate Shell
This is the vessel. We use high-quality semi-sweet or dark chocolate melted with a touch of coconut oil. The oil is the secret ingredient here—it gives the chocolate a glossy sheen (that “liquid glass” look) and ensures the shell isn’t rock hard when bitten. It snaps, then melts.
2. The 2-Ingredient Mousse
Forget separating eggs or cooking sugar syrups. We are making a cheat’s mousse (also known as a whipped ganache). By folding aerated whipped cream into slightly cooled melted chocolate, we achieve a texture that is light as air but rich in flavor. It is stable enough to hold its shape inside the cup but soft enough to dissolve on the tongue.
3. The Raspberry Crown
Fresh raspberries are smashed and macerated (or quickly simmered) to release their juices, creating a ruby-red topping that looks like jewels. The acidity of the berries is the necessary counterweight to the double-dose of chocolate below.
Ingredients You Will Need
For the Chocolate Cups & Topping:
- Dark Chocolate Chips or Bar: 2 cups (divided use). Aim for 60% to 70% cocoa for the best depth of flavor.
- Coconut Oil: 2 tablespoons. This helps thin the chocolate for coating the liners and adds a nice mouthfeel.
- Flaky Sea Salt: For garnish. Do not skip this!
For the Chocolate Mousse Filling:
- Heavy Whipping Cream: 1 cup. Must be cold to whip properly.
- Powdered Sugar: 2 tablespoons (optional, depending on your chocolate’s sweetness).
- Vanilla Extract: 1 teaspoon.
- Cocoa Powder: 1 tablespoon (for extra intensity).
For the Raspberry Layer:
- Fresh Raspberries: 1.5 cups. Frozen works too, but thaw and drain them first.
- Chia Seeds (Optional): 1 teaspoon. This helps thicken the raspberry mixture into a jam without cooking, but you can leave it out for a looser sauce.
- Lemon Juice: 1 teaspoon. Brightens the berry flavor.
- Maple Syrup or Honey: 1 tablespoon.
Step-by-Step Instructions
Marry Me No Bake Raspberry Chocolate Mousse Cups
Ingredients
Equipment
Method
- Line a muffin tin with paper or silicone liners.
- Melt 1.5 cups chocolate chips with coconut oil in 30-second intervals in the microwave until smooth.
- Spoon melted chocolate into liners and paint the sides to create a cup. Freeze for 10 minutes. Apply a second coat if needed and freeze again.
- Whip heavy cream, vanilla, and powdered sugar until stiff peaks form.
- Melt the remaining 0.5 cup chocolate chips and let cool slightly. Gently fold into the whipped cream to create the mousse.
- Fill the frozen chocolate cups with the mousse mixture.
- Mash raspberries with maple syrup and lemon juice. Spoon over the mousse layer.
- Refrigerate for at least 30 minutes. Top with flaky sea salt before serving.
Notes
Phase 1: Constructing the Shells
- Prepare the Molds: Line a standard muffin tin with 8-10 paper liners. Silicone liners work even better if you have them, as they peel off effortlessly.
- Melt the Chocolate: In a microwave-safe bowl, combine 1.5 cups of the chocolate chips and 1.5 tablespoons of coconut oil. Microwave in 30-second intervals, stirring vigorously in between, until completely smooth and glossy.
- Coat the Liners: Spoon about 1 tablespoon of melted chocolate into the bottom of a muffin liner. Use the back of a spoon or a small pastry brush to paint the chocolate up the sides of the liner. You want a thick enough layer so it doesn’t break, but thin enough to snap. Repeat for all liners.
- Freeze: Place the muffin tin in the freezer for 10 minutes to set.
- Second Coat (Crucial Step): Remove from freezer. If you see any thin spots where the liner shows through, apply a second layer of chocolate. Freeze again for another 10 minutes.
Phase 2: The Mousse Filling
- Whip the Cream: In a chilled bowl, beat the heavy whipping cream, vanilla, and powdered sugar until stiff peaks form. Be careful not to overbeat into butter.
- Prepare Chocolate Base: Melt the remaining 1/2 cup of chocolate chips (you can use the leftovers from the shell step if you have plenty). Let it cool slightly—it should be liquid but not hot to the touch.
- Fold: Gently fold the cooled melted chocolate into the whipped cream. Use a spatula and a “cut and fold” motion to keep the air in the cream. The mixture should turn a beautiful light brown.
- Fill: Spoon or pipe the mousse into your frozen chocolate cups, filling them about 3/4 of the way full. smooth the tops.
Phase 3: The Raspberry Topping & Assembly
- Make the Mash: In a small bowl, mash the raspberries with a fork. Mix in the maple syrup, lemon juice, and chia seeds (if using). Let it sit for 5 minutes to thicken slightly.
- Layer: Spoon a generous amount of the raspberry mixture over the mousse layer.
- Cap it Off: If you have remaining melted chocolate, you can drizzle it over the top or create a full “lid” to seal the cup. Alternatively, leave it open-faced as shown in the photos for that gorgeous color pop.
- Final Chill: Refrigerate the cups for at least 30 minutes to let the mousse set and flavors meld.
- Serve: Just before serving, sprinkle with flaky sea salt. Peel away the paper liners gently.
Tips for Success
Temperature Matters:
When making the mousse, ensure your melted chocolate has cooled down to room temperature before adding it to the whipped cream. If the chocolate is too hot, it will deflate the cream and result in a soup rather than a mousse.
The “Snap” Factor:
Don’t skip the coconut oil in the shell mixture. Pure melted chocolate can sometimes bloom (turn white) or become too hard to bite through comfortably when frozen. The oil keeps it shiny and palatable.
Storage:
These cups are best stored in the refrigerator. They can be kept in an airtight container for up to 3 days. You can also freeze them for up to a month—just let them thaw in the fridge for 20 minutes before eating.
Variations to Try
The “Peanut Butter Lover”:
Swap the raspberry layer for a dollop of natural peanut butter mixed with a little maple syrup. It creates a gourmet buckeye vibe.
The “Vegan” Edition:
Use dairy-free dark chocolate. Swap the heavy whipping cream for full-fat coconut cream (the thick part from a chilled can). Whip the coconut cream just like dairy cream. Use maple syrup instead of honey.
The “Crunchy” Twist:
Add a layer of crushed graham crackers or roasted chopped hazelnuts at the very bottom of the chocolate cup before adding the mousse for a cheesecake-style crust effect.
Serving Suggestions
To truly embrace the “Marry Me” theme, serve these on a nice ceramic platter. Pair them with a glass of champagne, a bold Cabernet Sauvignon, or a hot espresso. The bitterness of coffee pairs exceptionally well with the sweet and tart profile of the cups.
These mousse cups prove that you don’t need a pastry degree to create something stunning. They are messy, they are beautiful, and they are unapologetically delicious. So go ahead, melt that chocolate, smash those berries, and get ready to fall in love.