Corn Tortilla Chili Tacos
The Ultimate Corn Tortilla White Chicken Chili Tacos: A Creamy, Crispy Fusion
Imagine the comforting, soul-warming flavors of a slow-simmered white chicken chili—tender shredded chicken, creamy white beans, sweet corn, and zesty green chiles—all captured inside the satisfying crunch of a golden corn tortilla. These Corn Tortilla White Chicken Chili Tacos are not just a meal; they are a textural masterpiece that bridges the gap between soup season and taco Tuesday. If you have been searching for a dinner that is both incredibly easy to throw together and impressively delicious, you have found your match.
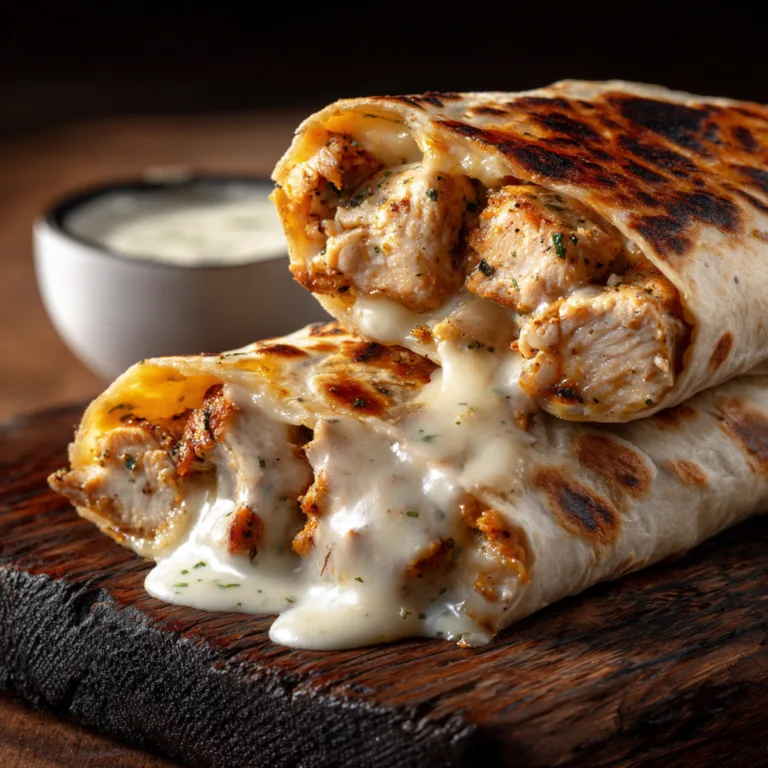
This dish takes the concept of the “baked taco” to a new level. Instead of struggling to fill brittle shells at the table while the fillings go cold, we bake these tacos in the oven. This allows the corn tortillas to crisp up beautifully while the creamy chicken filling heats through, and the generous topping of Monterey Jack cheese melts into a gooey, “liquid glass” finish. It is messy, it is indulgent, and it is exactly what your family wants for dinner tonight.
Why You Will Love This Recipe
There are a million taco recipes out there, but this one stands apart for several reasons. First, the texture. The contrast between the crispy, nutty corn tortilla and the velvety, rich white chicken chili filling is addictive. Second, the convenience. This is a brilliant way to use up leftover rotisserie chicken or that half-can of corn sitting in your fridge. Finally, the flavor profile. It’s mild enough for kids but complex enough for adults, with hints of cumin, coriander, and the tang of green chiles cutting through the rich cream cheese base.
Whether you are hosting a game day party, looking for a quick weeknight fix, or just craving comfort food, these tacos deliver. Plus, they are naturally gluten-free if you stick to certified gluten-free corn tortillas and spices.
Ingredients
The beauty of these White Chicken Chili Tacos lies in their simplicity. You likely have most of these ingredients in your pantry already. To get that ultra-glossy, mouth-watering look and taste, quality ingredients matter.
Corn Tortilla White Chicken Chili Tacos
Ingredients
Equipment
Method
- Preheat oven to 400°F (200°C). Lightly grease a large baking sheet with cooking spray or oil.
- In a large bowl, mix softened cream cheese, sour cream, chicken broth, cumin, chili powder, and garlic powder until smooth.
- Fold in shredded chicken, green chiles, corn, and beans until evenly coated.
- Wrap tortillas in damp paper towels and microwave for 45 seconds to soften. This prevents cracking.
- Spoon filling into each tortilla, add a pinch of cheese inside, and fold over.
- Arrange tacos on the baking sheet. Brush tops with olive oil and sprinkle generously with remaining Monterey Jack cheese.
- Bake for 12-15 minutes until cheese is bubbly and tortillas are golden and crispy.
- Serve hot, garnished with fresh chopped cilantro and lime wedges.
Notes
For the Filling
- Cooked Chicken – 3 cups, shredded. Rotisserie chicken works perfectly here for speed and flavor, or you can poach chicken breasts.
- Cream Cheese – 4 oz, softened. This is the base of our “chili” sauce, providing that essential tangy creaminess.
- Sour Cream – 1/3 cup. Adds moisture and a slight acidic kick to balance the richness.
- Green Chiles – 4 oz can, diced. Mild and flavorful, these are classic white chili staples.
- Corn – 1 cup. You can use fresh, frozen (thawed), or canned (drained). Sweet corn adds a nice pop of texture.
- Cannellini Beans – 1/2 cup, rinsed and drained. Mash them slightly if you want a thicker filling, or leave whole for texture.
- Chicken Broth – 1/4 cup. To loosen the mixture just enough so it isn’t a paste.
- Spices – 1 tsp ground cumin, 1/2 tsp chili powder, 1/2 tsp garlic powder, 1/2 tsp onion powder, salt and pepper to taste.
For the Tacos
- Corn Tortillas – 10-12 standard size. Yellow or white corn both work, but yellow tends to have a stronger corn flavor that holds up well to the rich filling.
- Olive Oil or Cooking Spray – For brushing the tortillas to ensure they bake up crispy.
- Monterey Jack Cheese – 2 cups, shredded. Avoid pre-shredded if possible; shredding it yourself ensures the best melt factor.
- Fresh Cilantro – For garnish.
- Lime Wedges – Essential for squeezing over the finished tacos to cut the richness.
Instructions
Follow these steps to create the perfect batch of baked tacos. The key is in the preparation of the tortillas so they don’t crack.

Step 1: Prep and Preheat
Preheat your oven to 400°F (200°C). Grease a large 9×13 baking sheet or a baking dish with non-stick spray or a light coating of oil. This ensures the bottoms of the tacos crisp up rather than getting soggy.
Step 2: Make the Creamy Chili Filling
In a large mixing bowl, combine the softened cream cheese and sour cream. Whisk or mash them together until smooth. Add the chicken broth, cumin, chili powder, garlic powder, onion powder, salt, and pepper. Mix until well combined.
Fold in the shredded chicken, diced green chiles, corn, and cannellini beans. Stir gently until everything is evenly coated in the creamy sauce. The mixture should be moist and glossy, not dry.
Step 3: Prepare the Tortillas
Corn tortillas can be brittle when cold. To prevent them from cracking when you fold them, wrap the stack of tortillas in a damp paper towel and microwave for about 30-45 seconds until they are pliable and steaming. Alternatively, you can flash fry them in a little oil for 10 seconds per side, but the microwave method is faster and adds less fat.
Step 4: Assemble the Tacos
Lay out your softened tortillas. Spoon a generous portion of the chicken mixture (about 2-3 tablespoons) onto one half of each tortilla. Sprinkle a little bit of the shredded Monterey Jack cheese inside with the meat.
Fold the tortilla over the filling. Arrange the tacos on the prepared baking sheet. It is okay if they touch; packing them slightly close together helps them stay closed during baking.
Step 5: Top and Bake
Once all tacos are arranged on the tray, brush the tops lightly with olive oil or spray with cooking spray. This promotes browning. Top each taco generously with the remaining Monterey Jack cheese.
Bake in the preheated oven for 12-15 minutes, or until the cheese is bubbling and melted, and the edges of the tortillas are golden brown and crispy. For extra browning on the cheese, you can switch the oven to broil for the last 1-2 minutes—but watch closely so they don’t burn!
Step 6: Garnish and Serve
Remove from the oven and let them sit for 2-3 minutes (the filling will be molten hot). Garnish with copious amounts of chopped fresh cilantro. Serve immediately with lime wedges on the side.
Tips for the Perfect Baked Taco
Avoid Soggy Bottoms: Ensure your baking sheet is hot or well-oiled. If you are using a very wet filling (if you added too much broth), try to drain the ingredients slightly before mixing. You can also place the tacos on a wire rack set inside a baking sheet for 360-degree crisping.
The Cheese Factor: Monterey Jack is the gold standard for melting, but Pepper Jack adds a nice kick if you like heat. Queso Quesadilla is another excellent authentic option that melts into a liquid pool of goodness.
Shredding Chicken: The easiest way to shred chicken quickly is to use a stand mixer with the paddle attachment. Put warm cooked chicken breasts in the bowl and run on low for 30 seconds. It shreds perfectly every time.
Variations and Substitutions
Make it Spicy: If you love heat, add a diced jalapeño to the filling, or swap the mild green chiles for hot ones. A dash of cayenne pepper in the spice mix also works wonders.
Bean Variations: While cannellini or Great Northern beans are traditional for white chili, pinto beans or black beans work just as well, though they will change the color profile slightly.
The “Red” Version: Prefer traditional chili flavors? Swap the cream cheese and sour cream for a tomato paste and enchilada sauce base, and use cheddar cheese instead of Monterey Jack.
Soft Taco Style: If you prefer soft tacos, skip the baking step! Simply heat your filling in a skillet until bubbly, warm your tortillas, and assemble fresh at the table.
Serving Suggestions
These Corn Tortilla White Chicken Chili Tacos are hearty enough to stand on their own, but they pair beautifully with sides. Here is how to build a full meal:
- Mexican Rice: A side of fluffy tomato-infused rice or cilantro-lime rice absorbs any extra sauce.
- Avocado Salad: A simple salad of avocado, tomato, and red onion with lime vinaigrette cuts through the richness of the cream cheese filling.
- Chips and Salsa: Serve with a bowl of tomatillo salsa (salsa verde) to mirror the green chile flavors in the tacos.
- Drinks: An ice-cold Horchata or a classic lime Margarita is the perfect beverage pairing.
Storage and Reheating
Storage: These tacos are best eaten fresh, as the corn tortillas will eventually soften from the filling. However, leftovers can be stored in an airtight container in the refrigerator for up to 3 days.
Reheating: Do not microwave leftovers unless you want a soft, chewy texture. To revive the crunch, reheat them in an oven or air fryer at 350°F for 5-8 minutes until heated through and crispy again.
Freezing: You can assemble the tacos (without the final top layer of cheese) and freeze them on a baking sheet. Once frozen solid, transfer to a bag. Bake from frozen, adding a few extra minutes to the cook time, and add the cheese topping in the last 5 minutes of baking.
The History of the Fusion
The concept of “White Chicken Chili” gained massive popularity in the United States in the late 80s and 90s as a lighter, poultry-based alternative to traditional beef chili. By combining this distinctively American stew—known for its use of dairy, white beans, and green chiles—with the vessel of a Mexican taco, we create a fusion dish that represents the best of modern comfort food cooking. It honors the Tex-Mex tradition of adapting ingredients to create melt-in-your-mouth family favorites.
Whether you call them “baked tacos,” “taco casserole,” or simply “dinner,” these White Chicken Chili Tacos are guaranteed to become a part of your regular rotation. They are fast, affordable, and incredibly satisfying.
So, preheat that oven, grab your tortillas, and get ready for a kitchen that smells like heaven. Happy cooking!