Artisanal Bi-Color Chocolate Croissants: A Bakery Masterpiece at Home
Introduction: Elevate Your French Pastry Game
Stepping into a Parisian patisserie, the senses are immediately overwhelmed by the scent of caramelized butter, toasted flour, and rich chocolate. Among the jewels in the pastry case, the classic Pain au Chocolat always stands out. But recently, a new star has emerged in the artisanal baking world: the bi-color chocolate croissant. With its striking, contrasting stripes of traditional golden pastry and deeply colored cocoa dough, it is a visual masterpiece that promises an equally spectacular eating experience.
Making croissants from scratch is widely considered a pinnacle of home baking. It requires patience, precision, and a willingness to understand the science of laminated dough. While the process spans over a couple of days, the actual active time is surprisingly manageable. This recipe demystifies the spectacular bi-color technique, guiding you through the process of creating those mesmerizing, flaky layers that shatter perfectly with every bite.
Whether you are an ambitious home baker looking for your next weekend project, or you want to present an unforgettable breakfast for a special holiday or anniversary, these croissants will deliver. Forget the dense, bread-like crescent rolls from the supermarket; prepare to create a delicate, buttery, chocolate-studded masterpiece that looks and tastes like it came from a high-end European bakery.
The Magic of Lamination: Understanding the Process
The secret to a croissant’s signature flaky texture is a process called lamination. This involves wrapping a block of cold butter (the beurrage) inside a yeast dough (the détrempe), and then repeatedly rolling it out and folding it. This creates hundreds of alternating microscopic layers of dough and butter.
The Role of Steam: When the laminated dough hits the hot oven, the moisture in the butter evaporates, creating steam. This steam pushes the layers of dough apart. Simultaneously, the fat from the butter melts into the dough, essentially frying the layers from the inside out, resulting in that incredible, shattering crispness.
Temperature is Everything: The absolute most critical rule of making croissants is temperature control. If the butter is too cold, it will shatter into shards when you roll it, breaking through the dough. If it is too warm, it will melt into the dough, resulting in a heavy, brioche-like bread rather than a flaky pastry. Your kitchen, your rolling pin, and your hands all play a part. Don’t be afraid to put the dough back in the fridge if things are getting too warm.
The Bi-Color Technique Explained
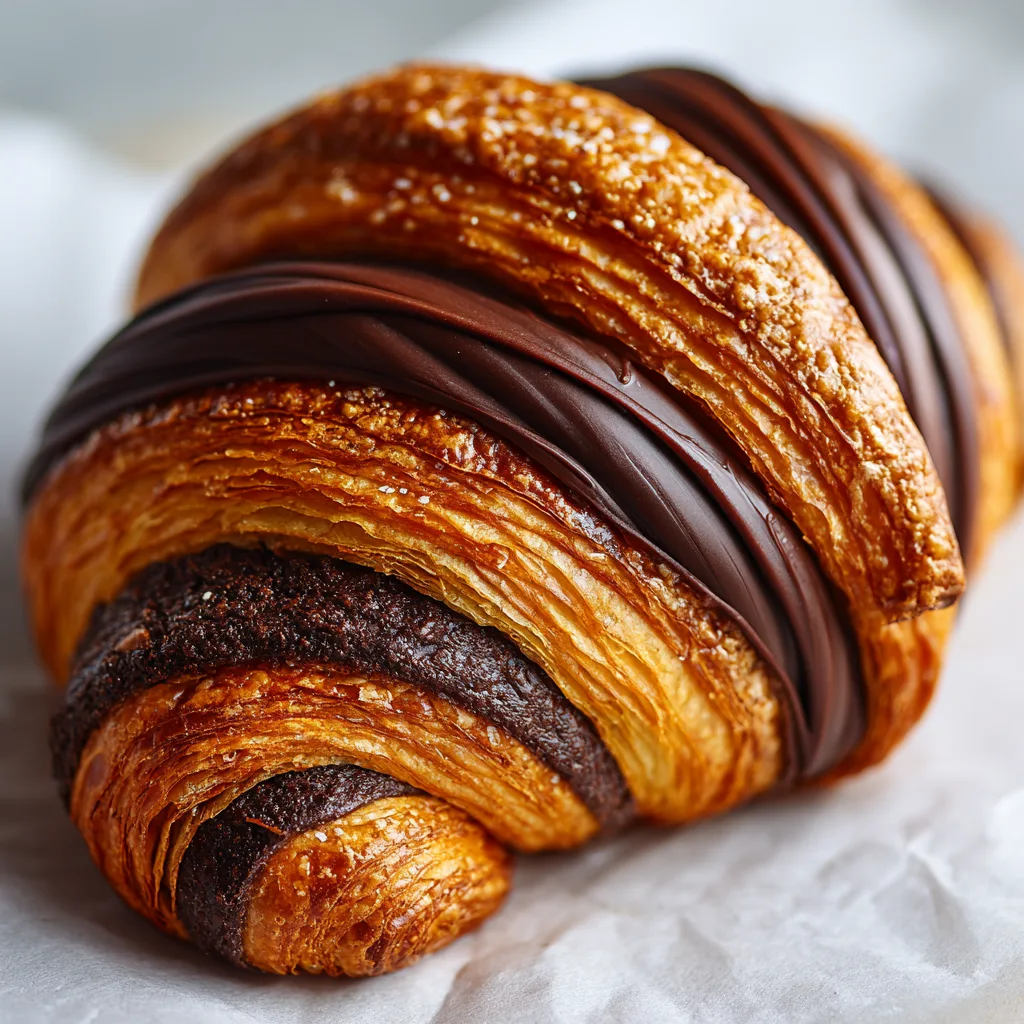
What gives these croissants their striking appearance is the addition of a thin layer of colored dough on the very outside before the final rolling and shaping.
In this recipe, we take a small portion of the base dough right after mixing and knead in high-quality Dutch-processed cocoa powder and a tiny bit of water. This creates the chocolate dough. While the main dough undergoes the lamination process with the butter block, the chocolate dough simply rests in the fridge. Right before you roll the laminated dough out for the final time to cut your triangles, you mist the top with water and lay the rolled-out chocolate dough over it. When you roll the croissants up, the chocolate layer creates beautiful, contrasting spirals.
Ingredients You Will Need
Precision is key in pastry. Weighing your ingredients with a digital kitchen scale will yield significantly better results than using volume measurements.
- For the Base Dough (Détrempe):
- 500g bread flour (the higher protein helps develop the necessary structure)
- 140g whole milk, cold
- 140g water, cold
- 50g granulated sugar
- 40g unsalted butter, softened
- 11g (1 tablespoon) instant yeast
- 10g (2 teaspoons) fine sea salt
- For the Chocolate Dough Layer:
- 150g of the prepared Base Dough (taken right after mixing)
- 15g Dutch-processed cocoa powder
- 1 tablespoon cold water
- For the Butter Block (Beurrage):
- 250g high-quality European-style unsalted butter (at least 82% butterfat), cold
- For the Filling and Finish:
- Dark chocolate batons (or chopped dark chocolate)
- 1 egg + 1 tablespoon milk (for egg wash, though we only wash the plain dough parts)
- Simple syrup (equal parts sugar and water boiled, for glazing after baking)
Step-by-Step Instructions
This process is best broken down over two days to allow for proper resting and chilling.
- Make the Dough (Day 1): In a stand mixer fitted with a dough hook, combine the bread flour, cold milk, cold water, sugar, softened butter, instant yeast, and salt. Mix on low speed for 5-7 minutes until a smooth dough forms.
- Separate the Chocolate Dough: Cut off 150g of the dough. Return this small piece to the mixer, add the cocoa powder and 1 tablespoon of water, and knead until the cocoa is fully incorporated and the dough is a uniform dark brown. Wrap both the plain dough and chocolate dough tightly in plastic wrap and refrigerate overnight (at least 8-12 hours).
- Prepare the Butter Block (Day 1): Place the cold 250g of butter between two sheets of parchment paper. Using a rolling pin, pound and roll the butter into a precise 6×6-inch (15x15cm) square. Keep the edges neat. Refrigerate overnight.
- Encase the Butter (Day 2): The next day, roll the plain chilled dough into a 6×12-inch rectangle. Place the butter block on one half of the dough, and fold the other half over to completely encase it. Pinch the edges to seal.
- First Fold (Lamination): Roll the dough out to a length of about 18 inches. Perform a “letter fold” (fold the top third down, and the bottom third up over it). Wrap in plastic and chill for 45 minutes.
- Second and Third Folds: Repeat the rolling and letter-folding process two more times, chilling the dough for 45 minutes between each fold. You now have your laminated dough. Chill for at least 1 hour.
- Apply the Chocolate Layer: Roll the small chocolate dough block into a thin rectangle roughly the same size as your folded laminated dough. Lightly mist the top of the plain laminated dough with water, and place the chocolate dough on top. Gently roll them together to adhere.
- Final Roll and Cut: Roll the combined dough out into a large, long rectangle, about 1/4 inch (4-5mm) thick. Use a pizza cutter or a sharp knife to trim the edges to expose the layers. Cut the dough into tall, narrow triangles (about 4 inches wide at the base and 10 inches tall).
- Shape the Croissants: Place a chocolate baton at the wide base of a triangle. Roll the dough over it once, place a second baton, and continue rolling tightly to the tip. Place on a parchment-lined baking sheet, ensuring the tip is tucked under the bottom so they don’t unroll in the oven.
- Proofing: Let the croissants proof in a draft-free place at room temperature (ideally 75°F-78°F) for 2 to 2.5 hours. They should double in size and jiggle like a water balloon when you gently shake the pan. Do not proof them in a warm oven, or the butter will melt out!
- Bake: Preheat your oven to 400°F (200°C). Carefully brush the exposed plain dough sections with egg wash (avoid the chocolate parts so they stay matte and dark). Bake for 10 minutes, then reduce the heat to 375°F (190°C) and bake for another 10-15 minutes until deeply golden brown.
- Glaze and Cool: Immediately upon removing from the oven, brush the warm croissants lightly with simple syrup for a professional bakery shine. Transfer to a wire rack to cool completely before eating.
Pro Tips for Croissant Success
Making croissants is a learning experience. Use these tips to avoid common pitfalls.
- Use European Butter: Standard American butter contains more water (about 80% fat). European-style butter has 82-84% butterfat, making it much more pliable when cold and resulting in far superior flavor and flakiness. Brands like Kerrygold or Plugra are excellent choices.
- Watch Your Room Temperature: If your kitchen is over 75°F (24°C), you will struggle to laminate. The butter will melt. If your kitchen is hot, chill the dough for longer periods between folds, or chill your rolling pin and counter.
- Don’t Rush the Proof: Under-proofed croissants will leak butter into a puddle on the pan during baking and will be dense and heavy. Give them the full time they need to get puffy and visibly separate their layers before baking.
Frequently Asked Questions (FAQs)
Why did butter leak out everywhere while baking?
Butter pooling on the baking sheet usually means one of two things: the croissants were under-proofed before going into the oven, or the butter melted and incorporated into the dough during the lamination process because the dough got too warm while rolling.
Can I freeze the croissants before baking?
Yes! Once you have shaped the croissants (Step 9), place them on a baking sheet and freeze until solid. Then transfer to a freezer bag for up to 2 months. When ready to bake, place them on a parchment-lined sheet and let them thaw and proof at room temperature overnight (about 8-10 hours) before baking as directed.
Is the chocolate dough layer necessary?
Not at all. If you want a classic Pain au Chocolat, simply skip separating the dough in step 2 and making the cocoa dough. Laminate the entire batch of dough and follow the rest of the shaping and baking instructions.
Conclusion: The Ultimate Baking Triumph
Pulling a tray of freshly baked, perfectly laminated, bi-color chocolate croissants out of your own oven is one of the most rewarding experiences a home baker can have. The sound of the flaky crust shattering as you take that first warm, chocolate-filled bite makes every minute of rolling, folding, and chilling entirely worth it.
While they require a bit of dedication, the process is highly structured and incredibly satisfying. Pour yourself a strong cup of coffee or a cafe au lait, sit back, and marvel at the bakery-quality masterpiece you’ve created right in your own kitchen.
Artisanal Bi-Color Chocolate Croissants
Ingredients
Equipment
Method
- Mix flour, milk, water, sugar, softened butter, yeast, and salt until a smooth dough forms. Remove 150g of dough and set aside.
- Knead cocoa powder and 1 tbsp water into the 150g of reserved dough until uniform. Wrap both doughs and chill overnight.
- Pound and roll the cold 250g butter into a 6×6 inch square between parchment. Chill overnight.
- Roll plain dough to 6×12 inches. Encase the butter block inside the dough completely.
- Perform 3 ‘letter folds’ (rolling out and folding in thirds), chilling the dough for 45 minutes between each fold.
- Roll the chocolate dough thin. Mist the laminated dough with water and press the chocolate dough on top.
- Roll the combined dough to 1/4 inch thickness. Cut into tall triangles.
- Place chocolate batons at the base of each triangle and roll up tightly. Place on a baking sheet.
- Proof at room temperature (75°F) for 2 to 2.5 hours until doubled and jiggly.
- Egg wash only the plain dough layers. Bake at 400°F for 10 minutes, then lower to 375°F for 10-15 more minutes.
- Brush hot croissants lightly with simple syrup and cool on a wire rack.