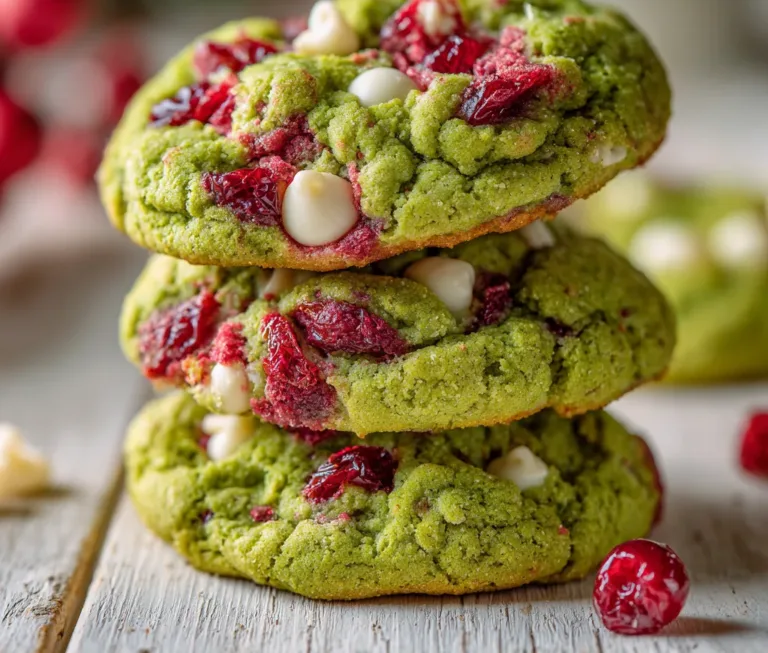
Crème Brûlée Cookies
Irresistible Crème Brûlée Cookies: The Ultimate Dessert Mashup
There are cookies, and then there are experiences. If you have ever found yourself sitting in a dimly lit bistro, cracking the back of a spoon against the hardened sugar shell of a vanilla bean crème brûlée, you know exactly the kind of magic I am talking about. Now, imagine taking that sophisticated, textural masterpiece and transforming it into a portable, handheld treat. Enter the Crème Brûlée Cookie.
This recipe is not just a sugar cookie; it is a labor of love that rewards you with one of the most incredible bite-sized desserts you will ever make. It starts with a tender, buttery vanilla bean cookie base, indented to hold a rich, velvety cheesecake-custard filling. But the pièce de résistance is the top: a layer of granulated sugar, torched to a deep amber, creating that signature “crack” that defines a true crème brûlée. It is the perfect marriage of a soft, chewy cookie and a fancy French dessert.
Why This Recipe Will Become Your New Obsession
You might be wondering if it is worth the extra step of torching a cookie. The answer is a resounding yes. Here is why this recipe stands out:
- The Texture Contrast: Most cookies are one note—either soft, crispy, or chewy. This cookie is all three. You get the soft crumble of the base, the smooth creaminess of the filling, and the shattering crunch of the caramelized sugar.
- Visual Showstopper: These cookies look like they came from a high-end patisserie. The glossy, glass-like sugar top makes them incredibly photogenic and perfect for impressing guests.
- Surprisingly Simple: While they look complex, the base is a standard sugar cookie dough, and the “custard” is a simple cream cheese mixture that bakes right in the oven. No water baths required!
- The “Crack” Factor: There is something deeply satisfying about biting into that hard sugar shell. It adds a slightly bitter, burnt caramel flavor that balances the sweetness of the cookie perfectly.
Ingredients
To replicate the flavor of a classic crème brûlée, we use high-quality vanilla and simple dairy ingredients.
Irresistible Crème Brûlée Cookies
Ingredients
Equipment
Method
- Cream butter, granulated sugar, and brown sugar until light and fluffy (2-3 mins). Mix in egg and vanilla.
- Whisk flour, baking powder, and salt together. Gradually add to wet ingredients until just combined.
- Scoop dough into balls. Place on parchment-lined sheet. Indent centers deeply with a spoon or thumb. Chill for 30 minutes.
- Preheat oven to 350°F (175°C).
- Whisk cream cheese, powdered sugar, egg yolk, and vanilla until smooth.
- Fill indentations with custard mixture (do not overfill). Bake 11-13 minutes until edges are golden and filling is set.
- Cool completely on the baking sheet.
- Sprinkle sugar over the custard centers. Use a kitchen torch to melt sugar until amber and hard. Serve immediately.
Notes
For the Cookie Base
- Unsalted Butter – 1 cup (2 sticks), softened to room temperature. This creates the tender crumb.
- Granulated Sugar – ¾ cup.
- Brown Sugar – ¼ cup. The molasses in the brown sugar adds moisture and chewiness.
- Egg – 1 large.
- Vanilla Bean Paste – 2 teaspoons. If you can, use paste instead of extract to get those beautiful black vanilla specks in the dough.
- All-Purpose Flour – 2 ½ cups.
- Baking Powder – 1 teaspoon.
- Salt – ½ teaspoon. Crucial to balance the sweetness.
For the Custard Filling
- Cream Cheese – 4 oz, softened. This provides a stable base that mimics custard but holds up better in a cookie.
- Powdered Sugar – ¼ cup.
- Egg Yolk – 1 large. This adds richness and that yellow custard hue.
- Vanilla Extract – 1 teaspoon.
For the Brûlée Topping
- Granulated Sugar – Approx. ½ cup, for sprinkling.
- Kitchen Torch – Highly recommended for the best results. (See tips below for broiler method).
Instructions
Step 1: Prepare the Dough
In the bowl of a stand mixer fitted with the paddle attachment (or a large bowl with a hand mixer), cream together the softened butter, granulated sugar, and brown sugar on medium-high speed for about 2-3 minutes. You want the mixture to be pale and fluffy. This aeration is key for a light cookie.
Add the egg and vanilla bean paste. Beat until fully combined, scraping down the sides of the bowl as needed.
In a separate bowl, whisk together the flour, baking powder, and salt. Gradually add the dry ingredients to the wet ingredients on low speed. Mix just until no white streaks of flour remain. Do not overmix, or the cookies will be tough.
Step 2: Shape and Indent
Scoop the dough into balls using a medium cookie scoop (about 1.5 tablespoons). Roll them smooth between your palms. Place the dough balls on a baking sheet lined with parchment paper.
Now, create the “nest” for the filling. You can use your thumb or the back of a round teaspoon measuring spoon to press a deep indentation into the center of each ball. If the edges crack, just gently smooth them back together with your fingers.
Chill Step: Place the baking sheet in the refrigerator for at least 30 minutes. This prevents the cookies from spreading too flat in the oven.
Step 3: Make the Filling
While the dough chills, make the custard layer. In a small bowl, whisk together the softened cream cheese, powdered sugar, egg yolk, and vanilla until completely smooth and lump-free.
Step 4: Fill and Bake
Preheat your oven to 350°F (175°C). Remove the cookies from the fridge. Spoon about 1-2 teaspoons of the cream cheese filling into the indentation of each cookie. Do not overfill, or it will spill over the sides during baking.
Bake for 11-13 minutes. The edges should be set and lightly golden, and the filling should look matte and set (it might puff up slightly but will settle). Let the cookies cool completely on the baking sheet. They are too fragile to move when hot.
Step 5: The Brûlée Finish
Once the cookies are completely cool, sprinkle a thin, even layer of granulated sugar (about 1 teaspoon) over the custard center of each cookie. You want full coverage but not a mountain of sugar.
Using a kitchen torch, carefully melt the sugar. Keep the flame moving in small circles until the sugar bubbles, melts, and turns a deep amber color. Let it cool for 1-2 minutes until the sugar hardens into a glass-like shell.

Tips for the Perfect “Crack”
1. The Torch vs. The Broiler:
A kitchen torch is the best tool for this job. It gives you precise control over the caramelization. If you don’t have one, you can use your oven’s broiler. Place the baking sheet on the highest rack and watch them like a hawk. It usually takes 1-2 minutes. Be warned: the broiler heats the whole cookie, not just the sugar, so it can dry out the base if you aren’t careful.
2. Sugar Selection:
Use standard white granulated sugar for the topping. Brown sugar has too much moisture and won’t harden into that crisp “glass” shell as effectively. Powdered sugar will burn instantly. Superfine (caster) sugar works quickly and evenly if you have it.
3. Don’t Brûlée Until Serving:
Moisture is the enemy of caramelized sugar. If you torch the cookies and let them sit for 6 hours, the humidity from the custard filling will dissolve the hard sugar crust, leaving you with a soggy amber syrup. For the best experience, bake the cookies ahead of time, but add the sugar and torch them right before you plan to eat them.
Variations to Try
- Salted Caramel: Before adding the sugar topping, drizzle a tiny bit of salted caramel sauce into the custard, or simply sprinkle flaky sea salt on top of the burnt sugar immediately after torching.
- Chocolate Crème Brûlée: Add 2 tablespoons of cocoa powder to the cookie dough and replace 1 tablespoon of flour. You can also mix melted chocolate into the cream cheese filling.
- Lemon Tart Style: Add lemon zest to the cookie dough and the filling for a bright, citrusy version that tastes like a lemon meringue pie crossed with crème brûlée.
- Spiced Holiday Version: Add cinnamon and nutmeg to the cookie dough for a snickerdoodle-crème brûlée hybrid perfect for Christmas.
Serving Suggestions
These cookies are rich, so they pair best with beverages that can cut through the sweetness:
- Black Coffee or Espresso: The bitterness of coffee compliments the burnt sugar flavor perfectly.
- Earl Grey Tea: The floral bergamot notes lift the heavy vanilla flavors.
- Champagne or Prosecco: For a fancy brunch or New Year’s Eve party.
Common Troubleshooting
My cookies spread too much!
This usually happens if the butter was too warm or you skipped the chilling step. The dough needs to be cold when it hits the hot oven to maintain that cup shape.
The sugar burned black!
You held the torch in one spot too long. Keep the flame moving constantly. Also, sugar goes from amber to black in seconds, so stop a moment before you think you need to.
The filling curdled!
Ensure your ingredients (cream cheese and egg yolk) are at room temperature when mixing to ensure a smooth emulsion. Also, don’t bake at too high a temperature.
Storage Instructions
Refrigerator: Because of the cream cheese and egg yolk filling, these cookies should be stored in the refrigerator. They will keep in an airtight container for up to 4 days.
Freezer: You can freeze the baked cookies without the burnt sugar topping. Thaw them in the fridge, bring to room temperature, and then torch the sugar just before serving.
Get your torches ready—this is one baking project that is as fun to make as it is to eat!