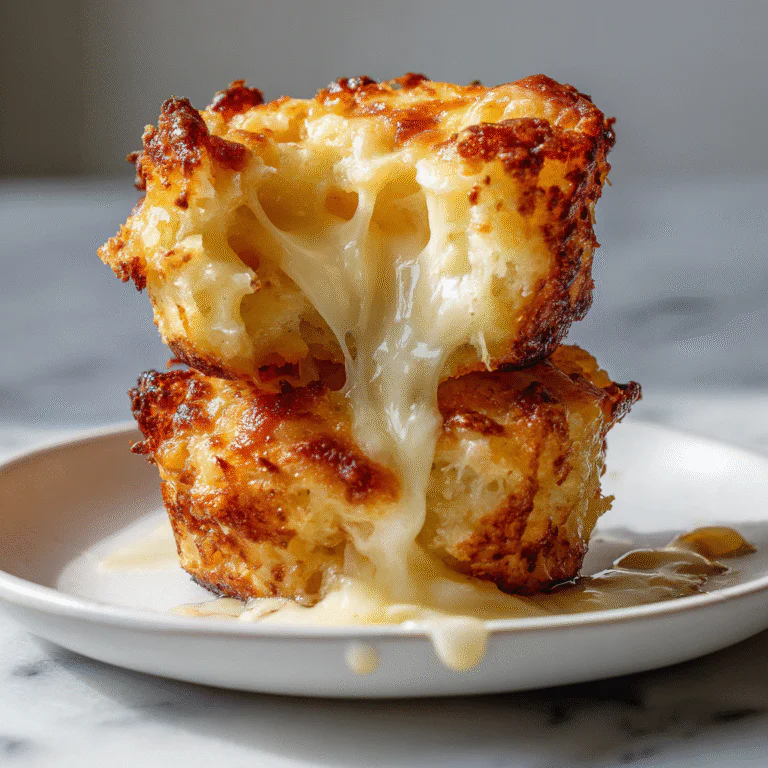
Crispy Herbed Waffle Chips
🥔 The Ultimate Guide to Crispy Homemade Herbed Waffle Chips
There is a distinct, satisfying sound that echoes through a kitchen when the perfect potato chip is bitten into—a thunderous crunch that signifies culinary victory. While the grocery store aisle is lined with colorful bags of mass-produced snacks, there is an artisanal magic in transforming a humble raw potato into a golden, seasoned masterpiece right in your own home. Today, we aren’t just making chips; we are crafting Crispy Herbed Waffle Chips, a snack that rivals the most expensive gourmet brands in both texture and flavor.
The image of these golden, ridged rounds brings to mind cozy movie nights, bustling summer barbecues, and the joy of sharing food that is made with love. The waffle cut, also known as the crinkle cut’s sophisticated cousin, isn’t just for aesthetics. Those ridges and valleys are flavor traps, holding onto the savory blend of garlic, dill, and sea salt in a way that a flat chip simply cannot. This guide will walk you through everything from selecting the right tuber to the science of the fry, ensuring you never settle for a stale bag of air again.
✨ Why You Should Ditch the Bag and Fry at Home
It might seem convenient to grab a bag off the shelf, but homemade waffle chips offer a customized experience that factory settings can’t replicate. When you control the ingredients, you control the quality of the oil, the sodium levels, and the freshness of the seasonings. There are no preservatives, no unpronounceable chemicals, and no stabilizers. Just potatoes, oil, and spices.
Furthermore, the texture of a fresh, warm chip is unparalleled. The oils are still settling, the crunch is at its peak, and the aroma fills the house with a comforting savory scent. This recipe is also surprisingly cost-effective. A five-pound bag of Russet potatoes costs less than a single premium bag of brand-name chips, yet it yields five times the amount of food. It is an economical luxury that elevates your snacking game instantly.
🔬 The Science of the Perfect Crunch: Choosing Your Potato
Not all potatoes are created equal, especially when it comes to frying. The success of your waffle chips hinges almost entirely on starch content and moisture levels. To achieve that glass-like shatter upon biting, you need a potato that is high in starch and low in water.
The Russet Potato: This is the gold standard for frying. Russets (or Idaho potatoes) have high specific gravity, meaning they are dense with starch. When fried, the water evaporates quickly, leaving behind a crispy, airy structure. They brown beautifully and have a neutral flavor profile that accepts seasoning readily.
Yukon Gold: While delicious for mashing due to their buttery flavor, Yukon Golds have a medium starch and higher sugar content. They can burn faster than Russets and may result in a slightly chewier chip, though some prefer this earthier flavor.
Red Potatoes: Avoid these for chips. They are waxy and high in moisture. Frying them usually results in a dark, limp, and greasy product rather than a crisp chip.
For this recipe, we strongly recommend sticking to Russet potatoes for that classic, unbeatable crunch.

🔪 Mastering the Waffle Cut
The intricate lattice or rigid appearance of the chips in the photo requires a specific tool: a mandoline slicer with a crinkle blade. Achieving the “waffle” or “gaufrette” look involves a simple technique of rotation.
To cut a standard crinkle chip, you simply slide the potato down the blade repeatedly. However, to get the waffle pattern with the holes (or deep opposing ridges), you must slide the potato down, lift it, rotate it 90 degrees, and slide it down again. This opposing cut intersects with the ridges on the back of the slice, creating that beautiful textured network. If you don’t have a mandoline, a handheld crinkle cutter can work, though getting paper-thin slices will be more challenging and require patience.
🌿 Ingredients
The beauty of this recipe lies in its simplicity. High-quality spices make all the difference here. Do not use old spices that have been sitting in the back of the cupboard for years; fresh herbs provide the aromatic punch these chips deserve.
The Base
– 3 large Russet potatoes (scrubbed clean, peeling is optional depending on preference)
– 4 cups Vegetable oil or Peanut oil (for frying)
– Ice water (for soaking)
The Herb Seasoning Blend
– 1 tablespoon Sea salt (fine grain adheres better)
– 1 teaspoon Garlic powder
– 1 teaspoon Onion powder
– 1 tablespoon Dried dill weed (or fresh dill, finely chopped)
– 1/2 teaspoon Smoked paprika (adds a subtle depth and color)
– 1/2 teaspoon Cracked black pepper
– 1/4 teaspoon Sugar (balances the savory notes)
Optional Garnish
– Fresh parsley, minced
– Grated Parmesan cheese (dust immediately after frying)
🔥 Instructions
Follow these steps meticulously. The difference between a soggy potato slice and a crispy chip is in the preparation, specifically the soaking and drying process.
1. Slice the Potatoes
Set up your mandoline slicer with the crinkle blade attachment. Adjust the thickness to approximately 1/8 inch (3mm). Slice the potatoes, rotating the potato 90 degrees between each slice if you want the waffle pattern, or slice straight down for deep crinkle cuts. Be careful with your fingers and use the safety guard!
2. The Crucial Soak
Place the potato slices immediately into a large bowl of ice-cold water. Agitate them with your hands to release the excess surface starch. You will see the water turn cloudy. Drain and repeat this process 2 or 3 times until the water runs clear. This step is non-negotiable; excess starch causes the chips to burn before they crisp up.
3. Dry Thoroughly
Drain the potatoes and lay them out in a single layer on clean kitchen towels or layers of paper towels. Pat them completely dry. Any water left on the potato will cause the oil to splatter dangerously and will lower the oil temperature, leading to greasy chips.
4. Heat the Oil
In a heavy-bottomed pot, Dutch oven, or deep fryer, heat 2 to 3 inches of oil to 350°F (175°C). Use a candy or frying thermometer to monitor the temperature. If the oil is too cool, the potatoes will absorb it like a sponge. If it’s too hot, they will burn.
5. Mix the Seasoning
While the oil heats, combine the sea salt, garlic powder, onion powder, dried dill, smoked paprika, pepper, and sugar in a small bowl. Whisk until well blended. Set aside.
6. Fry in Batches
Carefully lower a small batch of potatoes (about a handful) into the hot oil. Do not overcrowd the pot, or the temperature will drop drastically. Fry for 3 to 5 minutes, stirring occasionally with a slotted spoon or spider strainer to ensure even cooking.
7. Achieve the Golden Color
The bubbling will slow down significantly as the moisture leaves the potatoes. Once the chips are a golden amber color and the bubbles have mostly subsided, remove them from the oil.
8. Drain and Season Immediately
Transfer the chips to a wire rack set over a baking sheet or a paper towel-lined bowl. While the chips are still hot and slightly oily, generously sprinkle the seasoning blend over them. Toss gently to coat.
9. Cool and Serve
Allow the chips to cool completely. They will continue to crisp up as they cool. Serve in a large bowl and watch them disappear.
👨🍳 Pro Tips for the Perfect Fry
Oil Management
Choosing the right oil is vital. You need an oil with a high smoke point. Peanut oil is a favorite for chips because it adds a very subtle nutty flavor and handles high heat well. Canola oil, Vegetable oil, or Grapeseed oil are excellent neutral alternatives. Avoid olive oil, as its smoke point is too low for deep frying.
The “Double Fry” Method
If you find your chips are getting dark but staying soft in the middle, try the double fry technique. Fry the chips at a lower temperature (325°F) for about 3 minutes until they are cooked through but pale. Remove them, let them drain and cool slightly. Crank the heat up to 375°F and fry them a second time for 1-2 minutes to brown and crisp them. This is the secret used by many famous french fry restaurants.
Storage and Re-Crisping
Homemade chips are best eaten the same day (usually within hours). However, if you have leftovers, store them in an airtight container only after they are 100% cool. Any residual heat will create condensation and make them soggy. If they do lose their crunch, you can revive them by placing them on a baking sheet in a 300°F oven for 5-8 minutes.
🥗 Serving Suggestions and Pairings
While these herbed waffle chips are spectacular on their own, they are the perfect vessel for dips. The ridges hold heavy sauces beautifully.
- French Onion Dip: The classic pairing. The onion powder in the seasoning bridges the gap perfectly.
- Spicy Aioli: Mix mayonnaise, lemon juice, garlic, and sriracha for a creamy kick.
- Beer Cheese Dip: The hearty crunch of a waffle chip stands up well to a thick, warm cheese dip.
- Truffle Mayo: For an elevated, gourmet experience.
🧂 Customizing Your Flavor Profile
Once you master the frying technique, the seasoning possibilities are endless. Here are a few variations to try:
BBQ Style: Mix brown sugar, paprika, chili powder, garlic powder, and a pinch of cayenne.
Salt & Vinegar: This is tricky with homemade chips as liquid vinegar makes them soggy. Instead, buy “sodium diacetate” or vinegar powder online. Dust it on the hot chips for that lip-puckering tang without the moisture.
Parmesan & Rosemary: Finely blitz fresh rosemary and mix it with grated parmesan. Toss the hot chips in this mixture for an Italian twist.
📉 Troubleshooting Common Issues
Why are my chips brown but soft?
This usually means the oil was too hot. The outside sugars caramelized (burned) before the water inside fully evaporated. Lower your temperature to 350°F.
Why are my chips greasy?
The oil temperature dropped too low. When you add potatoes to the oil, the temp drops naturally. If you add too many potatoes at once, it drops below 300°F, and the potato absorbs the oil rather than frying in it. Fry in smaller batches.
Why are my chips unevenly cooked?
Inconsistent slicing. If you are cutting by hand, it is nearly impossible to get them all the same thickness. A mandoline is the only way to ensure every chip finishes cooking at the exact same time.
📝 Conclusion
Making Crispy Herbed Waffle Chips at home is a labor of love that pays off in every crunch. It transforms a simple vegetable into a centerpiece snack that sparks conversation. Whether you are hosting a Super Bowl party, a summer picnic, or just treating yourself on a rainy afternoon, these chips bring a warmth and authenticity that store-bought bags simply lack. So, heat up that oil, sharpen that slicer, and get ready to taste the best potato chip you’ve ever had—made by you.
Crispy Herbed Waffle Chips
Ingredients
Equipment
Method
- Slice potatoes using a mandoline crinkle blade, rotating 90 degrees between cuts for waffle pattern.
- Soak slices in ice water for at least 20 minutes to remove starch. Drain and repeat until water is clear.
- Pat potatoes completely dry with paper towels.
- Heat oil in a large heavy pot to 350°F (175°C).
- Fry potatoes in small batches for 3-5 minutes until golden brown and bubbles slow down.
- Remove chips and drain on a wire rack.
- Immediately toss with the seasoning blend while hot.
- Let cool completely to crisp up before serving.