JAM DONUT FOCACCIA
Quick Jam Donut Focaccia: The Ultimate Sweet Brunch Treat
Imagine the pillow-soft texture of a classic Italian focaccia colliding with the sticky, sweet nostalgia of a raspberry jelly donut. This isn’t a fever dream; it is the reality of the Quick Jam Donut Focaccia. If you have been searching for a baking project that delivers maximum impact with minimal effort, you have arrived at your destination. This recipe is a game-changer for brunch hosts, dessert lovers, and anyone who is intimidated by the prospect of deep-frying traditional donuts but craves that specific, yeasty satisfaction.
In the world of baking, focaccia is usually relegated to the savory side of the menu—topped with rosemary, sea salt, tomatoes, or olives. However, the structure of focaccia dough is essentially a blank canvas. It is airy, bubbly, and specifically designed to hold toppings in its signature dimples. By swapping olive oil for butter and savory toppings for fruit jam and a vanilla glaze, we transform a rustic bread into a decadent “cake” that tastes exactly like a fresh donut shop treat.
This article will guide you through every step of creating this masterpiece, ensuring your yeast blooms perfectly, your crumb is tender, and your glaze is glossy. We will explore the science behind the dough, variations to suit your pantry, and tips for serving this warm, gooey delight to friends and family.
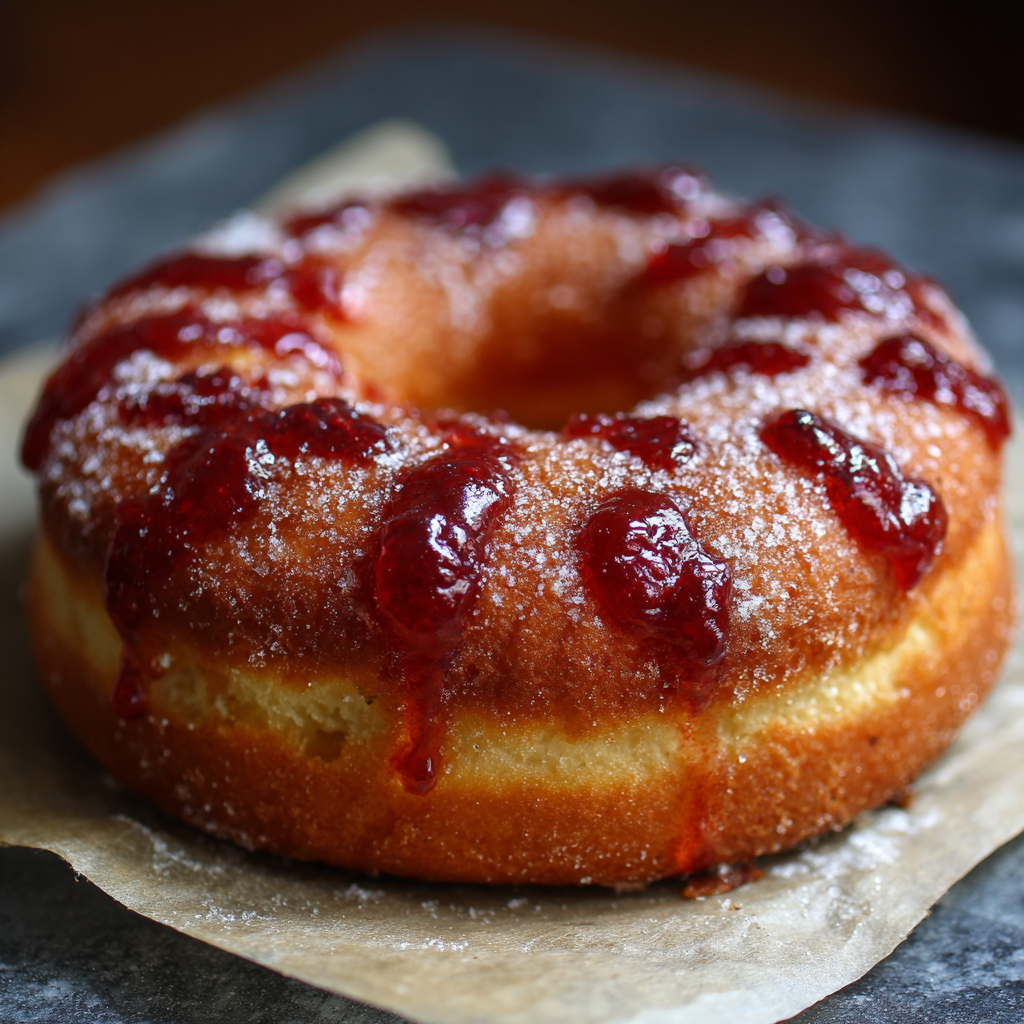
Why This Recipe Works
The magic of the Quick Jam Donut Focaccia lies in its texture. Traditional donuts require rolling, cutting, proofing, and the messy, dangerous process of deep-frying in hot oil. This recipe bypasses the most difficult steps while retaining the core characteristics of a great donut: the fluffy yeast dough and the sweet filling.
The “dimpling” technique used in focaccia making is actually perfect for a “jelly donut” effect. Instead of injecting jam into a fried ball of dough with a syringe, you simply spoon the jam into the deep pockets you create with your fingers. As the bread bakes, the dough rises around the jam, encasing it in soft bread. The final pour of glaze seals the deal, seeping into the crust and keeping the bread moist for days.
Ingredients
To make this sweet focaccia, you need standard pantry staples. The beauty is in the simplicity.
For the Dough
- All-Purpose Flour or Bread Flour – 3 ½ to 4 cups. Bread flour will give you a chewier, more authentic “bread” texture, while all-purpose flour yields a softer, cake-like crumb.
- Warm Water – 1 ½ cups (ensure it is around 110°F/45°C to activate the yeast without killing it).
- Active Dry Yeast – 1 packet (2 ¼ tsp). Instant yeast works too, but active dry gives a nice slow rise for flavor.
- Granulated Sugar – ¼ cup. This feeds the yeast and adds a subtle sweetness to the dough itself.
- Salt – 1 tsp. Essential to balance the sweetness.
- Unsalted Butter – ½ cup (melted). We use butter instead of the traditional olive oil to mimic the flavor profile of a donut.
For the Toppings and Glaze
- Raspberry or Strawberry Jam – ½ cup. Seedless is often preferred for a smoother texture, but a chunky preserve adds a rustic feel.
- Powdered Sugar – 1 ½ cups. The base of your glaze.
- Milk or Heavy Cream – 3-4 tbsp. To thin the glaze.
- Vanilla Extract – 1 tsp. For that bakery-shop aroma.
- Lemon Zest (Optional) – A pinch in the glaze adds a fresh lift.
Step-by-Step Instructions
Follow these steps to ensure your focaccia is fluffy, golden, and perfectly sweet.
Step 1: Bloom the Yeast
In a large mixing bowl or the bowl of a stand mixer, combine the warm water and 1 tablespoon of the granulated sugar. Sprinkle the yeast over the top and stir gently. Let it sit for 5–10 minutes until the mixture is foamy and bubbly. If it doesn’t bubble, your yeast may be old, and you should start over.
Step 2: Mix the Dough
Add the remaining sugar, salt, and half of the melted butter (¼ cup) to the yeast mixture. Gradually add the flour, one cup at a time, mixing on low speed or stirring with a wooden spoon. Once the dough comes together, it should be sticky but manageable. If using a stand mixer, switch to the dough hook and knead for 5–7 minutes. If kneading by hand, turn onto a floured surface and knead for 8–10 minutes until smooth and elastic.
Step 3: The First Rise
Grease a large bowl with a little butter or cooking spray. Place the dough inside, turning it once to coat it in the grease. Cover with a warm, damp cloth or plastic wrap. Place in a warm, draft-free area and let it rise for 1 to 1.5 hours, or until it has doubled in size.
Step 4: Pan and Second Rise
Generously grease a 9×13 inch baking pan with the remaining melted butter. Transfer the risen dough into the pan. Gently stretch the dough toward the corners. If it shrinks back (which is the gluten tightening), let it rest for 10 minutes and try again. Cover the pan and let it rise again for 30–45 minutes. It should look puffy and airy.
Step 5: Dimple and Jam
Preheat your oven to 375°F (190°C). This is the fun part. Using your fingertips, press down firmly into the dough to create deep dimples all over the surface. Do not be afraid to touch the bottom of the pan; the dough will rise back up. Spoon teaspoons of your chosen jam into these dimples.
Step 6: Bake
Bake for 20–25 minutes. The top should be golden brown, and the jam will be bubbly and slightly caramelized at the edges. A skewer inserted into the bread part (avoiding the jam) should come out clean.
Step 7: Glaze and Serve
While the focaccia is baking, whisk together the powdered sugar, milk, and vanilla until smooth. The consistency should be pourable but thick enough to coat a spoon. Remove the bread from the oven and let it cool for 5 minutes. While still warm, drizzle the glaze generously over the entire surface. Slice into squares and serve warm.
Expert Baking Tips for Success
Temperature Matters: Yeast is a living organism. If your water is too hot (over 120°F), it will kill the yeast. If it is too cold, the yeast will not wake up. Aim for “baby bathwater” temperature.
The Windowpane Test: To ensure your gluten is developed enough before the first rise, take a small piece of dough and stretch it between your fingers. If you can stretch it thin enough to see light through it without it tearing, it is ready.
Don’t Rush the Rise: Focaccia gets its flavor from fermentation. If your kitchen is cold, put the dough in the oven with the light on (but the heat off) to create a makeshift proofing box.
The Sticky Factor: Donut focaccia dough should be slightly stickier than standard bread dough. Avoid adding too much extra flour during kneading, or the final product will be dense rather than fluffy.
Variations and Customizations
Once you master the base recipe, the possibilities are endless.
The “Boston Cream” Focaccia
Instead of jam, bake the focaccia plain (with dimples). Once baked and cooled, pipe vanilla custard into the holes and top with a chocolate ganache glaze instead of vanilla.
Cinnamon Roll Style
Mix brown sugar and cinnamon with the melted butter used for the pan. Before dimpling, sprinkle a heavy layer of cinnamon sugar over the dough. Glaze with a cream cheese frosting.
Savory-Sweet Breakfast
Use fig jam in the dimples and top with crumbled goat cheese and a drizzle of honey after baking. This bridges the gap between dessert and a sophisticated cheese course.
Nutella Stuffed
If you are a chocolate lover, replace the fruit jam with dollops of Nutella or chocolate hazelnut spread. Be careful not to burn the chocolate; you may want to cover the pan with foil for the first 10 minutes of baking.
Storage and Reheating
This Quick Jam Donut Focaccia is best enjoyed on the day it is baked, ideally while still slightly warm from the oven. However, leftovers can be stored.
- Room Temperature: Store in an airtight container for up to 2 days. The glaze may become slightly sticky due to humidity.
- Freezing: You can freeze the baked focaccia without the glaze. Wrap tightly in plastic wrap and foil. Freeze for up to a month. Thaw at room temperature and warm in the oven before adding a fresh batch of glaze.
- Reheating: A quick 10-second zap in the microwave will restore the softness of the bread and make the glaze gooey again.
Nutritional Note
While this is a delicious treat, it is definitely an indulgence. It is high in carbohydrates and sugars, making it a perfect special occasion breakfast for holidays, birthdays, or a comforting Sunday morning. You can reduce the sugar slightly in the dough, but the glaze and jam provide the essential “donut” experience.
Conclusion
The Quick Jam Donut Focaccia is more than just a recipe; it is a hack that brings the joy of the bakery into your home kitchen without the mess of a deep fryer. It captures the essence of comfort food—warm, soft, sweet, and sticky. whether you are an experienced baker looking for a fun twist or a novice wanting to impress guests, this dish delivers on every front. So, grab your flour, bloom your yeast, and get ready for your kitchen to smell like heaven.
Quick Jam Donut Focaccia
Ingredients
Equipment
Method
- Combine warm water and 1 tbsp sugar in a bowl. Sprinkle yeast on top and let bloom for 5-10 minutes until foamy.
- Add remaining sugar, salt, and half the melted butter (1/4 cup). Gradually mix in flour until a sticky dough forms.
- Knead dough (by hand or mixer) for 5-8 minutes until smooth. Place in a greased bowl, cover, and let rise for 1 hour or until doubled.
- Grease a 9×13 inch pan with remaining butter. Transfer dough to pan and gently stretch to corners. Cover and let rise again for 30 minutes.
- Preheat oven to 375°F (190°C). Use fingers to dimple the dough deeply.
- Spoon jam into the dimples. Bake for 20-25 minutes until golden brown.
- Whisk powdered sugar, milk, and vanilla to create a glaze.
- Pour glaze over warm focaccia. Cool slightly before slicing.