No-Bake Peanut Butter Oat Cups
There is an undeniable, universal truth in the culinary world: peanut butter and chocolate are meant to be together. It is a flavor combination that spans generations, cultures, and dessert categories. But what happens when you take that classic, nostalgic pairing and elevate it with the wholesome, hearty texture of rolled oats? You get the No-Bake Peanut Butter Oat Cup. This incredibly simple, exceptionally delicious recipe bridges the gap between an energy-boosting afternoon snack and a decadent, late-night dessert. If you have been searching for a treat that satisfies your sweet tooth without requiring you to turn on your oven or spend hours measuring flour, this recipe is about to become your absolute favorite kitchen staple.
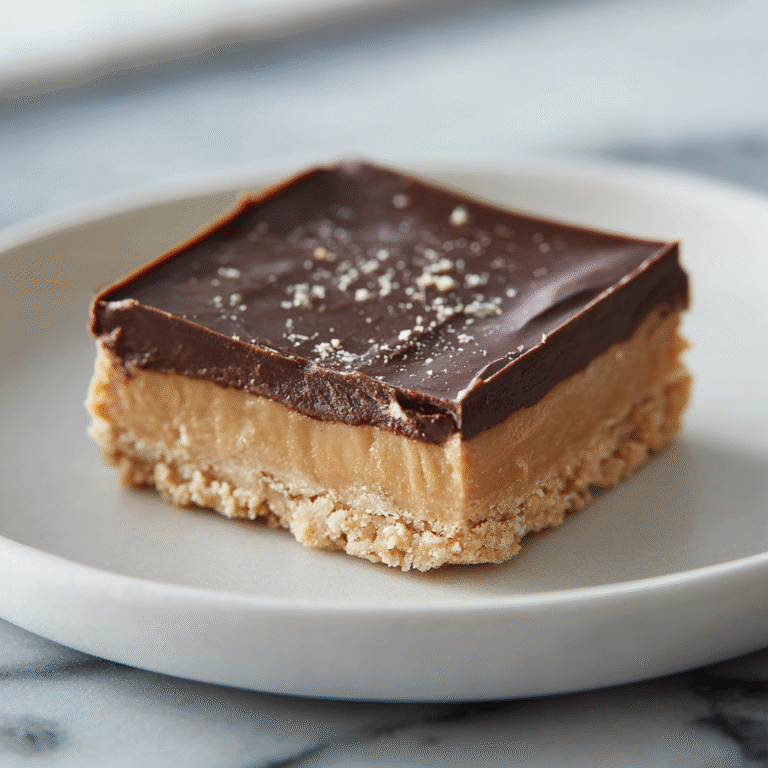
The brilliance of these oat cups lies in their simplicity and their texture. Imagine the chewy, satisfying bite of a thick oatmeal cookie, but entirely unbaked, allowing the rich, roasted flavor of peanut butter to shine through in its purest form. Now, imagine that hearty base crowned with a thick, snappy layer of semi-sweet chocolate and finished with a delicate crunch of flaky sea salt. It is a sensory experience that hits every craving: sweet, salty, chewy, creamy, and crunchy. Best of all, they come together with just a handful of pantry staples in less than twenty minutes of active prep time. The refrigerator does all the heavy lifting, transforming soft, sticky ingredients into perfectly set, portable cups of joy.
Why You Will Obsess Over These No-Bake Treats
While there are countless peanut butter and chocolate recipes out there, the No-Bake Peanut Butter Oat Cup stands in a league of its own. Here is why this specific recipe will quickly become a recurring star in your weekly meal prep and dessert rotation:
- Zero Baking Required: Whether it is the middle of a sweltering summer or you simply cannot be bothered to wait for an oven to preheat, this recipe offers instant gratification. The lack of baking also preserves the raw, vibrant flavors of the natural peanut butter and honey.
- Wholesome Ingredients: Unlike traditional store-bought peanut butter cups that are loaded with refined sugars, preservatives, and artificial stabilizers, these cups utilize whole, recognizable ingredients. Rolled oats provide complex carbohydrates and fiber, while natural peanut butter offers healthy fats and protein.
- Perfect for Meal Prep: These cups are incredibly stable once chilled. You can make a large batch on a Sunday afternoon, store them in the refrigerator or freezer, and have a grab-and-go snack ready for the entire week. They pack perfectly into lunchboxes and survive well in a desk drawer cooler.
- Dietary Flexibility: With just a few minor tweaks, this recipe can easily accommodate various dietary restrictions. It is naturally vegetarian, and can easily be made gluten-free (by using certified gluten-free oats) and vegan (by swapping honey for maple syrup and using dairy-free chocolate chips).
- Incredible Texture Contrast: The magic of this dessert is the mouthfeel. The base is dense, chewy, and satisfying, while the top layer provides a rich, smooth melt-in-your-mouth chocolate finish, all punctuated by the sharp, crystalline crunch of sea salt.
The Science of the No-Bake Bind
You might wonder how a mixture of oats and peanut butter can hold together so perfectly without the binding power of eggs, flour, or heat. The secret lies in the manipulation of temperature and natural fats. In traditional baking, heat causes proteins to coagulate and starches to gelatinize, creating structure. In no-bake desserts, we rely on the opposite process: chilling.
Natural peanut butter and coconut oil (or butter, if you prefer) are the primary binders here. At room temperature, or when slightly warmed, these ingredients become fluid, allowing them to thoroughly coat every single oat. However, when introduced to the cold environment of your refrigerator or freezer, the saturated fats in the peanut butter and coconut oil solidify. This solid state acts as an edible glue, firmly locking the oats together into a cohesive, sturdy cup that will not crumble when you take a bite. The liquid sweetener (honey or maple syrup) also plays a crucial role, acting as a secondary, sticky binder that prevents the base from becoming too dry or crumbly. Understanding this simple food science ensures you will never end up with a falling-apart oat cup.

Deconstructing the Ingredient List
Because this recipe does not rely on complex chemical leaveners or baking techniques, the quality of your ingredients takes center stage. Choosing the right components will dramatically elevate the final product.
- Old-Fashioned Rolled Oats: This is crucial. Do not use quick oats or steel-cut oats. Quick oats are processed to be very thin and will turn to mush when mixed with the wet ingredients, resulting in a pasty base. Steel-cut oats are too tough and require cooking. Old-fashioned rolled oats provide the perfect chewy, robust texture necessary for a sturdy cup.
- Creamy Natural Peanut Butter: The label should ideally list only one or two ingredients: peanuts and perhaps a little salt. Avoid commercial peanut butters that are packed with hydrogenated vegetable oils and added sugars. Natural peanut butter is runnier, which makes it infinitely easier to mix into the oats, and it provides a much deeper, authentic roasted peanut flavor.
- Maple Syrup or Honey: This provides the necessary sticky sweetness to bind the oats. Maple syrup offers a wonderful, subtle autumnal flavor that pairs beautifully with oats, while honey provides a thicker, more floral sweetness. Both work flawlessly.
- Coconut Oil: You will use a little bit in the oat base to help it set, and a little bit melted into the chocolate. In the chocolate layer, coconut oil is the secret ingredient. It slightly softens the chocolate when it chills, ensuring that when you bite into the cup, the chocolate yields smoothly rather than cracking and shattering all over your shirt.
- Vanilla Extract: A splash of high-quality pure vanilla extract enhances all the other flavors, adding a layer of aromatic warmth that makes the cups taste like a high-end bakery treat.
- Dark Chocolate Chips: While you can use milk chocolate or semi-sweet, dark chocolate (around 60-70% cacao) provides the perfect slightly bitter contrast to the sweet, rich peanut butter base. High-quality chocolate chips or a chopped baking bar will melt the smoothest.
- Flaky Sea Salt: This is non-negotiable for the ultimate flavor experience. A sprinkle of Maldon or similar flaky sea salt on top of the wet chocolate before it sets enhances the chocolate’s richness and perfectly balances the sweetness. Do not use standard table salt, which will be too harsh and lack the necessary crunch.
Step-by-Step Instructions for Perfect Oat Cups
Creating these cups is incredibly straightforward, but paying attention to the details during assembly makes all the difference.
- Prepare Your Tin: Line a standard 12-cup muffin tin with paper or silicone liners. Silicone liners are highly recommended for no-bake treats because the cups pop out effortlessly without any sticking or tearing.
- Warm the Wet Ingredients: In a medium microwave-safe bowl, combine the natural peanut butter, maple syrup (or honey), and melted coconut oil. Microwave for about 20-30 seconds. You do not want it hot; you just want it warm enough to be smooth, runny, and easily whisked together. Stir in the vanilla extract and a pinch of fine salt.
- Incorporate the Oats: Pour the old-fashioned rolled oats into the warm peanut butter mixture. Use a sturdy silicone spatula to fold everything together. Take your time here. You want to ensure that every single oat is thoroughly coated in the peanut butter mixture. If there are dry spots, your cups will crumble.
- Press the Base: Divide the oat mixture evenly among the 12 muffin cups (about 2 tablespoons per cup). Now comes the most important step: packing. Use the back of a spoon, or the bottom of a small shot glass lightly greased with coconut oil, to press the oat mixture down as firmly as possible into an even layer. The tighter you pack them, the better they will hold together.
- Melt the Chocolate: In a separate, clean microwave-safe bowl, combine the dark chocolate chips and a teaspoon of coconut oil. Microwave in 30-second increments, stirring vigorously after each increment. Stop microwaving when there are still a few small unmelted lumps; just keep stirring until the residual heat melts them completely. This prevents the chocolate from scorching.
- Layer the Chocolate: Spoon the melted chocolate evenly over the packed oat bases, using the back of the spoon to smooth it out so it covers the oats completely from edge to edge.
- The Salt and the Chill: Immediately sprinkle a pinch of flaky sea salt over the wet chocolate. Do not wait, or the chocolate will set and the salt will bounce off. Place the muffin tin flat in the refrigerator for at least 1 hour, or in the freezer for 30 minutes, until the chocolate is completely hard and the oat base is firm.
- Serve and Enjoy: Remove the cups from the liners. If they were in the freezer, let them sit at room temperature for 5 minutes before biting into them so the chocolate softens slightly.
Pro-Tips for Customizing Your Treat
Once you master this base recipe, consider it a blank canvas for your culinary imagination. Here are some fantastic ways to switch up the flavors and add nutritional boosts:
- The Protein Boost: If you use these as a pre- or post-workout snack, you can easily add a scoop of your favorite vanilla or chocolate protein powder to the oat mixture. You may need to add an extra tablespoon of peanut butter or a splash of almond milk to ensure the mixture doesn’t become too dry.
- Nut and Seed Swaps: If you have a peanut allergy in the house, sunflower seed butter or almond butter work as perfect 1:1 substitutions. You can also mix a tablespoon of chia seeds or ground flaxseed into the oats for extra omega-3s and fiber.
- The Trail Mix Cup: Fold miniature chocolate chips, finely chopped dried cranberries, and crushed walnuts into the oat mixture before pressing it into the cups. It transforms the base into a chewy, textured trail mix bite.
- White Chocolate Raspberry: Swap the dark chocolate topping for melted white chocolate, and gently press a small piece of freeze-dried raspberry into the top before the chocolate sets. It looks beautiful and offers a tart, fruity contrast.
Proper Storage and Freezing Guidelines
Because these cups rely on solidified fats to hold their shape, proper storage is crucial. They should not be kept at room temperature for prolonged periods, especially in warm climates, as the chocolate will melt and the base will become too soft and sticky.
Refrigerator Storage: Transfer the fully set oat cups to an airtight container. You can stack them, but it is best to place a piece of parchment or wax paper between the layers to prevent the sea salt from scratching the chocolate layers. They will keep perfectly in the refrigerator for up to two weeks.
Freezer Storage: These cups are exceptional candidates for freezing. Place them in a heavy-duty freezer bag or a freezer-safe container. They will last for up to 3 months. Many people actually prefer eating them straight from the freezer! The oats become incredibly chewy, and the chocolate provides a satisfying snap. If they are too hard straight from the freezer, simply let them sit on the counter for 5 to 10 minutes before enjoying.
These No-Bake Peanut Butter Oat Cups are a testament to the fact that you do not need complex techniques or an afternoon of baking to create something truly spectacular. With their wholesome ingredients, deeply satisfying texture, and the unbeatable flavor profile of peanut butter and dark chocolate, they are guaranteed to become a beloved staple in your home. Whip up a batch today, and enjoy the ultimate sweet, salty, and chewy treat!
No-Bake Peanut Butter Oat Cups
Ingredients
Equipment
Method
- Line a 12-cup muffin tin with paper or silicone liners.
- In a medium microwave-safe bowl, combine the peanut butter, maple syrup (or honey), and 2 tablespoons of melted coconut oil. Microwave for 20-30 seconds until warm and easily stirrable. Stir in the vanilla extract and fine salt.
- Add the rolled oats to the warm peanut butter mixture. Fold thoroughly with a spatula until every oat is coated and no dry spots remain.
- Divide the oat mixture evenly among the 12 muffin cups. Use the back of a spoon or a small glass to press the mixture down very firmly into an even, compact layer.
- In a separate microwave-safe bowl, combine the dark chocolate chips and 1 teaspoon of coconut oil. Microwave in 30-second increments, stirring well after each, until completely melted and smooth.
- Spoon the melted chocolate evenly over the packed oat bases, smoothing it to the edges.
- Immediately sprinkle flaky sea salt over the wet chocolate.
- Place the muffin tin in the refrigerator for at least 1 hour (or freezer for 30 minutes) until the chocolate is fully set and the oat base is firm.
- Store leftovers in an airtight container in the refrigerator for up to 2 weeks, or freeze for up to 3 months.