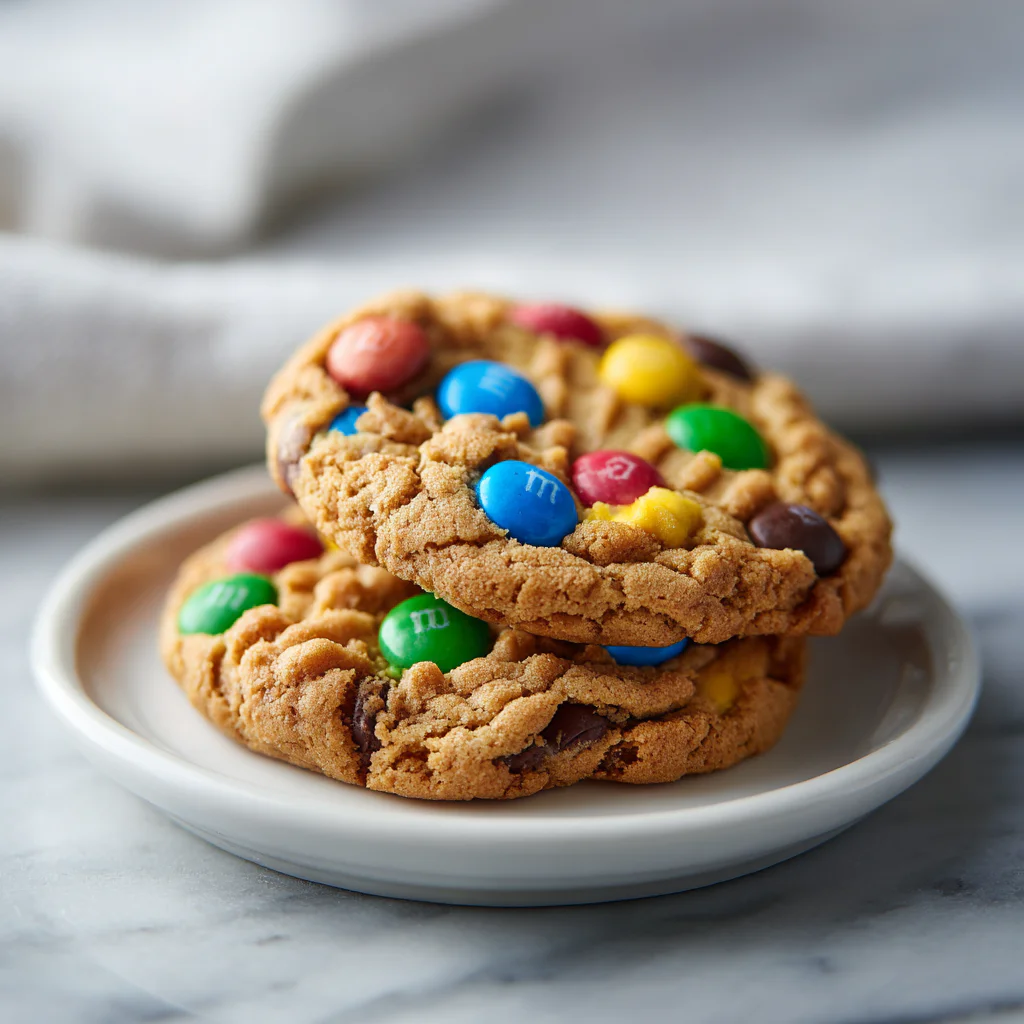
Peanut Butter M&M Cookies
The Perfect Chewy Bite: Mastering Peanut Butter M&M Cookies
A Timeless Classic: The Enduring Appeal of Peanut Butter Cookies
There are few cookies more universally beloved than the classic peanut butter cookie. Its distinct, rich flavor and characteristic crinkled texture evoke a powerful sense of nostalgia and comfort. But how do you take a classic and make it even better? By adding M\&M candies. The combination of the salty-sweet, dense richness of peanut butter with the crisp candy shell and melt-in-your-mouth chocolate of M\&Ms is a confectionery match made in heaven.
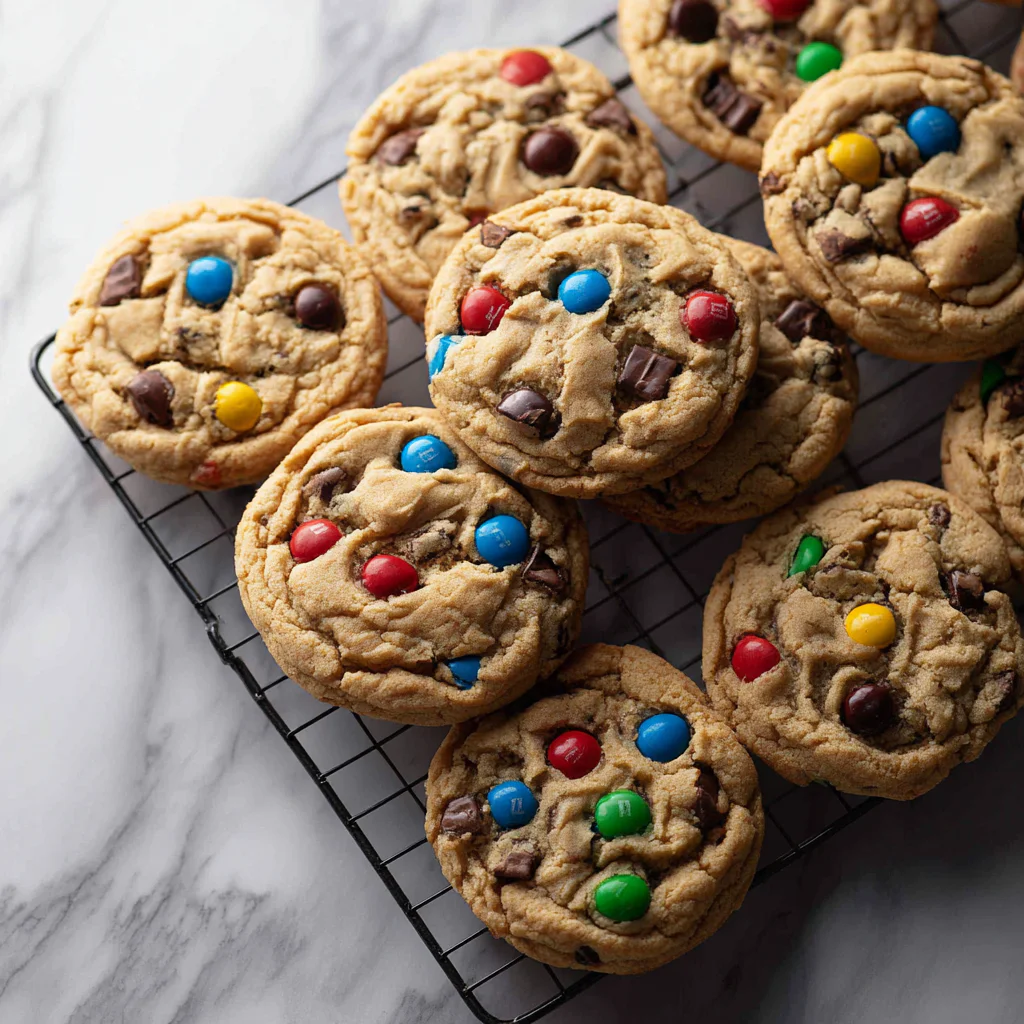
This recipe for Peanut Butter M\&M Cookies is designed to deliver a cookie that is perfectly soft and chewy in the center, with slightly crispy edges, and guaranteed to be studded with bright pops of color and chocolate. Forget those thin, dry, and crunchy versions; this is a thick, substantial cookie that holds its shape while remaining tender and delicious. It is a cookie that truly delivers on its promise of comfort, making it a perfect addition to lunchboxes, bake sales, or simply an afternoon snack with a cold glass of milk.
The Science of Softness: Achieving the Perfect Cookie Texture
The secret to a truly outstanding peanut butter cookie lies in managing its core ingredients—namely, the types of fat and sugar used. Unlike some chocolate chip cookie recipes that rely heavily on all-purpose flour for structure, the rich fat and protein content of peanut butter plays a massive role here, and the cookie’s texture is largely defined by the ratio of brown sugar to granulated sugar.
The Sugar Ratio:
- Brown Sugar (High Moisture): We use a higher proportion of brown sugar in this recipe. Brown sugar contains molasses, which is naturally acidic and hygroscopic, meaning it absorbs and retains moisture easily. This high moisture content is what is directly responsible for that desirable soft, chewy center and helps prevent the cookie from drying out during baking. The molasses also imparts a deeper, more complex caramel flavor.
- Granulated Sugar (Spread and Crispness): Granulated sugar is dry and helps the cookies spread slightly and contributes to the crispness of the edges. However, too much granulated sugar can make the cookies crunchy and brittle. The balanced ratio used here maximizes chewiness while providing just enough structure.
The Role of Fat (Peanut Butter and Butter):
- Peanut Butter: Peanut butter is high in fat, which limits gluten development in the flour. This is a critical factor in creating a tender cookie. Use a standard creamy peanut butter (like Jif or Skippy) for the most consistent results. Natural-style peanut butter, which tends to separate and be oilier, can drastically change the texture of the dough, often making the cookies too crumbly or greasy.
- Butter: Using softened, unsalted butter that is properly creamed with the sugars incorporates tiny air pockets, creating a lighter, more tender crumb. This creaming process is essential for cookie success.
Kitchen Setup: Essential Tools for Cookie Dough Success
While cookies are forgiving, having the right setup streamlines the process and ensures consistent results every time.
- Stand Mixer or Hand Mixer: While you can absolutely make this dough by hand, a mixer is essential for properly creaming the butter and sugars together, a step that adds air and yields a superior, fluffier texture.
- Large Mixing Bowls: Necessary for combining dry ingredients and later for the mixing process.
- Cookie Scoop (Recommended): Using a 1.5 to 2-tablespoon cookie scoop ensures that all your cookies are the same size. This guarantees they bake evenly at the same rate, preventing some from burning while others remain underbaked.
- Baking Sheets: Use light-colored aluminum baking sheets lined with parchment paper. Parchment paper prevents sticking and helps the bottoms of the cookies bake evenly without scorching. Darker baking sheets can absorb too much heat, leading to burned bottoms.
- Cooling Rack: Crucial for immediately stopping the baking process once the cookies are out of the oven, allowing them to cool and set without becoming overly crisp.
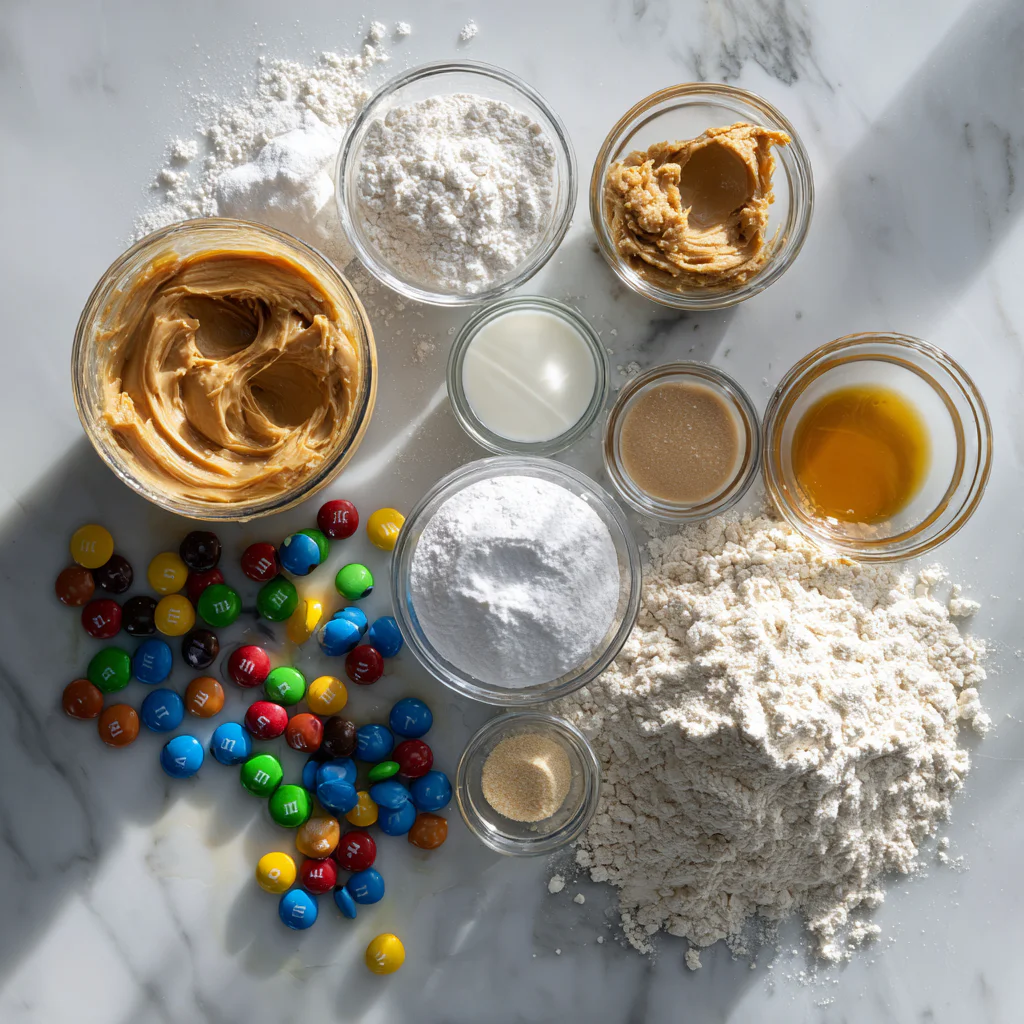
–Ingredients–
This recipe yields approximately 2 dozen medium-sized cookies. The use of both butter and peanut butter ensures a perfect blend of richness and classic flavor.
For the Cookie Dough:
- 1 cup all-purpose flour
- 1/2 teaspoon baking soda
- 1/4 teaspoon salt
- 1/2 cup (1 stick or 8 tablespoons) unsalted butter, softened to room temperature
- 1/2 cup creamy peanut butter (do not use natural, oily style)
- 1/2 cup granulated sugar
- 1/2 cup packed light brown sugar
- 1 large egg
- 1 teaspoon vanilla extract
- 3/4 cup M\&M plain or peanut candies, plus extra for topping
–Instructions–
Follow these steps for chewy, colorful, and utterly satisfying Peanut Butter M\&M Cookies that hold their shape beautifully.
- Preparation: Preheat your oven to $350^{\circ}\text{F}$ ($175^{\circ}\text{C}$). Line two large baking sheets with parchment paper. This preparation is key for non-stick results and easy cleanup.
- Whisk Dry Ingredients: In a medium-sized bowl, whisk together the all-purpose flour, baking soda, and salt. Set this aside. Whisking ensures the leavening agent is evenly distributed.
- Cream Butter and Sugars: In the bowl of a stand mixer fitted with the paddle attachment (or use a large bowl and a hand mixer), beat the softened butter, creamy peanut butter, granulated sugar, and brown sugar on medium speed until the mixture is light, creamy, and fluffy. This should take 3 to 4 minutes. Do not cut this time short, as proper creaming is essential for the final texture.
- Add Egg and Vanilla: Beat in the large egg until just combined, then mix in the vanilla extract. Scrape down the sides of the bowl with a rubber spatula to ensure everything is incorporated.
- Combine Wet and Dry: Reduce the mixer speed to low. Gradually add the flour mixture to the wet ingredients, mixing only until the dough comes together and no streaks of dry flour remain. Be careful not to overmix; overmixing develops gluten and makes the cookies tough.
- Mix in M&Ms: Remove the bowl from the mixer and use a rubber spatula to gently fold in the $\text{3/4}$ cup of M\&M candies.
- Scoop Dough: Use a medium cookie scoop (about 1.5 to 2 tablespoons) to portion the dough. Roll the portions lightly between your palms to form smooth balls. Place the dough balls onto the prepared baking sheets, spacing them about 2 inches apart.
- Press and Bake: Take the extra M\&Ms and press 3 to 5 candies into the top of each dough ball. This step is purely cosmetic but ensures a beautiful, colorful cookie presentation. Place the baking sheets in the preheated oven.
- Bake: Bake for 10 to 12 minutes. The cookies are done when the edges are set and lightly golden brown, but the centers still look slightly soft and puffy. This slight underbaking is the key to a super chewy center.
- Cool: Let the cookies cool on the baking sheet for 5 minutes before carefully transferring them to a wire rack to cool completely. Allowing them to rest on the hot sheet finishes the cooking process gently and helps the cookie structure set without drying them out.
Customizing Your Crunch: Variations and Serving Suggestions
The base Peanut Butter M\&M Cookie is wonderful on its own, but it serves as an excellent canvas for simple customization, allowing you to tailor the cookies to any occasion or preference.
Fun and Flavorful Variations:
- Extra Peanut Butter Texture: For added crunch, fold in $\text{1/2}$ cup of chopped, lightly salted peanuts along with the M\&Ms. This boosts the peanut flavor and adds a satisfying contrast to the chewy dough.
- Seasonal Swaps: For holidays, use seasonal M\&M mixes (red and green for Christmas, pastels for Easter, orange and black for Halloween). This simple swap makes the cookie instantly relevant for any party or gathering.
- Chocolate Chip Fusion: Replace half of the M\&Ms with high-quality semi-sweet chocolate chips for a deeper, richer chocolate flavor that complements the peanut butter beautifully.
- The Flatter Cookie Hack: For those who prefer a flatter, crisper cookie, lightly press the cookie dough balls down with the bottom of a glass or a fork before baking. This increases the surface area exposed to heat.
Serving Ideas:
- The Classic Milk Pairing: Nothing beats a tall, cold glass of whole milk with a warm peanut butter cookie.
- Cookie Ice Cream Sandwiches: Take two cooled cookies and sandwich a generous scoop of vanilla or chocolate ice cream between them. Roll the edges in extra M\&Ms for a decadent dessert.
- Cookie Sundae: Serve a single warm cookie in a bowl, topped with a scoop of ice cream, chocolate syrup, and whipped cream.
Storage, Shelf Life, and Troubleshooting
Proper storage is essential to maintain the softness and chewiness of these cookies. Knowing how to troubleshoot common cookie issues will ensure your batches are perfect every time.
Storage Tips:
- Room Temperature: Once completely cooled, store the cookies in an airtight container at room temperature for up to 5 days. To keep them extra soft, place half a slice of plain white bread in the container with the cookies; the cookies will absorb the moisture from the bread.
- Freezing Baked Cookies: Baked and cooled cookies freeze extremely well. Layer them between sheets of parchment paper in a freezer-safe container. They can be frozen for up to 3 months. Thaw at room temperature.
- Freezing Dough: Roll the dough balls, press the M\&Ms into the tops, and freeze them on a baking sheet until solid. Transfer the frozen dough balls to a freezer bag. When ready to bake, place the frozen balls on a baking sheet and bake for 14–16 minutes (adding a few extra minutes to the bake time).
Troubleshooting Common Issues:
- Cookies are too crumbly/dry: This is usually due to too much flour or not enough fat. Make sure to spoon and level the flour (don’t scoop directly from the bag) and ensure your peanut butter is not an oily, natural style.
- Cookies spread too much: The culprit is likely overly softened or melted butter, or perhaps the dough was overmixed. If the dough seems too soft, chill it for 30 minutes before scooping to prevent excessive spreading.
- Cookies are tough/hard: This is a classic sign of overmixing the dough. Only mix until the flour streaks disappear, and no more.
Conclusion: Your New Go-To Cookie Recipe
The Peanut Butter M\&M Cookie is the definition of a crowd-pleaser—simple to make, highly customizable, and deeply satisfying. By following the precise balance of sugars and fats, you’re guaranteed to achieve a cookie that is perfectly soft, wonderfully chewy, and bursting with that signature salty-sweet peanut butter flavor and colorful chocolate crunch. This recipe eliminates the need for chilling the dough, making it an excellent choice for a last-minute baking session. Whether you’re a novice baker or a seasoned pro, these cookies are destined to become a staple in your kitchen, delivering a batch of pure, unadulterated comfort with every single bite. Go ahead, grab your apron, and get ready to enjoy the ultimate peanut butter indulgence!