Red Velvet Brownies Recipe
Introduction: The Best of Both Dessert Worlds
There are few desserts as universally beloved as a classic, deeply chocolatey brownie. Its dense, fudgy texture and crackly top are the stuff of culinary legends. On the other end of the dessert spectrum lies the elegant, Southern-inspired classic: Red Velvet Cake. Known for its striking crimson hue, delicate crumb, and distinct flavor profile that balances a hint of cocoa with the tang of buttermilk and vinegar, red velvet is a showstopper. But what happens when you marry the irresistible, chewy texture of a brownie with the iconic flavor and visual appeal of red velvet? You get the ultimate baked treat: Red Velvet Brownies.
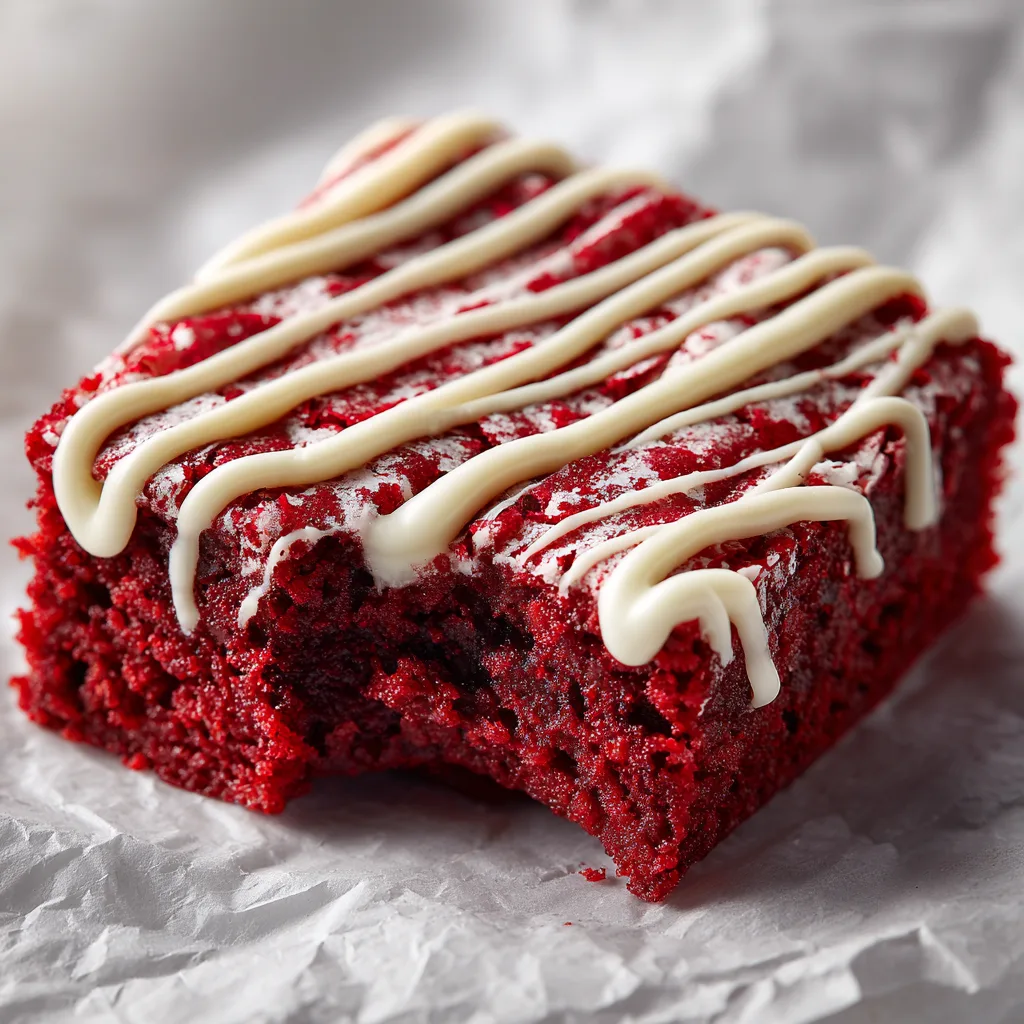
This recipe for Red Velvet Brownies is a testament to the magic of baking. It is not merely a standard vanilla blondie dyed red, nor is it a cakey square that disappoints those seeking true brownie decadence. Instead, it is a meticulously formulated recipe designed to deliver an unapologetically rich, intensely fudgy, and perfectly chewy dessert. The visual contrast alone—a vibrant, deep red square adorned with a stark white, sweet cream cheese drizzle—makes it an instant centerpiece for Valentine’s Day, holiday parties, or any occasion that calls for a touch of edible drama.
When you take your first bite, you will immediately notice the texture. The edges provide that sought-after, slightly crisp chewiness, while the center yields to a dense, melt-in-your-mouth fudginess. The flavor is complex and satisfying: the subtle warmth of cocoa powder, the comforting aroma of vanilla, and that signature, ever-so-slight tangy note that authenticates the red velvet experience. The sweet, creamy drizzle on top acts as the perfect flavor counterpoint, mimicking the classic cream cheese frosting found on traditional red velvet cakes without overwhelming the dense brownie beneath it.
The Fascinating History and Flavor of Red Velvet
To truly appreciate this dessert, it is helpful to understand what “red velvet” actually is. Many people mistakenly believe that red velvet is simply chocolate cake with a heavy dose of red food coloring. However, a true red velvet connoisseur knows that its origins are far more rooted in culinary chemistry.
Historically, during the Victorian era, the term “velvet” was used to describe cakes that had a particularly soft, fine, and smooth crumb, distinguishing them from coarser sponge cakes. The “red” aspect originally came from a chemical reaction. When natural, non-alkalized cocoa powder (which is rich in anthocyanins) was mixed with acidic ingredients like buttermilk and vinegar, it revealed a subtle, dark reddish-mahogany tint. While modern processing of cocoa powder and the desire for a brighter, more vibrant color have made the addition of red food coloring standard practice today, that original combination of cocoa, acid, and vanilla remains the defining flavor profile of red velvet.
Translating this delicate flavor profile into a brownie requires careful balancing. Brownies rely on a heavy ratio of fat and sugar to flour, which can easily mask subtle flavors. By using a precise amount of natural cocoa powder and a touch of white vinegar, we ensure that these brownies retain that authentic red velvet soul, rather than just looking the part.
The Science of the Perfect Fudgy Texture
In the world of brownies, there are three distinct camps: cakey, chewy, and fudgy. This recipe is planted firmly and proudly in the fudgy camp. But how exactly do we achieve that dense, rich texture without it turning into an underbaked mess or a fluffy cake?
The secret lies entirely in the ratios and the mixing method. First, we use melted butter rather than creaming softened butter with sugar. Creaming butter incorporates air into the batter, which acts as a mechanical leavening agent and creates a lighter, cake-like texture. By using melted warm butter and dissolving the sugar into it, we prevent air from getting trapped, keeping the batter dense.
Second, you will notice an absolute absence of chemical leaveners in this recipe. There is no baking soda and no baking powder. Without these ingredients to create gas bubbles during baking, the batter has no choice but to stay compact and rich, yielding that dense, truffle-like interior that defines a superior fudgy brownie.
Finally, the fat-to-flour ratio is intentionally skewed. We use more butter and eggs relative to the amount of all-purpose flour. Flour provides structure through gluten; too much structure leads to a tough or cakey crumb. By keeping the flour content just high enough to bind the ingredients together, the resulting brownie is incredibly moist, tender, and intensely fudgy.
Key Ingredients for Your Red Velvet Masterpiece
Every ingredient in this recipe serves a specific structural or flavor-enhancing purpose. Here is a detailed breakdown of what you will need:
- Unsalted Butter: Using unsalted butter allows us to control the exact sodium content of the batter. It must be melted and slightly warm to help dissolve the sugar and create a glossy, crackly top crust on the brownies.
- Granulated Sugar: Provides the necessary sweetness but also contributes significantly to the moisture and the signature shiny, crinkly crust on top of the baked brownies.
- Large Eggs: The eggs provide binding and structure. Using eggs at room temperature is crucial, as cold eggs will cause the melted butter to seize and solidify, breaking the emulsion of the batter.
- Pure Vanilla Extract: Do not skip this! Vanilla is half of the flavor profile of red velvet. It rounds out the cocoa and adds depth.
- Red Food Coloring: For the best results, use a high-quality liquid gel food coloring (like Americolor or Wilton). Gel coloring is highly concentrated, meaning you only need a small amount to achieve a brilliant, deep red color without adding excessive liquid that could alter the batter’s consistency. If using traditional liquid food coloring, you will need significantly more (often a full ounce).
- White Vinegar: Just a teaspoon provides that signature red velvet tang and helps set the vibrant red color during the baking process.
- All-Purpose Flour: The foundation of the brownie. Be sure to measure your flour by spooning it into the measuring cup and leveling it off with a knife. Scooping directly from the bag packs the flour and will result in dry brownies.
- Unsweetened Natural Cocoa Powder: You must use natural cocoa powder, not Dutch-processed. Natural cocoa is more acidic and pairs beautifully with the vinegar to create the authentic red velvet flavor. We use just enough to provide a chocolate note without turning the batter completely brown.
- Salt: Essential for balancing the sweetness and enhancing the complex flavors of the vanilla and cocoa.
- Cream Cheese and Powdered Sugar (For the Drizzle): A simple, sweet glaze that mimics the classic cream cheese frosting traditionally served with red velvet cake, thinned out with a splash of milk for perfect drizzling consistency.
Step-by-Step Instructions for Baking Success
Follow these detailed steps carefully to ensure your red velvet brownies turn out perfectly fudgy and vibrant every single time.
- Preheat and Prepare: Begin by preheating your oven to 350°F (175°C). Line an 8×8-inch metal baking pan with parchment paper, leaving an overhang on two sides. This acts as a “sling” that will allow you to easily lift the entirely cooled block of brownies out of the pan for clean slicing. Lightly grease the parchment paper with non-stick spray or a touch of butter.
- Whisk the Wet Ingredients: In a large mixing bowl, combine the warm, melted unsalted butter and the granulated sugar. Whisk them together vigorously for about a minute. The mixture should look slightly grainy but well combined.
- Add the Eggs and Flavorings: Add the room-temperature eggs to the butter and sugar mixture one at a time, whisking well after each addition until the batter is smooth. Next, whisk in the pure vanilla extract and the white vinegar.
- Color the Batter: Add the red gel food coloring to the wet mixture. Start with about 1 to 1 ½ teaspoons of gel color, or 1 to 2 tablespoons of liquid color. Whisk thoroughly. The batter should be an intensely bright red. It will darken slightly when the cocoa powder is added and as it bakes, so err on the side of a brighter hue at this stage.
- Fold in the Dry Ingredients: In a separate smaller bowl, sift together the all-purpose flour, natural cocoa powder, and salt. Sifting is important here to remove any stubborn lumps of cocoa powder. Gently pour the dry ingredients into the vibrant red wet ingredients. Using a rubber spatula, carefully fold the mixture together until just combined. Stop mixing the very second you no longer see streaks of dry flour. Overmixing will develop the gluten and result in tough brownies.
- Bake: Pour the thick, rich batter into your prepared baking pan. Use an offset spatula to spread it evenly into the corners and smooth the top. Bake in the preheated oven for 25 to 30 minutes.
- The Toothpick Test: Because these are fudgy brownies, a standard toothpick test won’t come out completely clean. You want to insert a toothpick into the center; it should come out with moist, sticky crumbs attached, but not raw, wet batter. If you wait until the toothpick is perfectly clean, the brownies will be overbaked and dry.
- Cool Completely: Remove the pan from the oven and place it on a wire rack. This is the hardest part: you must let the brownies cool completely in the pan for at least 2 hours. Fudgy brownies continue to set as they cool. If you try to cut them while warm, they will fall apart.
- Prepare the Drizzle: While the brownies are cooling, prepare the cream cheese drizzle. In a small bowl, beat the softened cream cheese until perfectly smooth. Add the powdered sugar and a tiny splash of milk or heavy cream. Whisk until you have a smooth, thick, but pourable glaze.
- Drizzle and Slice: Once the brownies are entirely cool, use the parchment paper overhang to lift them out of the pan and onto a cutting board. Transfer the cream cheese drizzle to a piping bag or a ziplock bag with a tiny corner snipped off. Drizzle the glaze in a back-and-forth zig-zag pattern across the entire block. Use a large, sharp chef’s knife to cut the block into 16 even squares, wiping the knife blade clean between cuts for perfectly neat edges.
Pro Tips for Flawless Brownies Every Time
Elevate your baking game with these professional tips to guarantee success:
- Use a Metal Baking Pan: Glass or ceramic pans conduct and retain heat very differently than metal. They take longer to heat up and hold heat longer after being removed from the oven, which often leads to overbaked edges and underbaked centers. A light-colored aluminum baking pan is always the best choice for brownies.
- The Crinkly Top Secret: That beautiful, glossy, crinkly crust on top of a brownie is actually a very thin layer of meringue. To achieve it, make sure your butter is warm when you mix it with the sugar, and whisk the eggs in very thoroughly. This dissolves the sugar into the wet ingredients, which then rises to the surface during baking to create the crust.
- Chill for Clean Cuts: If you want absolute bakery-perfection with razor-sharp edges on your slices, place the cooled block of brownies (still in the parchment paper) into the refrigerator for an hour before slicing. Cold brownies cut much cleaner than room-temperature ones.
Delicious Variations to Try
While this recipe is phenomenal as written, you can easily customize it to suit your cravings:
- White Chocolate Chips: Fold 3/4 cup of high-quality white chocolate chips into the batter right before pouring it into the pan. The creamy sweetness of the white chocolate complements the tang of the red velvet beautifully.
- Cream Cheese Swirl: Instead of a drizzle on top, create a cheesecake swirl. Mix 4 oz of cream cheese, an egg yolk, and 3 tablespoons of sugar. Dollop this mixture over the raw brownie batter in the pan, and use a butter knife to swirl it through before baking.
- Nutty Crunch: Add a half cup of toasted, chopped pecans or walnuts to the batter for a satisfying textural contrast.
Serving and Storage Instructions
These Red Velvet Brownies are incredibly rich, so serving them alongside a glass of cold milk or a hot cup of black coffee is highly recommended. For an over-the-top dessert experience, briefly warm a square in the microwave for 10 seconds and top it with a scoop of premium vanilla bean ice cream.
Room Temperature Storage: Store the cut brownies in an airtight container at room temperature for up to 4 days. Because of the high moisture content, they will remain wonderfully soft and fudgy.
Refrigerator Storage: If you prefer a denser, chewier texture (or if you made the cream cheese swirl variation), store them in the refrigerator for up to a week. They are absolutely delicious straight from the fridge.
Freezing Instructions: These brownies freeze exceptionally well. Wrap individual squares tightly in plastic wrap, then place them in a freezer-safe ziplock bag. They can be frozen for up to 3 months. Thaw at room temperature for a couple of hours before eating.
Frequently Asked Questions (FAQs)
Can I make these without food coloring?
Yes, you can absolutely omit the food coloring. The recipe will still work perfectly and taste exactly the same. However, without the food dye, the brownies will bake into a light reddish-brown or mahogany color due to the natural cocoa powder, rather than the vibrant crimson associated with modern red velvet.
Why did my brownies turn out brown instead of red?
This usually happens for two reasons. First, you may not have used enough food coloring. Liquid food coloring is much weaker than gel paste, so you need a lot more of it. Second, you might have used too much cocoa powder or used Dutch-processed cocoa. Dutch-processed cocoa is darker and has a higher pH, which neutralizing the acidic reaction that helps highlight the red tones. Stick to the precise measurements and use natural cocoa powder.
Can I double the recipe?
Yes! To double the recipe, simply multiply all the ingredients by two and bake the batter in a 9×13-inch metal baking pan. The baking time will be slightly longer, usually around 30 to 35 minutes. Always rely on the toothpick test to determine doneness.
Conclusion
Creating the perfect Red Velvet Brownie is an exercise in culinary balance. By combining the unmistakable flavor profile of classic red velvet cake with the dense, indulgent texture of a fudgy brownie, you create a dessert that is truly greater than the sum of its parts. Armed with the science of brownie baking, the knowledge of proper ingredient ratios, and the step-by-step instructions provided, you are now ready to bake a batch of these vibrant, decadent treats. Whether you are baking for a loved one, a holiday gathering, or simply to satisfy your own sweet tooth, these Fudgy Red Velvet Brownies are guaranteed to become a highly requested favorite.
Fudgy Red Velvet Brownies
Ingredients
Equipment
Method
- Preheat your oven to 350°F (175°C). Line an 8×8-inch metal baking pan with parchment paper, leaving an overhang on the sides for easy removal.
- In a large mixing bowl, vigorously whisk together the warm melted butter and granulated sugar until well combined and slightly grainy.
- Whisk in the eggs one at a time, mixing well after each addition until smooth. Then whisk in the vanilla extract and white vinegar.
- Add the red gel food coloring and whisk thoroughly until the batter reaches a vibrant, deep red color.
- In a separate bowl, sift together the all-purpose flour, natural cocoa powder, and salt. Gently fold this dry mixture into the wet ingredients using a rubber spatula just until no streaks of flour remain. Do not overmix.
- Pour the batter into the prepared baking pan, spreading it evenly to the corners.
- Bake for 25 to 30 minutes. A toothpick inserted into the center should come out with moist, sticky crumbs (not raw batter). Do not overbake.
- Let the brownies cool completely in the pan on a wire rack for at least 2 hours to allow them to set into a fudgy texture.
- While cooling, whisk together the softened cream cheese, powdered sugar, and milk until completely smooth to create the drizzle.
- Use the parchment overhang to lift the cooled brownies out of the pan. Drizzle the cream cheese glaze in a zig-zag pattern over the top, then slice into 16 squares.