Rich & Creamy Peanut Butter Pie
🥜 The Ultimate No-Bake Indulgence: Rich & Creamy Peanut Butter Pie 🍫
There are few flavor combinations more iconic or beloved than chocolate and peanut butter. It’s a pairing that speaks directly to our comfort-food-loving souls. And this Rich & Creamy Peanut Butter Pie is the absolute pinnacle of that pairing. Imagine a dark, crunchy chocolate cookie crust, pressed thick and acting as the perfect vessel for the star of the show: a filling so unbelievably thick, rich, and creamy it defies description. This isn’t a light, airy mousse; it’s a heavy, dense, viscous peanut butter filling that is pure, unadulterated indulgence, all topped off with a generous scattering of chopped peanut butter cups.
Best of all? This entire masterpiece is 100% no-bake. There is no need to turn on your oven, no fussing with water baths, and no worrying about cracked tops. It’s the perfect make-ahead dessert for any occasion, from holiday gatherings to summer barbecues. The magic lies in its texture: the sharp, crunchy crust against the impossibly smooth, thick, and gooey filling.
This recipe is designed for true peanut butter lovers. It’s a decadent treat that looks stunning on a dessert table but is secretly one of the easiest pies you will ever make. Get ready to create a showstopper that will have everyone begging you for the recipe. This is not just a pie; it’s a peanut butter experience.
🌟 The Secret to a Truly Thick, Heavy, Gooey Filling
So many peanut butter pies promise creaminess but deliver a light, airy foam that dissolves on the tongue. This recipe is different. The goal here is a luxuriously dense, heavy, and viscous filling that has the satisfying, rich mouthfeel of a chilled peanut butter fudge.

The Holy Trinity of Texture:
- Cream Cheese: This is the non-negotiable foundation. A full block of softened cream cheese provides structure, a subtle tang that cuts the richness, and the primary source of the filling’s heavy, viscous consistency. It ensures the pie slices beautifully and holds its shape without being gelatinous or icy.
- Creamy Peanut Butter: Use a standard processed creamy peanut butter (like Jif or Skippy) for this recipe. “Natural” peanut butters, which tend to separate, can make the filling oily or grainy. The processed peanut butter is already emulsified, contributing to that perfectly smooth, thick, and gooey final texture.
- Powdered Sugar: We use powdered sugar instead of granulated sugar. Why? It dissolves instantly into the cream cheese and peanut butter, meaning there is zero risk of a grainy or gritty texture. It simply melts into the base, sweetening it and further enhancing the dense, smooth, viscous quality of the filling.
- Whipped Topping (or Cream): To lighten the heavy base just enough to make it scoopable, we fold in whipped topping (like Cool Whip) or stabilized whipped heavy cream. This adds a crucial element of lightness without compromising the rich, gooey character of the pie.
When these components are combined, the result is a filling that is stable, incredibly rich, and has the most satisfying thick, heavy, and gooey consistency imaginable.
🍫 The Perfect Foundation: A No-Fuss Chocolate Crust
The perfect peanut butter filling deserves the perfect crust. A no-bake chocolate cookie crust is the ideal partner, providing a dark, crunchy, and slightly salty contrast to the sweet, creamy filling.
- Cookie Choice: Chocolate sandwich cookies (like Oreos) are the classic choice. You use the entire cookie, cream filling and all! This adds to the structure and sweetness.
- The Binder: A simple mix of finely crushed cookie crumbs and melted butter creates a “concrete” that, once chilled, becomes firm, sliceable, and wonderfully crunchy.
- The Press: The most important step is pressing the crust mixture firmly into the bottom and up the sides of your pie plate. Use the bottom of a measuring cup or glass to get a tight, even layer. This prevents a crumbly, falling-apart crust later. Chilling this crust while you make the filling is essential for it to set up properly.
🛒 — ingredients — 🥜
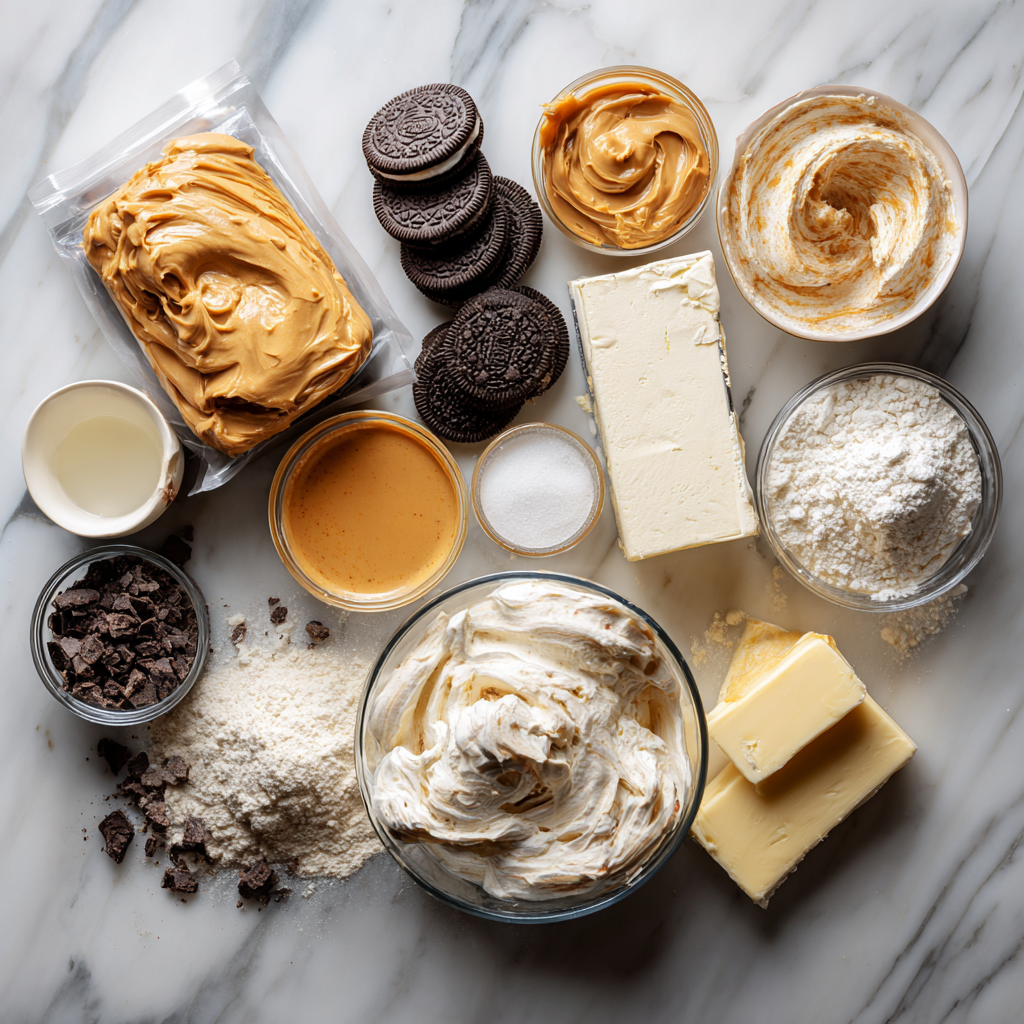
This simple, no-bake recipe relies on a few powerhouse ingredients.
- For the Chocolate Crust:
- 25 Chocolate Sandwich Cookies (e.g., Oreos), whole
- 5 tablespoons Unsalted Butter, melted
- For the Thick Peanut Butter Filling:
- 1 package (8 oz) Cream Cheese, softened
- 1 cup Creamy Peanut Butter (not natural)
- 1 cup Powdered Sugar
- 1 teaspoon Vanilla Extract
- 1 container (8 oz) Whipped Topping (e.g., Cool Whip), thawed (or 1.5 cups homemade whipped cream)
- For the Topping:
- 1 cup Mini Peanut Butter Cups, roughly chopped
👩🍳 — instructions — 🥄
Follow these simple steps to no-bake perfection. The only hard part is waiting for it to chill!
- Make the Crust: Place the whole chocolate sandwich cookies into a food processor. Pulse until they are fine crumbs. In a medium bowl, combine the cookie crumbs with the melted butter and stir until the mixture resembles wet sand.
- Press the Crust: Tip the crumb mixture into a 9-inch pie plate. Use the bottom of a glass or measuring cup to press the crumbs firmly and evenly into the bottom and up the sides of the plate. Place the crust in the freezer to chill while you prepare the filling.
- Start the Filling: In a large bowl, using an electric mixer, beat the softened cream cheese and the creamy peanut butter together until perfectly smooth and no lumps remain.
- Add Sugar and Vanilla: Add the powdered sugar and vanilla extract to the bowl. Beat again, starting on low speed (to avoid a sugar cloud) and increasing to medium, until the mixture is fully combined, light, and fluffy. The mixture will be very thick, heavy, and viscous.
- Fold in Whipped Topping: Add the thawed whipped topping to the peanut butter mixture. Using a rubber spatula, gently fold the whipped topping in until no white streaks remain. Be careful not to overmix or deflate the air. The final filling should be exceptionally thick and gooey.
- Fill the Pie: Spoon the heavy, viscous peanut butter filling into the chilled chocolate crust. Spread it into an even layer using an offset spatula or the back of a spoon.
- Top the Pie: Sprinkle the chopped peanut butter cups evenly over the top of the pie, gently pressing them into the filling slightly.
- CHILL. (Crucial Step!): Cover the pie with plastic wrap (try to “tent” it so it doesn’t touch the filling) and refrigerate for at least 4-6 hours, or preferably overnight. This step is mandatory for the filling to set into its final dense, firm, and gooey state.
- Serve: Slice the chilled pie with a sharp knife (wiping it clean between cuts helps) and serve cold.
🥧 Pro-Tips, Tricks, and Variations
A few extra hints to make your Rich & Creamy Peanut Butter Pie even more spectacular.
- For Clean Slices: The number one trick for perfect slices is twofold: 1. Chill overnight. A 4-hour chill is the minimum, but an overnight chill creates the absolute best dense, sliceable texture. 2. Use a hot knife. Dip a large, sharp knife into a cup of hot water, wipe it dry, then make one cut. Repeat for every single slice. The heat cuts through the heavy, viscous filling and firm crust like butter.
- Homemade Whipped Cream: If you’re not a fan of store-bought whipped topping, you can make your own. Beat 1.5 cups of very cold heavy whipping cream with 1/4 cup of powdered sugar until stiff peaks form. Gently fold this into your peanut butter base.
- The Drizzle: For an extra “wow” factor, melt 1/2 cup of chocolate chips with 1 teaspoon of coconut oil and drizzle this over the top of the pie (after adding the peanut butter cups). Let the drizzle set in the fridge.
- Storage: This pie is a perfect make-ahead dessert. It must be stored in the refrigerator, where it will keep beautifully for up to 5 days. It also freezes exceptionally well! Freeze it whole or in slices, and let it thaw in the fridge for an hour before serving for a firmer, almost ice-cream-like gooey texture.
💖 A Sweet Conclusion: The Ultimate No-Bake Treat
This Rich & Creamy Peanut Butter Pie is a testament to the idea that dessert doesn’t need to be complicated to be decadent. It’s a study in contrasts: the dark, crunchy crust against the pale, impossibly thick and gooey filling. The salty notes from the peanut butter and crust balance the sweetness of the sugar and candy topping. It’s a reliable, no-fuss, no-bake hero that delivers on its promise of a heavy, viscous, and dense peanut butter experience every single time. Prepare for this to become your most requested dessert!
Rich & Creamy Peanut Butter Pie
Ingredients
Equipment
Method
- Make Crust: Pulse chocolate sandwich cookies in a food processor until fine crumbs form. Mix with melted butter. Press firmly into the bottom and up the sides of a 9-inch pie plate. Freeze while making the filling.
- Start Filling: In a large bowl, beat softened cream cheese and creamy peanut butter with an electric mixer until smooth.
- Finish Filling: Beat in powdered sugar and vanilla. The mixture will be very thick, heavy, and viscous. Gently fold in the thawed whipped topping until no streaks remain. The final filling should be thick and gooey.
- Assemble: Spoon the heavy, viscous peanut butter filling into the chilled crust and spread evenly.
- Top: Sprinkle the chopped peanut butter cups over the top, pressing gently.
- CHILL: Cover and refrigerate for at least 4-6 hours, or overnight, until the filling is firm and set into a dense, gooey state.
- Serve: Slice with a sharp, hot knife and serve cold.