Strawberry White Chocolate Sourdough Bread
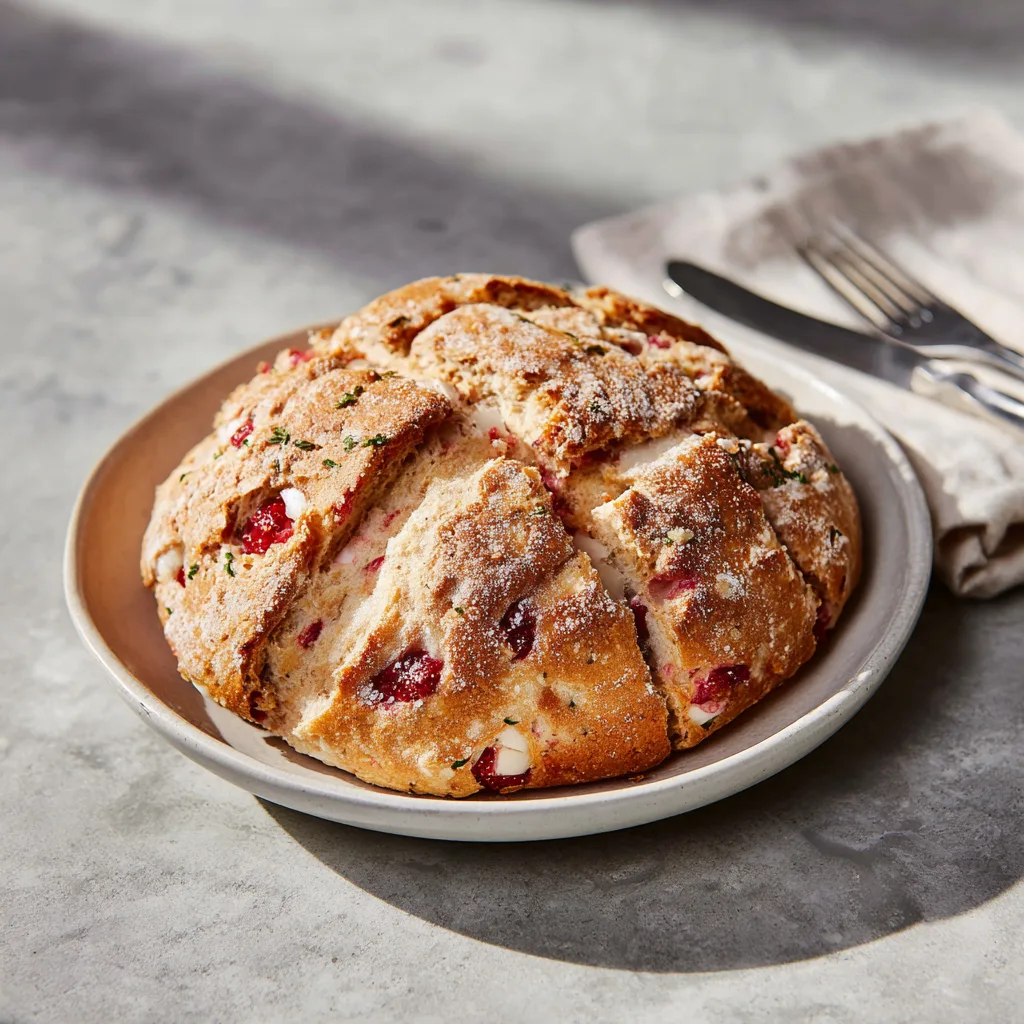
This recipe is not just a loaf of bread; it is an edible work of art. The moment you slice into the crusty, artisan exterior, you are greeted with a beautiful pastel pink crumb, studded with ruby-red strawberry pieces and creamy, melt-in-your-mouth white chocolate chips. The contrast between the natural sourness of the fermented dough, the bright fruity acidity of the strawberries, and the mellow sweetness of the white chocolate creates a flavor profile that dances on the palate. Whether you are toasting a slice for a decadent weekend breakfast, serving it alongside a brunch spread, or simply enjoying it with a smear of salted butter, this bread is guaranteed to be a showstopper.
If you have been intimidated by adding inclusions to your sourdough, fear not. This comprehensive guide will walk you through every single step, from understanding hydration when working with fruit, to the precise folding techniques required to distribute those delicious morsels evenly without degassing your dough. Prepare to elevate your baking repertoire and impress everyone lucky enough to share a loaf with you.
Why You Will Fall in Love with This Recipe
Sourdough purists might scoff at sweet inclusions, but one bite of this bread will convert the harshest of critics. Here is why this recipe deserves a permanent spot in your baking rotation:
- Aesthetic Appeal: The natural pink hue, achieved by using freeze-dried strawberry powder, makes this loaf visually striking. It is perfect for Valentine’s Day, Mother’s Day, spring gatherings, or anytime you want a beautiful bake.
- Perfect Flavor Balance: Sourdough naturally has a tangy, complex flavor. The sweet white chocolate cuts through that tang, while the strawberries add a bright, fruity zing that ties it all together.
- Incredible Texture: Despite the inclusions, this bread maintains the classic sourdough characteristics—a crackly, blistered crust with a chewy, open crumb.
- Versatility: It walks the line between a breakfast pastry and a hearty bread. It is sweet enough to satisfy a craving but robust enough to be toasted and buttered.
The Great Strawberry Debate: Choosing the Right Fruit
When adding fruit to sourdough, moisture is your biggest enemy. Adding ingredients with high water content can completely ruin the hydration level of your carefully calculated dough, resulting in a gummy, dense, or collapsed loaf. Therefore, choosing the right type of strawberry is crucial for this recipe.
1. Freeze-Dried Strawberries (The Secret Ingredient)
To achieve that beautiful, all-natural pink crumb without turning your dough to soup, freeze-dried strawberries are absolute perfection. In this recipe, we use them in two ways. First, we pulverize some into a fine powder to mix directly into the flour, giving the dough its color and a pervasive strawberry flavor. Second, we fold in larger chunks of freeze-dried strawberries. As the dough ferments, these chunks will rehydrate slightly by absorbing ambient moisture from the dough, becoming soft and jammy by the time the bread is baked.
2. Dehydrated/Dried Strawberries
Commercially dried strawberries are chewy and have a concentrated sweetness. They are an excellent option for inclusions because they will not bleed excess water into your dough. If you use dried strawberries, give them a rough chop so they distribute evenly.
3. Fresh Strawberries (Proceed with Caution)
While you can use fresh strawberries, it is highly discouraged for beginners. Fresh strawberries are mostly water. As they bake, they burst and release that water into the crumb, which can create large, gummy pockets around the fruit. If you insist on using fresh strawberries, you must reduce the overall hydration of your dough significantly and gently fold them in at the very last minute. For this recipe, we strongly recommend sticking to freeze-dried or dehydrated fruit.
The Role of White Chocolate
White chocolate is the perfect companion to strawberries. Because white chocolate is made primarily of cocoa butter, sugar, and milk solids, it lacks the bitter notes of dark or milk chocolate. This allows the delicate flavor of the strawberries to shine while providing a creamy, rich contrast to the chewy sourdough crumb.
Pro Tip: Use high-quality white chocolate chips or chop up a premium white chocolate baking bar. Cheaper white chocolate chips often contain stabilizers that prevent them from melting beautifully, and they can sometimes burn on the exterior of the crust. If you notice chips poking out of the top of your shaped loaf, gently push them down into the dough so they don’t scorch during the high-heat bake.
Essential Equipment for Sourdough Baking
To achieve bakery-quality results at home, a few specialized tools will make the process infinitely smoother:
- Digital Kitchen Scale: Precision is key in baking. Measuring by volume (cups) is too inaccurate for sourdough. Weighing your ingredients in grams ensures consistency.
- Dutch Oven: A heavy cast-iron Dutch oven traps the steam escaping from the dough during the first half of the bake. This steam keeps the crust soft, allowing the bread to expand rapidly (oven spring) before the crust hardens.
- Banneton (Proofing Basket): These baskets support the dough during its long, cold fermentation in the fridge, helping it maintain its shape and creating beautiful flour lines on the crust.
- Lame or Sharp Razor Blade: Essential for scoring the dough. Scoring guides the expansion of the bread so it doesn’t burst out the sides.
- Bench Scraper: A crucial tool for shaping sticky dough and building surface tension.
Ingredients List
Gather the following ingredients before you begin. Ensure your sourdough starter is active, bubbly, and passes the float test.
- 100g Active Sourdough Starter (fed at 100% hydration)
- 350g Water (lukewarm, preferably filtered)
- 450g Bread Flour (high protein content, around 12-13%)
- 50g Whole Wheat Flour (adds depth of flavor and aids fermentation)
- 15g Freeze-Dried Strawberry Powder (pulverize freeze-dried strawberries in a blender)
- 10g Fine Sea Salt
- 40g Freeze-Dried or Dehydrated Strawberries (roughly chopped)
- 70g High-Quality White Chocolate Chips (or chopped white chocolate bar)
Detailed Step-by-Step Instructions
Sourdough is a labor of love that requires patience. While the active hands-on time is relatively low, the entire process takes about 24 hours. Here is your comprehensive guide to bringing this loaf to life.
Step 1: The Autolyse and Mixing Phase
- In a large mixing bowl, whisk together the lukewarm water and active sourdough starter until the starter is completely dissolved and the liquid is milky.
- In a separate bowl, whisk the bread flour, whole wheat flour, and freeze-dried strawberry powder together.
- Add the dry flour mixture to the wet starter mixture. Use your hands or a dough whisk to mix until no dry spots of flour remain. The dough will look shaggy and feel quite stiff.
- Cover the bowl with a damp towel or plastic wrap and let it rest for 45 minutes to 1 hour. This resting period is called the autolyse. It allows the flour to fully absorb the water and begins the gluten development process, making the dough much easier to handle later.
Step 2: Adding Salt and Beginning Bulk Fermentation
- After the autolyse, sprinkle the fine sea salt over the top of the dough. Add a tiny splash of water (about 1 teaspoon) to help dissolve the salt.
- Pinch the salt into the dough, then fold the dough over itself several times. Squeeze and knead the dough in the bowl for about 3-5 minutes until the salt is fully incorporated and the dough starts to feel a bit smoother.
- Cover the bowl and let it rest in a warm spot (around 75°F/24°C) for 30 minutes.
Step 3: Stretch and Folds & Adding Inclusions
During the bulk fermentation phase, you will perform a series of “stretch and folds” to build strength in the dough. This is also when we will gently incorporate our strawberries and chocolate.
- Fold 1: Wet your hands slightly to prevent sticking. Grab one side of the dough, stretch it upwards gently until you feel resistance, and fold it over the center. Repeat this on all four sides of the dough. Cover and rest for 30 minutes.
- Fold 2 (Lamination & Inclusions): Lightly mist your countertop with water. Turn the dough out and gently stretch it into a large, thin rectangle (lamination). Sprinkle the chopped strawberries and white chocolate chips evenly over the surface. Fold the dough into thirds (like a letter), then roll it up. Place it back in the bowl, cover, and rest for 30 minutes.
- Fold 3: Perform a gentle “coil fold” by lifting the dough from the middle, letting the ends tuck under, and setting it down. Rotate the bowl 90 degrees and repeat. The inclusions should be getting well-distributed. Cover and rest for 30 minutes.
- Fold 4: Perform one last gentle coil fold. At this point, the dough should feel strong, elastic, and hold its shape well.
Step 4: Completing Bulk Fermentation
- After the final fold, leave the dough untouched in a warm spot to finish its bulk fermentation. Depending on the temperature of your kitchen and the vigor of your starter, this could take anywhere from 2 to 4 additional hours.
- You are looking for the dough to increase in volume by about 50-75%. It should look puffy, have bubbles on the surface, and jiggle slightly when you shake the bowl.
Step 5: Pre-Shaping and Final Shaping
- Turn the dough out onto a lightly floured surface. Use a bench scraper to gently round the dough into a loose ball, creating some tension on the surface. Let it rest on the counter, uncovered, for 20 minutes (the bench rest).
- Dust a banneton generously with rice flour (rice flour prevents sticking better than wheat flour).
- Flip the dough over so the sticky side is up. Gently stretch the dough outwards. Fold the bottom up to the center, fold the left side to the center, fold the right side to the center, and finally fold the top down over the entire package. Gently roll it over so the seam is down.
- Use your hands to drag the dough towards you on the counter, tightening the outer skin into a tight, smooth boule (ball) or batard (oval). If any chocolate chips are poking through the skin, poke them back inside to prevent burning.
- Place the dough seam-side up into your prepared banneton.
Step 6: Cold Retard (The Fridge Phase)
- Place the banneton inside a plastic bag or cover it tightly with a shower cap.
- Transfer the dough to the refrigerator for a cold proof (retard) of 12 to 24 hours. This cold environment slows down the yeast activity but allows the bacteria to produce lactic and acetic acids, which develops that complex, deep sourdough flavor. It also makes the dough much easier to score.
Step 7: Scoring and Baking
- Place your Dutch oven (with the lid) into your oven and preheat to 450°F (230°C) for at least 45 minutes to 1 hour. It needs to be screaming hot.
- Cut a piece of parchment paper large enough to hold your bread.
- Remove the dough from the fridge and gently invert it out of the banneton onto the parchment paper. Brush off any excess rice flour.
- Using your lame or razor blade, score the dough. For a round boule, a single deep slash off-center, an “X”, or a decorative wheat stalk pattern works beautifully. A deep slash is necessary to allow the bread to expand.
- Carefully remove the hot Dutch oven from the oven. Use the edges of the parchment paper to lower the dough into the pot. Place the lid back on and return it to the oven.
- Bake covered for 25 minutes. The steam trapped inside will give you incredible oven spring.
- Carefully remove the lid. The bread should be beautifully puffed and pale. Bake uncovered for another 20-25 minutes. Lower the heat to 425°F (220°C) if the crust is browning too quickly. You want a deep golden-brown crust, but keep an eye on any exposed white chocolate chips so they don’t scorch.
Step 8: Cooling (The Hardest Part!)
- Remove the bread from the Dutch oven and transfer it immediately to a wire cooling rack.
- Crucial Step: Do not cut into the bread while it is hot! The crumb is still gelatinizing and setting. If you cut it too soon, the bread will be gummy and sticky. Let it cool completely for at least 2 to 3 hours before slicing.
Pro Tips for Sourdough Success with Inclusions
Working with inclusions like fruit and chocolate can throw a wrench into standard sourdough behavior. Keep these pro tips in mind to guarantee a stunning loaf every time:
- Manage Your Hydration: Even freeze-dried strawberries will alter the dough’s hydration dynamics. If the dough feels impossibly stiff during mixing, resist the urge to add too much water; the moisture from the environment and the autolyse process will soften it. Conversely, if it feels too wet, rely on coil folds to build strength rather than adding raw flour.
- The Lamination Technique: Adding inclusions during lamination (spreading the dough out thin on a wet counter) is far superior to trying to knead them in. Kneading will crush the strawberries and tear the delicate gluten network. Lamination ensures even distribution without destroying your dough strength.
- Protect the Chocolate: White chocolate burns easily at 450°F. When shaping your final loaf, inspect the smooth surface. If you see chocolate chips protruding, use your finger to push them deep into the dough and pinch the skin closed over them.
- Watch the Fermentation, Not the Clock: Sourdough is highly dependent on ambient temperature. A warm kitchen will cause your dough to ferment much faster than a cold one. Look for signs of fermentation (puffiness, bubbles, a 50% increase in size) rather than strictly adhering to the 30-minute intervals.
Delicious Variations to Try
Once you have mastered the base recipe, the possibilities for customization are endless. Here are a few exciting ways to tweak this loaf:
- Dark Chocolate Raspberry: Swap the freeze-dried strawberry powder for raspberry powder, use dried raspberries, and substitute dark chocolate chips for the white chocolate. The bitterness of dark chocolate pairs wonderfully with tart raspberries.
- Strawberry Almond: Add a half cup of toasted, slivered almonds during the lamination phase. The nutty crunch contrasts beautifully with the soft fruit and creamy chocolate.
- Matcha White Chocolate: Instead of strawberry powder, add 2 tablespoons of high-quality culinary matcha powder to your dry ingredients. Omit the strawberries entirely for a striking green loaf with sweet chocolate chips.
Serving Suggestions: Elevating Every Slice
This bread is phenomenal on its own, eaten fresh on the day it is baked. However, there are numerous ways to elevate it to a gourmet treat:
- The Classic Toast: Lightly toast a slice until the crust is warm and crispy and the white chocolate chips become slightly melty. Spread generously with high-quality salted European butter. The salt enhances both the strawberry and the chocolate.
- Cream Cheese & Jam: Smear a slice with whipped cream cheese and a dollop of fresh strawberry preserves for a dessert-like breakfast.
- French Toast: If you have stale bread left over after a few days, this makes the most decadent French toast imaginable. The custard soak revitalizes the crumb, and the caramelized sugars from the chocolate take it over the top.
Storage and Freezing Instructions
Because sourdough does not contain commercial preservatives, proper storage is essential to maintain freshness.
- Room Temperature: Store the bread cut-side down on a wooden cutting board, or wrap it loosely in a linen bread bag or a beeswax wrap. It will stay fresh at room temperature for up to 3 days. Do not put it in the refrigerator, as the cold air will cause the starches to crystallize and the bread to stale rapidly.
- Freezing: This bread freezes incredibly well. To freeze, wait until the loaf is completely cool. Slice the entire loaf. Place parchment paper between the slices so they don’t stick together, then place the slices in a heavy-duty ziplock freezer bag. Squeeze out as much air as possible. Freeze for up to 3 months. You can pop individual frozen slices straight into the toaster!
Frequently Asked Questions (FAQ)
Can I make this without a Dutch oven?
Yes! While a Dutch oven provides the best environment for steam, you can replicate it. Place a baking stone or a heavy baking sheet in the oven to preheat. Place an empty cast-iron skillet on the bottom rack. When you load your bread onto the stone, carefully pour a cup of boiling water into the skillet below and quickly shut the door to trap the steam.
Why did my white chocolate chips burn?
White chocolate is prone to scorching at high baking temperatures. This usually happens if the chips are exposed on the very outside crust of the dough. Next time, during the final shaping, take care to tuck any exposed chips into the center of the dough so they are insulated by the bread as it bakes.
Why is my crumb gummy, even after baking?
Gummy crumb in a fruit loaf is usually caused by one of two things: cutting the bread while it is still hot, or using fruit with too much moisture. Always wait at least 2 hours before slicing. If you used fresh strawberries, their excess water likely disturbed the bake—stick to freeze-dried or dehydrated next time!
My dough was a sticky, unmanageable mess. What happened?
Sourdough hydration can be tricky. If your dough was soup, your starter might have been too liquid, your kitchen might be very humid, or your flour might not have high enough protein to absorb the water. Next time, hold back 20-30g of water during the initial mix. You can always add more later, but you can’t take it out.
Does the strawberry powder add flavor or just color?
It adds both! Freeze-dried fruit is highly concentrated. Pulverizing it into a powder ensures that the distinct, tart-sweet flavor of strawberries permeates the entire loaf, rather than just being isolated to where the chunks are.
Strawberry White Chocolate Chip Sourdough Bread
Ingredients
Equipment
Method
- Autolyse: In a large bowl, whisk starter and lukewarm water until milky. Add bread flour, whole wheat flour, and strawberry powder. Mix until a shaggy dough forms. Cover and rest for 45-60 minutes.
- Add Salt: Sprinkle sea salt over the dough with a tiny splash of water. Knead and fold the salt into the dough for 3-5 minutes until incorporated. Cover and rest 30 minutes in a warm spot.
- Fold 1: Perform a set of stretch and folds by pulling each side of the dough up and over the center. Cover and rest 30 minutes.
- Fold 2 (Lamination & Inclusions): Gently stretch the dough into a large thin rectangle on a lightly misted counter. Sprinkle the chopped strawberries and white chocolate chips evenly. Fold into thirds, roll up, return to bowl. Cover and rest 30 minutes.
- Folds 3 & 4: Perform two sets of gentle coil folds, resting 30 minutes between each. The dough should feel strong and elastic.
- Bulk Fermentation: Let the dough rest undisturbed until it has increased in volume by 50-75%, appears puffy, and shows surface bubbles (about 2-4 more hours).
- Pre-shape & Shape: Turn dough out, round loosely, and rest 20 minutes. Shape into a tight boule or batard, ensuring no chocolate chips are exposed on the outer skin. Place seam-side up in a rice-floured banneton.
- Cold Retard: Cover the banneton tightly and place in the refrigerator for 12 to 24 hours.
- Bake Prep: Preheat oven to 450°F (230°C) with a Dutch oven inside for 1 hour.
- Score and Bake: Turn the cold dough out onto parchment paper. Score the top with a lame. Transfer to the hot Dutch oven. Bake covered for 25 minutes.
- Finish Bake: Remove the lid and bake for another 20-25 minutes until the crust is deep golden brown.
- Cool: Transfer to a wire rack and cool completely for at least 2-3 hours before slicing to prevent a gummy crumb.