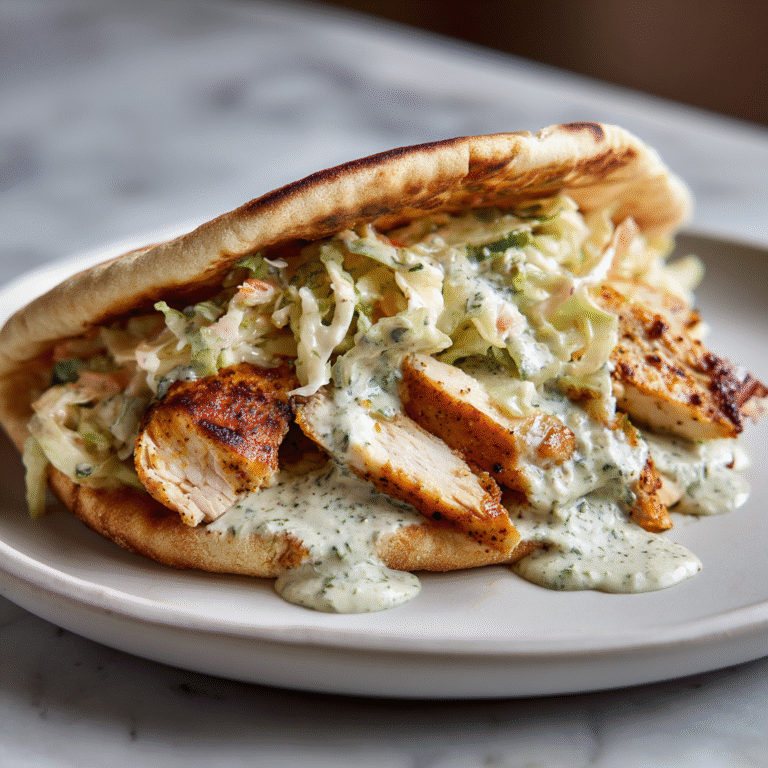
Thai Fried Chicken Sandwich with Spicy Slaw
The Ultimate Crispy Thai Fried Chicken Sandwich Recipe
If there is one sandwich that creates a perfect storm of flavor and texture, it is this Thai Fried Chicken Sandwich. Imagine biting into a cloud-soft brioche bun, crunching through a shatteringly crisp golden batter, and hitting a juicy chicken thigh drenched in a sticky, sweet, and spicy red glaze. Now, add the cooling crunch of a fresh cilantro-lime slaw and a creamy layer of garlic chili mayo. It is not just a sandwich; it is an experience.
This recipe takes the concept of a standard fried chicken sandwich and elevates it with the vibrant, aromatic flavors of Thai cuisine. We are talking about the holy trinity of Thai flavor: sour, sweet, and salty, balanced with just the right amount of heat. Forget the drive-thru lines; this homemade version is fresher, crunchier, and infinitely more satisfying. Whether you are hosting a game day gathering or just craving a restaurant-quality meal at home, this dish delivers on every front.
In this guide, we will walk you through exactly how to achieve that “liquid glass” glaze, the secret to the ultimate crunch, and how to assemble the sandwich so every bite is perfect. Let’s get cooking!
Why You Will Love This Thai Fried Chicken Sandwich
There are a million fried chicken recipes out there, but this one stands apart for a few key reasons:
- Texture Overload: We use a mix of flour and cornstarch (or potato starch) to ensure the coating stays incredibly crispy, even after being tossed in the sauce.
- Flavor Bomb: The chicken isn’t just breaded; it is marinated in soy, ginger, and garlic first, ensuring the meat is flavorful all the way through.
- The Glaze: This isn’t a dry spice rub. It is a wet, sticky, glossy glaze made from sweet chili sauce, fish sauce, and lime that coats every nook and cranny.
- Balance: The richness of the fried chicken is cut perfectly by the acidity of the slaw and the fresh burst of cilantro.
Thai Fried Chicken Sandwich
Ingredients
Equipment
Method
- Whisk soy sauce, oyster sauce, ginger, and garlic in a bowl. Add chicken, coat well, and marinate for 30 minutes.
- Mix mayonnaise with a splash of lime juice and set aside. Combine cabbage and carrots for slaw.
- Heat oil in a heavy pot to 350°F (175°C).
- Whisk flour, cornstarch, and baking powder in a shallow dish.
- Dredge marinated chicken in flour mixture, pressing firmly to coat. Shake off excess.
- Fry chicken 6-8 minutes until golden and cooked through (165°F). Drain on wire rack.
- Simmer sweet chili sauce, fish sauce, Sriracha, and lime juice in a pan until slightly thickened.
- Brush hot chicken generously with glaze. Assemble on toasted buns with mayo, slaw, and cilantro.
Notes
Ingredients Needed
To make the best Thai Fried Chicken Sandwich, you need the right components. Don’t skip the fresh herbs—they make all the difference.
For the Chicken & Marinade:
- Chicken Thighs – 4 boneless, skinless thighs. Thighs are essential here for juiciness and flavor; breast meat tends to dry out too quickly.
- Soy Sauce – 2 tablespoons. Adds saltiness and umami depth.
- Oyster Sauce – 1 tablespoon. For a rich, savory undertone.
- Ginger – 1 tablespoon, freshly grated.
- Garlic – 2 cloves, minced.
- White Pepper – ½ teaspoon. A staple in Thai cooking for a sharp, earthy heat.
For the Crispy Coating:
- All-Purpose Flour – 1 cup. Provides the base structure for the crust.
- Cornstarch – ½ cup. The secret ingredient for that shatteringly light and crispy texture.
- Baking Powder – 1 teaspoon. Helps the batter puff up and become airy.
- Salt – 1 teaspoon.
- Ice Cold Water or Soda Water – As needed to create a wet batter (optional, if doing a wet dredge method).
For the Sticky Thai Glaze:
- Thai Sweet Chili Sauce – ½ cup. The sweet and garlicky base.
- Sriracha or Sambal Oelek – 1-2 tablespoons. Adjust based on your spice tolerance.
- Fish Sauce – 1 tablespoon. Essential for that authentic funk and saltiness.
- Lime Juice – 1 tablespoon. Freshly squeezed to brighten the sauce.
- Soy Sauce – 1 teaspoon.
- Honey or Brown Sugar – 1 tablespoon. To help the sauce thicken and glaze.
For the Slaw & Assembly:
- Brioche Buns – 4 buns. Toasted with butter until golden.
- Red Cabbage – 2 cups, thinly shredded.
- Carrots – 1 cup, julienned or grated.
- Green Onions – 2 stalks, sliced.
- Cilantro – 1 large bunch, leaves picked. Be generous!
- Mayonnaise – ½ cup.
- Lime Juice – 1 teaspoon (for the slaw dressing).
- Sesame Oil – ½ teaspoon.

Step-by-Step Instructions
Step 1: Marinate the Chicken
- In a large bowl, whisk together the soy sauce, oyster sauce, grated ginger, minced garlic, and white pepper.
- Add the chicken thighs and toss to coat thoroughly.
- Cover and refrigerate for at least 30 minutes, or up to 4 hours for deeper flavor penetration.
Step 2: Prepare the Slaw and Sauce
- While the chicken marinates, make the slaw. In a bowl, combine the shredded red cabbage, carrots, green onions, and half of the cilantro.
- Toss with a splash of lime juice, a pinch of salt, and the sesame oil. Set aside to let the flavors meld.
- In a small saucepan over medium heat, combine the sweet chili sauce, Sriracha, fish sauce, soy sauce, honey, and lime juice.
- Simmer for 2–3 minutes until the sauce bubbles and thickens slightly into a glaze. Remove from heat.
- Make the base sauce by mixing the mayonnaise with a teaspoon of the glaze or a little extra chili sauce.
Step 3: Dredge and Fry
- Heat oil in a deep fryer or heavy-bottomed pot (like a Dutch oven) to 350°F (175°C).
- In a shallow dish, whisk together the flour, cornstarch, baking powder, and salt.
- Take a chicken thigh from the marinade (let excess drip off slightly) and press it firmly into the flour mixture. Ensure every crevice is coated. Shake off excess flour.
- Pro Tip: Drizzle a little of the marinade into the flour mixture and stir to create little clumps. These clumps fry up into extra crispy bits on the chicken!
- Carefully lower the chicken into the hot oil. Fry in batches (2 at a time) to avoid dropping the oil temperature.
- Fry for 6–8 minutes, flipping halfway, until the chicken is deep golden brown and the internal temperature reaches 165°F (74°C).
- Transfer to a wire rack to drain. Do not put them on paper towels, or they will steam and get soggy.
Step 4: Glaze and Assemble
- While the chicken is still hot, brush the sticky Thai glaze generously over both sides of the fried chicken. You want it wet and glistening.
- Toast your brioche buns in a pan with a little butter until the cut sides are golden brown.
- Spread the spicy mayonnaise on the bottom bun.
- Place the glazed chicken thigh on top.
- Top with a massive handful of the slaw and the remaining fresh cilantro leaves.
- Close the sandwich with the top bun and serve immediately.
Tips for the Perfect Fry
Temperature Control is Key: Use a kitchen thermometer to monitor your oil. If the oil is too cool, the chicken will be greasy. If it’s too hot, the outside will burn before the inside is cooked.
The Double Dip (Optional): For an insanely thick crust, you can dip the flour-coated chicken into a bowl of whisked egg or buttermilk, and then back into the flour mixture again before frying.
Keep it Warm: If you are making a large batch, keep the fried chicken warm on a rack in a 200°F (95°C) oven while you fry the rest. Glaze them right before serving to maintain the crunch.
Variations and Serving Suggestions
Spiciness Level
If you love heat, add chopped fresh Thai bird’s eye chilies to the glaze or the slaw. If you prefer a milder sandwich, reduce the Sriracha and rely more on the sweet chili sauce.
The “Wet” Factor
For a truly indulgent experience, double the glaze recipe and use it as a dipping sauce on the side. The “liquid glass” look comes from the sugar in the glaze caramelizing and mixing with the oils—don’t be afraid to slather it on.
What to Serve With?
This sandwich is a meal in itself, but it pairs beautifully with:
- Sesame Cucumber Salad: Light and refreshing to cut the grease.
- Sweet Potato Fries: The sweetness complements the spicy glaze.
- Shrimp Chips: A classic Thai snack that adds extra crunch.
- Thai Iced Tea: The creamy sweetness is the perfect beverage to cool down your palate.
Cultural Context: The Fusion of Flavors
This recipe is inspired by the flavors of Gai Tod (Thai Fried Chicken), which is a popular street food in Thailand. Traditionally, Gai Tod is served with sticky rice and a dipping sauce like Nam Jim Jaew. This sandwich adaptation takes those authentic marinade flavors—garlic, coriander root, and white pepper—and translates them into the Western burger format. It is a perfect example of how global flavors can transform comfort food staples into something exciting and new.
The use of cilantro (coriander) is abundant here. In many Western dishes, cilantro is a garnish. In Thai cuisine, it is a vegetable. Don’t be shy with it; the fresh, herbal bite is necessary to balance the sticky, sweet, and savory glaze.
Final Thoughts
Making a restaurant-quality Thai Fried Chicken Sandwich at home is easier than you think. The effort of marinating and double-dredging pays off the moment you hear that first crunch. It is sticky, messy, and absolutely delicious—exactly how a good burger should be.
So, grab your ingredients, heat up that oil, and get ready to impress your family (and yourself) with this masterpiece. Don’t forget to snap a photo before you dig in—that glaze is definitely camera-ready!