The Ultimate Gluten-Free Air Fryer Mini Bagels: Stuffed, Savory, and Simple
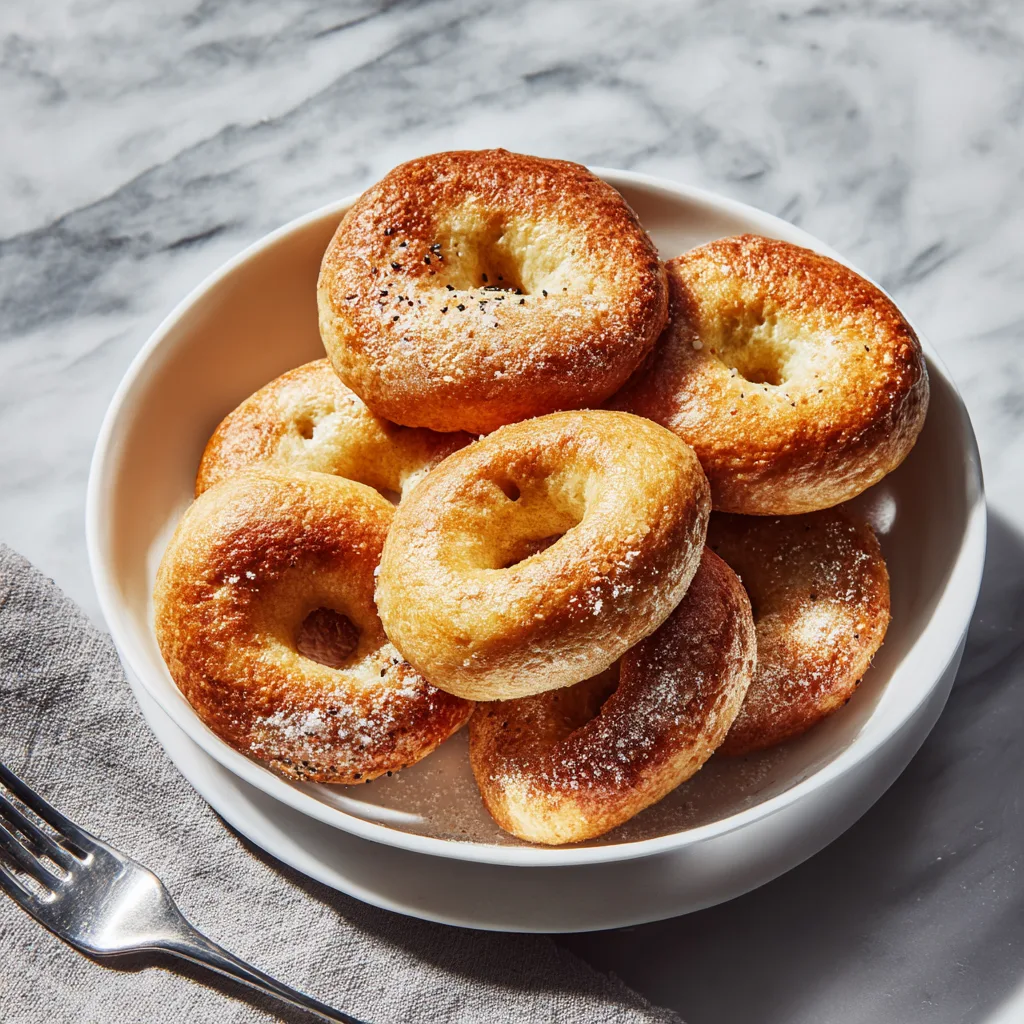
If you have been on the hunt for a gluten-free breakfast or snack that actually tastes like the real deal, your search ends here. Welcome to the world of Gluten-Free Air Fryer Mini Bagels. These aren’t just any bagels; these are bite-sized, perfectly golden spheres of joy, generously coated in everything bagel seasoning, and hiding a creamy, rich cream cheese center. The best part? They are made in the air fryer and require absolutely no yeast, no boiling, and no hours of proofing dough.
Living a gluten-free lifestyle often means sacrificing the chewy, comforting texture of traditional baked goods. Bagels, in particular, are notoriously difficult to replicate without gluten, the protein responsible for that signature stretch and chew. However, culinary innovation has brought us the “magic dough”—a simple combination of Greek yogurt and gluten-free flour—that mimics the texture of traditional yeast dough with a fraction of the effort. By stuffing this dough with cream cheese and air-frying it, we achieve a crisp, seasoned exterior and a soft, pillowy interior that will have even your gluten-eating friends begging for the recipe.
Why You Will Fall in Love with This Recipe
There are countless reasons why these gluten-free stuffed mini bagels will quickly become a staple in your household routine. First and foremost is the sheer convenience. Traditional bagel-making is a labor of love, often taking a full day or overnight resting periods. This recipe takes less than 30 minutes from the moment you pull out your mixing bowl to the moment you bite into a warm, cheesy bagel bite.
Secondly, the texture is phenomenally close to a classic bagel. The air fryer works its magic by circulating intense, hot air around the dough, rapidly creating a crust that holds the classic “everything” seasoning beautifully. The inside steams perfectly, staying moist thanks to the Greek yogurt in the dough and the cream cheese core.
Finally, these are incredibly versatile. While this recipe focuses on the savory, iconic “everything bagel” flavor profile, the base dough is a blank canvas. You can customize the fillings and toppings to suit any craving, making them perfect for meal prep, after-school snacks, brunch gatherings, or a quick on-the-go breakfast.
The Magic Behind the “Two-Ingredient” Dough
If you aren’t familiar with the viral two-ingredient dough, it is a revelation in quick baking. Originally popularized by weight-loss communities for its lower calorie count, it has been embraced by the gluten-free community for its ease and fantastic texture.
The science behind it relies on the acidity and moisture of the Greek yogurt reacting with the leavening agents (baking powder) in the flour. Because we are making a gluten-free version, we use a high-quality gluten-free 1-to-1 baking flour that contains xanthan gum. Xanthan gum is crucial here; it acts as the binding agent that replaces gluten, preventing the dough from crumbling and allowing it to hold its shape wrapped around the cream cheese.
When this dough is exposed to the rapid heat of the air fryer, the baking powder causes an immediate “oven spring” (or, in this case, “air fryer spring”), puffing the dough up while the outside quickly sets. This traps the moisture inside, ensuring the bagel bites don’t dry out, a common pitfall of gluten-free baking.
Detailed Ingredient Deep Dive
To achieve the best possible results, it is important to understand the role of each ingredient in this recipe. Here is exactly what you will need:
- Gluten-Free 1-to-1 Baking Flour: This is the foundation. You must use a blend that contains xanthan gum. Brands like Bob’s Red Mill 1-to-1 Baking Flour or King Arthur Measure for Measure work exceptionally well. Do not use plain almond flour, coconut flour, or a single-grain gluten-free flour, as the chemistry will not work, and the dough will not hold together.
- Greek Yogurt: Plain, unflavored Greek yogurt is essential. It must be thick. If you use regular yogurt, the dough will be entirely too wet and sticky to handle. Full-fat or 2% Greek yogurt provides the best flavor and texture, though non-fat can work in a pinch. The acidity in the yogurt tenderizes the flour and activates the leavening agents.
- Baking Powder: Even though many 1-to-1 flours contain a little baking powder, adding extra is crucial for the lift and puffiness of these mini bagels. Make sure your baking powder is fresh for the best rise.
- Kosher Salt: A pinch of salt enhances the flavor of the dough, preventing it from tasting flat or floury.
- Cream Cheese: Used for the filling. It should be cold and cut into small cubes. Cold cream cheese is easier to wrap the dough around and is less likely to melt and burst out during the cooking process. Full-fat block cream cheese yields the most decadent result.
- Egg: Beaten well to create an egg wash. The egg wash serves two critical purposes: it gives the bagels that beautiful, shiny, golden-brown finish, and it acts as the “glue” that holds the heavy seasoning onto the dough.
- Everything Bagel Seasoning: The star flavor component! A savory, crunchy blend of sesame seeds, poppy seeds, dried minced garlic, dried minced onion, and coarse salt. You can buy this pre-mixed at almost any grocery store or easily make your own.
Step-by-Step Instructions for Perfect Stuffed Mini Bagels
Follow these steps closely to ensure your dough comes together beautifully and your bagels don’t leak their cheesy centers.
- Prepare the Filling: Start by taking your cold cream cheese and cutting it into small, uniform cubes, roughly the size of a marble. Place these cubes on a small plate and keep them in the refrigerator while you prepare the dough to ensure they stay as cold as possible.
- Mix the Dry Ingredients: In a large mixing bowl, whisk together the gluten-free flour, baking powder, and kosher salt. Whisking ensures the baking powder is evenly distributed, which is vital for an even rise.
- Incorporate the Yogurt: Add the plain Greek yogurt to the dry ingredients. Use a sturdy spatula or a wooden spoon to stir the mixture. It will look shaggy and crumbly at first—this is completely normal. Keep mixing until a rough dough begins to form.
- Knead the Dough: Turn the dough out onto a clean, lightly floured surface (using a little extra of your gluten-free flour). With clean hands, knead the dough gently for about 1 to 2 minutes. You want the dough to become smooth and tacky, but not overly sticky. If it is too sticky to handle, dust it with a little more flour, one tablespoon at a time. If it is too dry and crumbly, add a teaspoon of yogurt.
- Divide and Conquer: Roll the kneaded dough into a log shape and use a sharp knife or a bench scraper to divide it into 8 to 10 equal portions.
- Stuff and Seal: Take one portion of dough and flatten it in the palm of your hand to form a small disc. Place a cold cube of cream cheese in the center. Carefully fold the edges of the dough up and around the cream cheese, pinching the seams together tightly to seal. Roll the ball gently between your palms to smooth it out. A tight seal is absolutely crucial to prevent the cream cheese from leaking in the air fryer. Repeat with the remaining dough.
- Egg Wash and Season: Place the stuffed dough balls on a piece of parchment paper. Brush the top and sides of each ball generously with the beaten egg wash. Immediately sprinkle a heavy coat of everything bagel seasoning over the egg wash, pressing lightly so the seeds adhere.
- Air Fry to Perfection: Preheat your air fryer to 350°F (175°C) for a few minutes. Carefully arrange the mini bagels in the air fryer basket in a single layer, ensuring they have a little space between them for the air to circulate. You may need to cook them in two batches depending on the size of your air fryer. Air fry for 9 to 11 minutes, or until the bagels are puffed up, deeply golden brown, and the crust feels firm to the tap.
- Cool and Serve: Remove the bagels from the air fryer and let them cool on a wire rack for at least 5 minutes. The cream cheese inside will be molten hot right out of the basket, so patience is key!
Pro Tips for Gluten-Free Dough Success
Working with gluten-free dough can sometimes be finicky. Here are some expert tips to ensure success every single time:
- Do Not Over-Flour: Gluten-free baked goods can easily become dense and brick-like if too much flour is used. When measuring your flour, use the spoon-and-level method rather than scooping directly from the bag with your measuring cup.
- Keep Your Hands Damp: If you find the dough is sticking to your hands while rolling the balls, lightly dampen your palms with water or a tiny bit of olive oil. This makes handling the tacky yogurt dough much easier.
- Don’t Skip the Pinch: When sealing the dough around the cream cheese, take the extra second to really pinch the dough together. Any weak spots will expand during cooking, leading to a cream cheese blowout.
- Parchment Paper Liner: If your air fryer basket tends to stick, use a perforated parchment paper liner designed for air fryers. Do not use regular parchment paper without food on top of it while preheating, as it can fly up into the heating element and cause a fire hazard.
Delicious Variations and Flavor Tweaks
Once you have mastered the basic recipe, the flavor possibilities are endless. Here are a few creative ways to switch up your mini bagels:
- Jalapeño Cheddar: Mix finely diced jalapeños (pickled or fresh) and shredded sharp cheddar cheese into the dough itself. Stuff with plain cream cheese or a jalapeño cream cheese blend. Top with a pinch of extra cheddar before air frying.
- Sweet Cinnamon Raisin: Omit the salt and everything seasoning. Add a teaspoon of cinnamon and a handful of raisins to the dough. Stuff with a sweet cream cheese mixture (cream cheese blended with a little powdered sugar and vanilla extract). Brush with melted butter instead of egg wash and roll in cinnamon sugar after baking.
- Garlic Herb: Mix a teaspoon of garlic powder and dried Italian herbs into the dough. Stuff with chive and onion cream cheese. Top with a sprinkle of grated Parmesan cheese.
- Dairy-Free/Vegan Option: You can adapt this recipe for dairy-free diets! Substitute the Greek yogurt with a thick, dairy-free plain yogurt (like almond or coconut milk-based Greek-style yogurt). Use a dairy-free cream cheese alternative for the filling, and swap the egg wash for a brush of unsweetened almond milk or melted vegan butter.
Storage, Freezing, and Reheating Instructions
These bagels are undoubtedly best eaten fresh and warm, shortly after they come out of the air fryer. However, they store wonderfully if you want to make a batch for the week.
To Store: Allow the baked mini bagels to cool completely to room temperature. Store them in an airtight container in the refrigerator for up to 4 days. Storing them in the fridge is necessary because of the dairy in the cream cheese filling.
To Freeze: These freeze exceptionally well! Once cooled, place the bagels on a baking sheet in the freezer for about an hour until solid (this prevents them from sticking together). Transfer them to a freezer-safe zip-top bag or container and freeze for up to 2 months.
To Reheat: To bring back that freshly baked texture, avoid the microwave, which will make them rubbery. Instead, pop the refrigerated bagels back into the air fryer at 320°F (160°C) for 3 to 4 minutes until warmed through and crispy on the outside. If reheating from frozen, air fry at 300°F (150°C) for 6 to 8 minutes, checking frequently so the outside doesn’t burn before the center thaws.
Serving Suggestions
How should you serve these delightful little bites? They are perfect on their own as a grab-and-go breakfast alongside your morning coffee or tea. If you are hosting a brunch, serve a platter of these warm bagel bites alongside fresh fruit, a smoked salmon platter (lox, capers, thinly sliced red onions), and perhaps a small bowl of extra whipped cream cheese for dipping.
They also make a fantastic savory side dish. Pair them with a warm bowl of tomato soup or a hearty chili on a cold day. The chewy, savory profile of the everything bagel seasoning complements soups beautifully.
Frequently Asked Questions
Can I bake these in a regular oven instead of an air fryer?
Yes, absolutely! If you don’t have an air fryer, you can bake these in a conventional oven. Preheat your oven to 375°F (190°C). Place the prepared, seasoned bagels on a parchment-lined baking sheet and bake for 15 to 18 minutes, or until golden brown and puffed. The crust might not be quite as crispy as the air fryer version, but they will still be delicious.
Why did my cream cheese leak out?
This usually happens for two reasons: the cream cheese wasn’t cold enough when you stuffed the dough, or the dough wasn’t pinched and sealed tightly enough. Ensure your cream cheese is chilled and take care to pinch every seam securely.
Why is my dough so sticky and unmanageable?
The moisture content of Greek yogurt can vary drastically between brands. If your dough is too wet, your yogurt was likely too thin. Simply add more gluten-free flour, a tablespoon at a time, until the dough becomes workable. Next time, try straining your yogurt or using a thicker brand.
Can I use regular all-purpose flour if I don’t need them to be gluten-free?
Yes! This exact ratio works brilliantly with regular wheat-based all-purpose flour. The process and cooking times remain exactly the same.
Making bagels from scratch doesn’t have to be an intimidating, all-day affair, especially when you are navigating a gluten-free diet. Armed with an air fryer, some Greek yogurt, and your favorite seasonings, you can enjoy fresh, warm, stuffed bagel bites any day of the week. Gather your ingredients and prepare to be amazed by just how easy and delicious gluten-free baking can be!
Gluten-Free Air Fryer Stuffed Mini Bagels
Ingredients
Equipment
Method
- Cut the cold cream cheese into 10 equal, small cubes. Place them on a plate in the refrigerator to keep cold while you make the dough.
- In a large mixing bowl, whisk together the gluten-free flour, baking powder, and kosher salt.
- Add the thick Greek yogurt to the dry ingredients. Stir with a spatula until a shaggy dough begins to form.
- Turn the dough out onto a lightly floured surface. Knead gently for 1-2 minutes until smooth and slightly tacky. If it’s too sticky, add a sprinkle of extra flour.
- Divide the dough into 10 equal portions.
- Flatten one dough portion into a small disc in the palm of your hand. Place a cold cream cheese cube in the center. Fold the edges up and tightly pinch the seams to seal the cream cheese inside. Roll gently into a smooth ball. Repeat with remaining dough.
- Brush the tops and sides of each dough ball generously with the beaten egg wash.
- Sprinkle the everything bagel seasoning heavily over the egg-washed balls, pressing slightly so it sticks.
- Preheat your air fryer to 350°F (175°C).
- Place the mini bagels in the air fryer basket in a single layer, leaving space between each. Cook in batches if necessary.
- Air fry for 9 to 11 minutes, or until deeply golden brown and puffed up.
- Remove from the air fryer and let cool for 5 minutes before serving, as the cream cheese center will be very hot.