Homemade Birria Tacos Recipe
🌮🔥 The Ultimate Birria Tacos Recipe: Your Guide to Crispy, Cheesy, Dippable Perfection 🔥🌮
There are tacos, and then there are Birria Tacos.
If you’ve spent any time on the internet in the last few years, you’ve seen them: the gloriously red-stained, crispy-fried tacos, oozing with melted cheese, being triumphantly dipped into a steaming cup of rich, savory broth. This isn’t just a meal; it’s an event. It’s a flavor explosion. It’s the QuesaBirria Taco, and it has taken the food world by storm for one simple reason: it is, quite possibly, the most perfect taco ever created.
But what if you don’t have a trendy food truck on your corner? What if you want to bring this magical, messy, and utterly divine experience into your own home?
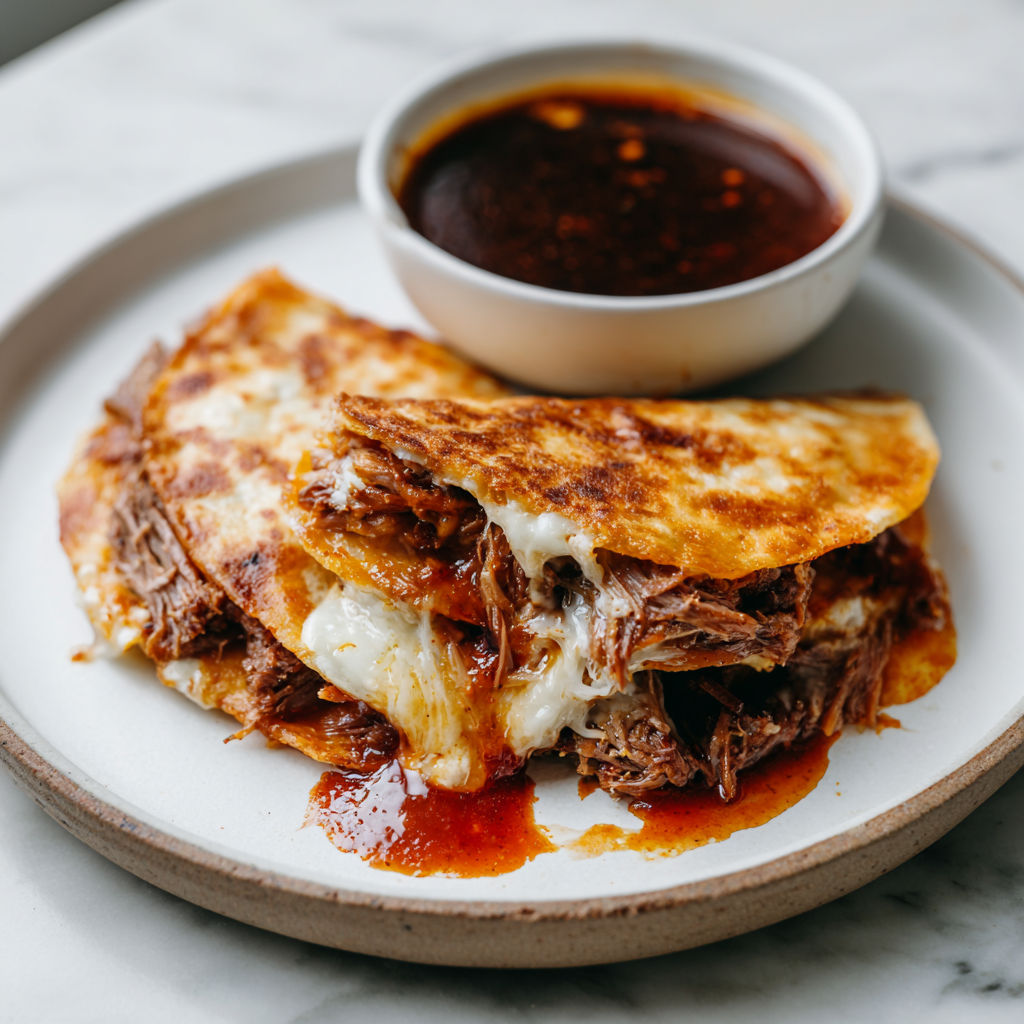
Good news. You can.
Making Birria Tacos from scratch is a labor of love, I won’t lie. It’s an afternoon project. It’s a journey. But the destination—that moment you crunch through the savory, chile-infused shell, hit the tender, flavorful beef and melted cheese, and then dip it all into the complex, soul-warming consommé—is one of the most profound culinary rewards you will ever experience. This guide will walk you through every single step, demystifying the process and guaranteeing you a spot in your family’s Taco Hall of Fame.
Ready? Let’s make Birria.
🤔 What Exactly Is Birria? And How is it Different from QuesaBirria?
This is a great place to start, because “Birria” itself is not actually the taco.
Birria is a traditional, celebratory stew from the state of Jalisco, Mexico. At its heart, it is a rich, complex, and savory dish of slow-cooked meat, traditionally goat, marinated in a profound adobo sauce made from dried chiles, herbs, and spices. It’s simmered for hours until the meat is fall-apart tender, and it’s typically served in a bowl as a hearty stew (Birria Tatemada), topped with onions and cilantro, with tortillas on the side.
So, what are the QuesaBirria Tacos you see everywhere?
This is a brilliant and delicious evolution, often credited to street food vendors in Tijuana. They took the traditional Birria stew and transformed it into a taco experience:
- They switched the meat from goat to more widely-available beef (like chuck roast or short rib).
- They took the tortillas and dipped them in the rich, fatty layer of the consommé (the braising liquid), giving them that signature red color and flavor.
- They added cheese (Oaxaca or mozzarella) to the taco with the shredded beef, creating the “Quesa” (cheese) part of the name.
- They fried the tacos on a flat top until crispy and the cheese was melted.
- And, most importantly, they served these crispy, cheesy tacos with a side of the consommé for dipping.
It’s this final act—the dip—that seals the deal. It re-hydrates the crispy taco, adds another layer of immense flavor, and creates a food experience that is interactive, messy, and absolutely unforgettable. Today, we are making the full QuesaBirria Taco experience.
❤️ Why You Will Be Utterly Obsessed With This Recipe
- The Flavor is Insane: We’re not talking about a sprinkle of taco seasoning. This is a deep, complex, smoky, savory, and slightly spicy flavor built from scratch by toasting and blending multiple types of dried chiles and spices. It’s a taste that stays with you.
- The Textural Contrast: It’s a masterpiece of textures. The crispy, pan-fried, fat-basted tortilla. The tender, juicy, fall-apart shredded beef. The gooey, melted cheese pull. The rich, soupy, warm consommé. It hits every single note.
- The “Wow” Factor: This is not your average Tuesday taco night. This is a show-stopper. Bringing a platter of these to the table with individual dipping bowls of consommé is an impressive, celebratory act. It’s perfect for a weekend, a party, or a special occasion.
- The Leftovers Are Legendary: The Birria stew itself just gets better the next day. The leftover meat and consommé can be used for quesadillas, ramen (Birria-Ramen is a whole other level!), or just eaten as the traditional stew it was born to be.
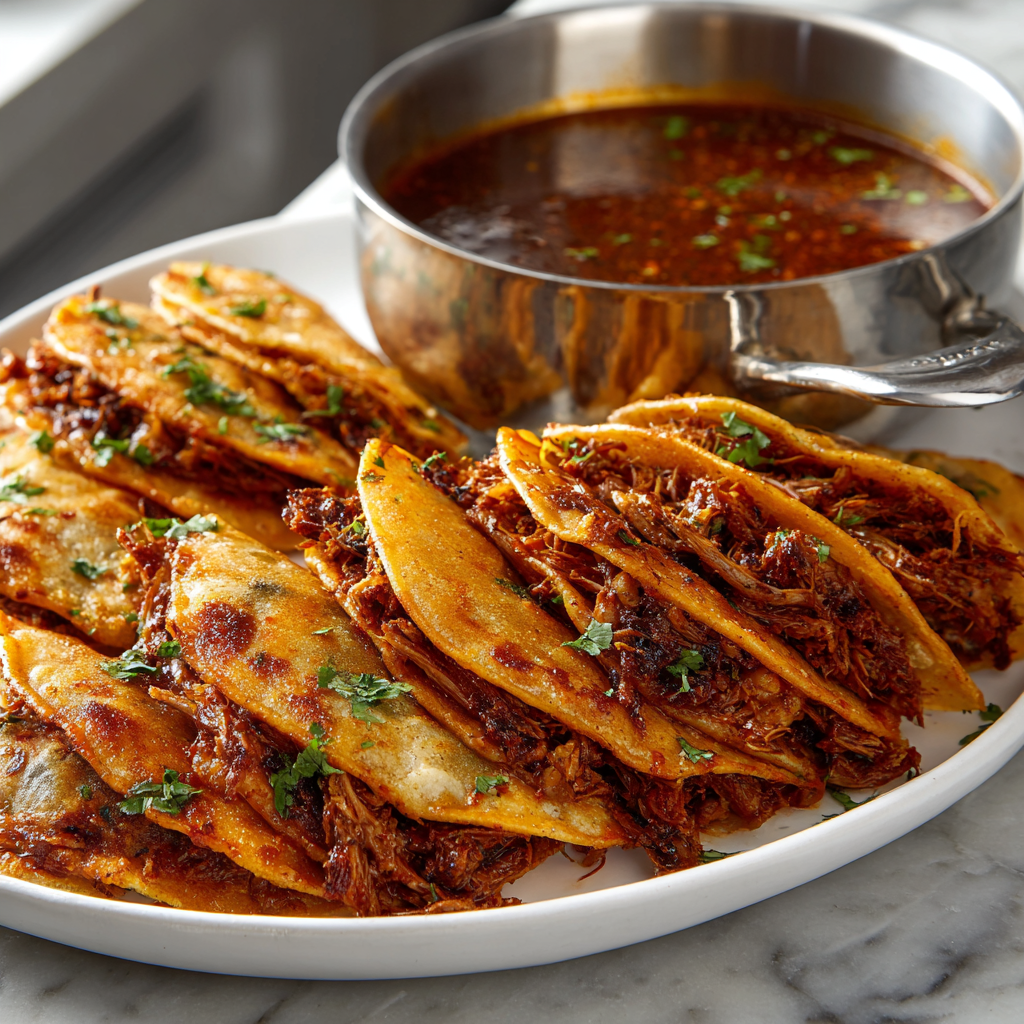
🌶️ The Birria Breakdown: A Symphony of Ingredients
This recipe has three main parts: the Beef, the Adobo (the flavor base), and the Assembly. Don’t be intimidated by the long list; it’s mostly spices and chiles!
- For the Beef:
- 3-4 lbs beef chuck roast (or a mix of chuck and bone-in short ribs for extra flavor)
- Salt and black pepper
- 2 tbsp vegetable oil
- For the Adobo (Chile Sauce):
- 8-10 dried Guajillo chiles, stemmed and seeded
- 3-4 dried Ancho chiles, stemmed and seeded
- 2-4 Chiles de Árbol, stemmed (use more for spicier, fewer for mild)
- 1 white onion, quartered
- 6-8 cloves garlic
- 2-3 large Roma tomatoes, halved
- 1 tsp whole black peppercorns
- 1 tsp whole cumin seeds (or 1.5 tsp ground cumin)
- 1/2 tsp whole cloves (about 4-5)
- 1-2 inch stick of cinnamon (or 1/2 tsp ground)
- 1 tsp dried oregano (preferably Mexican oregano)
- 1/4 cup apple cider vinegar
- 6 cups beef broth (low sodium)
- For the Tacos (Assembly):
- Corn tortillas (you’ll need 2-3 per person)
- 1-2 cups shredded Oaxaca cheese (or low-moisture mozzarella)
- 1/2 cup white onion, finely diced (for topping)
- 1/2 cup fresh cilantro, chopped (for topping)
- Lime wedges (for serving)
🥘 The Journey to Flavortown: Step-by-Step Instructions
This is a weekend project. Put on some music, clear your afternoon, and enjoy the process.
Part 1: The Adobo (Flavor Base)
- Toast the Chiles: Heat a dry skillet (comal or cast iron) over medium heat. Working in batches, place the dried chiles on the skillet and toast for 30-60 seconds per side. They will become fragrant and slightly change color. Be very careful not to burn them, or they will turn bitter.
- Soften the Chiles: As the chiles are toasted, place them in a heat-proof bowl. Pour 2-3 cups of very hot (but not boiling) water or some of the beef broth over them. Use a small plate to press them down so they are submerged. Let them soak for 30 minutes until they are soft and pliable.
- Toast Aromatics: While the chiles soak, add the onion quarters, garlic cloves, and Roma tomatoes to the same hot skillet. Char them on all sides until they have blackened, blistered spots. This adds a smoky depth.
- Toast Spices: In the same dry skillet, add the peppercorns, cumin seeds, cloves, and cinnamon stick. Toast for 30-60 seconds, swirling the pan, until extremely fragrant.
- Blend the Adobo: Transfer the softened chiles (discard the soaking water), the charred vegetables (onion, garlic, tomatoes), the toasted spices, dried oregano, and the apple cider vinegar to a high-powered blender. Add 1-2 cups of the beef broth. Blend on high for 2-3 minutes until the mixture is perfectly smooth. This is your adobo.
- Strain the Sauce: For an extra-silky consommé, strain the adobo sauce through a fine-mesh sieve into a large bowl, pressing the liquid through with a spatula. This step is optional but recommended.
Part 2: The Braise (Making the Birria)
- Prep the Meat: Cut your beef chuck roast into large, 3-4 inch chunks. Pat them completely dry with paper towels and season generously all over with salt and pepper.
- Sear the Meat: Heat the vegetable oil in a large Dutch oven or heavy-bottomed pot over medium-high heat. Working in batches, sear the beef chunks on all sides until a deep, brown crust forms (about 3-4 minutes per side). Do not crowd the pan. Transfer the seared beef to a plate.
- Combine & Simmer: Lower the heat to medium. Pour your strained adobo sauce into the same pot, scraping up any browned bits (fond) from the bottom. Let the sauce “fry” and darken for about 5 minutes, stirring constantly.
- Braise: Return the seared beef (and any juices) to the pot. Add the remaining 4-5 cups of beef broth. The liquid should cover the meat. Bring to a simmer, then reduce the heat to low, cover the pot, and let it braise for 3 to 4 hours. Your house is about to smell incredible. The Birria is done when the beef is fork-tender and falls apart easily.
- Shred the Meat: Carefully remove the tender beef chunks from the pot and transfer to a large bowl. Using two forks, shred the meat.
- Prep the Consommé: The magical liquid left in the pot is your consommé! Skim off any excessive fat from the top (but save it!). Taste the consommé and season with salt if needed. This is your dipping sauce.
Part 3: The Assembly (Making the QuesaBirria Tacos)
- The “Red Fat”: Take that fat you skimmed from the consommé (or just dip your ladle into the fatty top layer of the pot). This is liquid gold.
- Dip the Tortilla: Pour some of the consommé (especially the red fat) into a shallow dish. Dip a corn tortilla completely into the consommé, coating it on both sides.
- Fry the Taco: Place the wet tortilla on a hot, pre-heated skillet or griddle (cast iron is best) over medium heat. Let it fry for a minute.
- Fill the Taco: On one half of the tortilla, add a sprinkle of Oaxaca cheese, a generous pile of your shredded birria beef, and another sprinkle of cheese.
- Fold & Crisp: Fold the other half of the tortilla over the filling. Press down gently with a spatula. Fry for 2-3 minutes per side, until the tortilla is crispy and browned, and the cheese is completely melted and oozing.
- Serve Immediately: Transfer the crispy taco to a plate. Serve with a small bowl of the hot consommé (the dipping broth) topped with a sprinkle of diced white onion and fresh cilantro. Don’t forget the lime wedges!
🌮 Pro-Tips from the Taquero (Tips for Success)
- Chile Handling: Wear gloves when handling the dried chiles, especially when deseeding. The oils can burn your skin (and especially your eyes).
- Don’t Burn the Spices/Chiles: This is the #1 rule. Toasting equals flavor. Burning equals bitterness. Work quickly and keep your nose active.
- Sear Your Meat! Don’t skip searing. That brown crust (the Maillard reaction) is not just color, it’s the foundation of a deep, savory, beefy flavor.
- The Cheese: Use a good melting cheese. Oaxaca is traditional and melts beautifully. Low-moisture mozzarella is a perfect substitute. Pre-shredded cheese often has anti-caking agents, so a block is better.
- Make it Ahead: The Birria stew is even better the next day. You can make the entire stew (Parts 1 and 2) a day in advance. Let it cool, refrigerate, and the fat will solidify on top, making it incredibly easy to scrape off and use for frying the tacos. Then, just reheat the stew/consommé and shred the meat when you’re ready to serve.
🎉 Your New Taco Night Legend 🎉
You did it. You’ve created a masterpiece.
This is more than a taco. It’s an interactive, multi-sensory feast. It’s a dish that demands you sit down, get your hands messy, and truly savor every single bite. The time and love you put into that pot transforms into an experience that’s shared and celebrated.
So, gather your friends, put out the bowls of consommé, and prepare for the silence that falls over a room when everyone takes their first, life-changing dip. You’re not just a cook; you’re a Birria legend.
Homemade Birria (QuesaBirria) Tacos
Ingredients
Equipment
Method
- Toast chiles in a dry skillet for 30-60 seconds per side. Do not burn.
- Submerge toasted chiles in a bowl of hot water or broth for 30 minutes until soft.
- In the same skillet, char the onion, garlic, and tomatoes until blistered.
- Toast the peppercorns, cumin seeds, cloves, and cinnamon in the dry skillet for 30-60 seconds until fragrant.
- Blend the softened chiles, charred vegetables, toasted spices, oregano, vinegar, and 2 cups of beef broth until perfectly smooth.
- For a smoother sauce, strain the adobo through a fine-mesh sieve.
- Cut beef into large chunks, pat dry, and season with salt and pepper.
- Sear the beef in oil in a large Dutch oven over medium-high heat until deep brown on all sides. Remove beef.
- Pour the adobo sauce into the same pot, scraping up browned bits. Let it fry for 5 minutes.
- Return beef to the pot. Add remaining beef broth. Bring to a simmer, cover, and cook on low for 3-4 hours, until beef is fall-apart tender.
- Remove beef and shred it with two forks. The liquid left in the pot is the consommé.
- To assemble tacos: Skim the red fat from the top of the consommé.
- Dip a corn tortilla completely in the consommé (especially the fat).
- Place the wet tortilla on a hot skillet. Top one half with cheese, shredded beef, and more cheese.
- Fold the taco and fry for 2-3 minutes per side until crispy and cheese is melted.
- Serve tacos immediately with a side bowl of hot consommé, topped with diced onion and cilantro, and lime wedges.