Easy Baked Maple Donut Bars
🍁 The Easiest Maple Donut Bars (Better Than the Bakery!)
There is a very specific, almost magical comfort found in the flavor of maple. It’s the smell of a crisp autumn morning, the sweetness of a slow weekend breakfast, and the heart of the most beloved donut at the bakery: the maple bar. But what if you could capture that exact feeling—that dense, cakey, sweet-and-salty perfection—without the pot of hot oil, the finicky yeast, or even leaving your house?
Welcome. You’ve just found the recipe for the Easiest Maple Donut Bars. This is the ultimate breakfast-dessert hybrid, a true game-changer for brunch. We’re taking all the best parts of a classic, old-fashioned cake donut (the moist, tender crumb, the hint of nutmeg) and combining it with the simplicity of a bar recipe. No frying, no cutting, no mess.
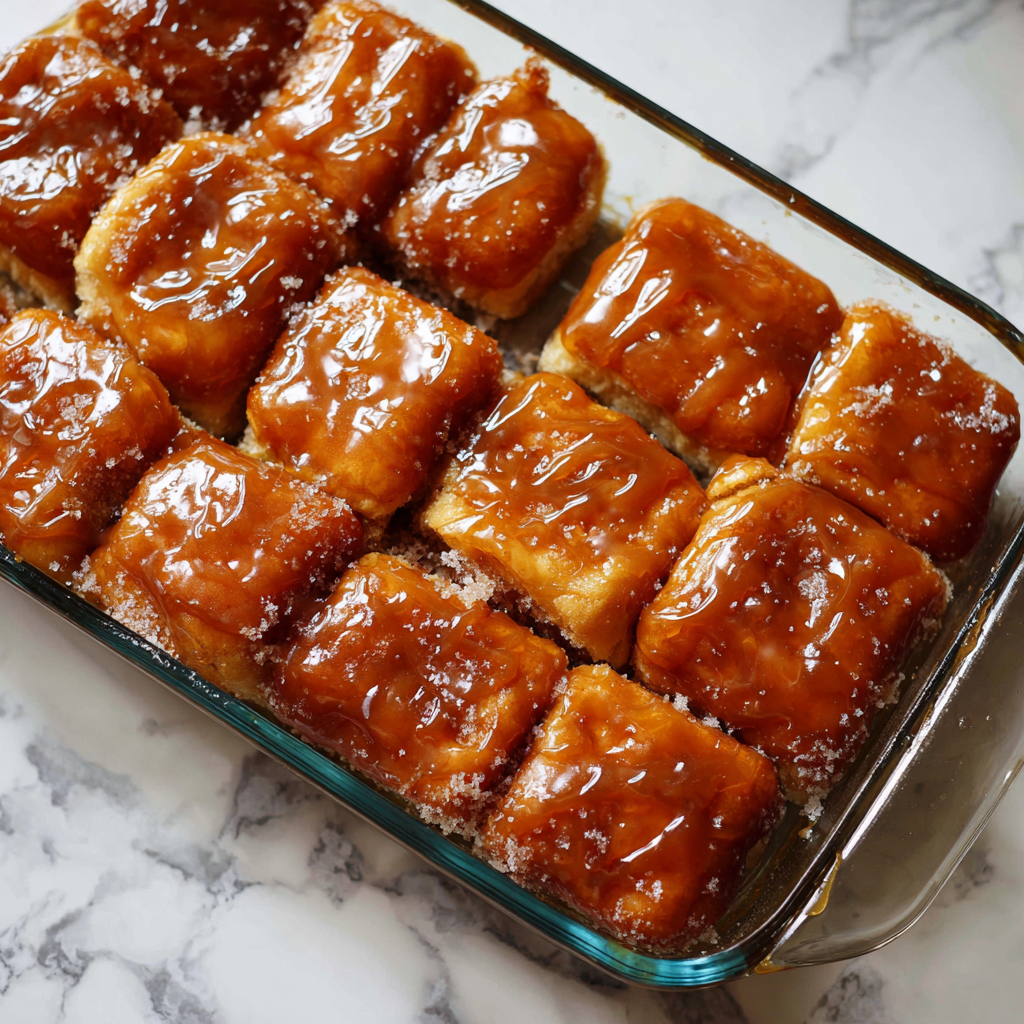
This recipe delivers a whole pan of pure joy. The base is a soft, buttery, “baked donut” that is so tender it practically melts in your mouth. But the real star, the component that makes you close your eyes, is the glaze. This isn’t a thin, watery drizzle. This is a thick, rich, gooey blanket of pure maple flavor that sets into an idyllic, just-firm-enough shell. It’s the perfect, simple, show-stopping recipe for your next brunch, holiday breakfast, or a random Tuesday when you deserve a fantastic treat.
⭐ Why You Will Ditch the Donut Shop
In a world of complicated baking projects, these Maple Donut Bars are a breath of fresh, sweet air. Here is exactly why this recipe will become a permanent fixture in your baking rotation.
- No Frying, No Fuss: This is the biggest selling point. We get all the flavor of a donut with none of the hassle. No splattering oil, no thermometers, no worrying about yeast, and no leftover vat of grease to deal with. It’s a simple melt-mix-bake-glaze process.
- The Texture is Everything: This is not a “cake” that’s pretending to be a donut. The texture is engineered to be a true “cake donut.” It’s dense but unbelievably moist, with a tender, tight crumb. The crucial, secret ingredient—a hint of nutmeg—is what tricks your brain into screaming “DONUT!”
- The Glaze is the Boss: This is a real maple glaze. It’s thick, it’s opaque, and it’s made with actual, pure maple syrup. It’s a gooey, viscous river of perfection that we pour on while the bars are still warm, allowing it to sink into the top just slightly while still creating that signature sweet crust on top.
- Pantry Staples, Big Reward: You likely have everything you need to make these right now. Flour, sugar, butter, an egg… the only “specialty” item is real maple syrup, which is a worthy investment.
- Feeds a Crowd (or Just You): Because it’s made in a 9×13-inch pan, this recipe is a one-and-done solution for feeding a family, a brunch party, or your office. Or, you can slice them up, store them, and have a delicious breakfast-treat waiting for you all week.
🛒 The Building Blocks of Donut Bar Perfection
The magic of this recipe is its simplicity. Here are the simple components you’ll need.
For the Maple Donut Bars:
- 2 1/2 cups all-purpose flour
- 1 cup granulated sugar
- 2 teaspoons baking powder
- 1 teaspoon ground nutmeg (This is the ‘donut’ flavor!)
- 1/2 teaspoon salt
- 1/2 cup (1 stick) unsalted butter, melted
- 2 large eggs
- 1 cup whole milk
- 1 teaspoon vanilla extract
For the Thick Maple Glaze:
- 2 1/2 cups powdered sugar, sifted
- 1/2 cup pure maple syrup (the real stuff, not pancake syrup)
- 3-4 tablespoons milk or cream
- 1/2 teaspoon vanilla extract
- A pinch of salt (to balance the sweetness)

🧑🍳 Step-by-Step to Maple-Glazed Bliss
Follow these simple instructions, and you’ll be on your way to the best breakfast bake of your life.
- Get Ready: Preheat your oven to 350°F (175°C). Generously grease a 9×13-inch baking pan with butter or baking spray. This is a moist cake, so you want to be sure it won’t stick!
- Mix the Dry Goods: In a large bowl, whisk together the all-purpose flour, granulated sugar, baking powder, ground nutmeg, and salt. Make sure the nutmeg is well distributed—it’s the key to the flavor.
- Mix the Wet Goods: In a separate, medium-sized bowl, whisk together the melted butter, the 2 large eggs, the whole milk, and the vanilla extract until everything is well combined.
- Combine Wet and Dry: Pour the wet ingredient mixture into the large bowl of dry ingredients. Using a spatula, fold the two together just until no dry streaks of flour remain. The most important rule of a tender bar is DO NOT OVERMIX! A few lumps are perfectly fine and, in fact, encouraged.
- Spread the Batter: The batter will be thick and substantial. Scrape it into your prepared 9×13-inch pan and use your spatula (or an offset spatula if you’re fancy) to spread it into an even layer, making sure it reaches all the corners.
- Bake to Perfection: Bake in the preheated oven for 20-25 minutes. You’ll know it’s done when the edges are pulling away from the pan, the top is a light golden brown, and a toothpick inserted into the center comes out clean.
- Cool (Slightly): Let the pan of bars cool on a wire rack for about 15-20 minutes. You want them to be warm, not piping hot, when you add the glaze.
- Make the Glaze: While the bars are cooling, make the magic happen. In a medium bowl, whisk together the sifted powdered sugar, the pure maple syrup, 3 tablespoons of milk, the vanilla, and the pinch of salt. Whisk vigorously until it’s perfectly smooth. The glaze should be very thick and heavy, but pourable. If it’s too thick, add the remaining 1 tablespoon of milk.
- Pour the Glaze: This is the best part. Pour the thick, gooey maple glaze all over the top of the warm donut bars. Use your spatula to quickly spread it to the edges, letting it drape over the top in a thick, beautiful layer.
- Let It Set: This is the hardest part. You must wait! Let the bars sit for at least 20-30 minutes. As they cool, the glaze will set into that perfect, soft, sugary crust.
- Slice and Serve: Once the glaze is no longer-weth, slice into squares and serve. Watch them disappear.
💡 A Baker’s Secrets for Flawless Donut Bars
Want to make sure they’re perfect every time? Keep these non-negotiable tips in mind.
- The Nutmeg is NOT Optional: I’ve said it three times, and I’ll say it again. The ground nutmeg is what provides 90% of the “donut shop” flavor. Without it, you just have a maple cake. With it, you have a donut bar.
- Use REAL Maple Syrup: I cannot stress this enough. You are not looking for “pancake syrup” (which is mostly corn syrup and artificial flavor). You need 100% Pure Maple Syrup. This is where all the flavor in the glaze comes from. It’s worth the splurge.
- Sift Your Powdered Sugar: To get that perfectly smooth, glossy, liquid-blanket glaze, you must sift your powdered sugar. It takes 30 seconds and prevents any lumps, ensuring a professional, silky-smooth finish.
- The “Don’t Overmix” Rule: Lumpy batter = tender bars. When you mix flour with liquid, you develop gluten. The more you mix, the more gluten you develop, and the tougher your final product will be. For a soft, melt-in-your-mouth crumb, mix only until the flour disappears.
- Glaze While Warm: This is the key. If the bars are too hot, the glaze will melt and soak in completely. If they are too cold, the glaze will just sit on top. By glazing while warm, you get the best of both worlds: the glaze “sets” on top, but the warmth helps it spread beautifully and creates a perfect bond with the bar.
📦 Storing Your Delicious Creation
If, by some miracle, you have leftovers, here’s how to store them:
- At Room Temp: These bars are best enjoyed within the first 1-2 days. Store them in a single layer in an airtight container at room temperature. They will actually become more dense and moist (in a good way!) by day two.
- Refrigerating: I don’t recommend refrigerating them, as it can dry out the cake base.
- Freezing: Yes! You can freeze these. Slice them into bars (but don’t glaze them). Wrap the bars individually in plastic wrap, place them in a freezer bag, and freeze for up to 3 months. To serve, let them thaw at room temperature, then whip up a fresh batch of glaze to pour on top.
🎉 Your New Favorite Brunch Has Arrived
These Maple Donut Bars are, quite simply, a home run. They are the perfect embodiment of comfort—sweet, warm, and satisfying. They deliver all the nostalgia of a donut shop favorite, but with the ease and simplicity of a tray-bake. They are a “secret weapon” recipe, the kind you pull out for houseguests, holidays, or just a lazy Sunday morning when you want to make the day feel special.
Bake a pan of these. Your home will fill with the intoxicating aroma of butter, nutmeg, and warm maple. It’s a culinary hug in a 9×13-inch pan.
Maple Donut Bars
Ingredients
Equipment
Method
- Preheat oven to 350°F (175°C). Grease a 9×13-inch baking pan.
- In a large bowl, whisk together the flour, sugar, baking powder, nutmeg, and salt.
- In a separate medium bowl, whisk the melted butter, eggs, milk, and vanilla extract.
- Pour the wet ingredients into the dry ingredients and fold with a spatula until just combined. Do not overmix.
- Spread the thick batter evenly into the prepared pan.
- Bake for 20-25 minutes, or until a toothpick inserted in the center comes out clean. Let cool on a wire rack for 15-20 minutes.
- While the bars are cooling, make the glaze. In a medium bowl, whisk the sifted powdered sugar, maple syrup, 3 tbsp milk, vanilla, and salt until smooth. Add the last tbsp of milk only if needed to reach a thick, pourable consistency.
- Pour the thick glaze over the warm donut bars and spread evenly.
- Let the glaze set for at least 20 minutes before slicing and serving.