Homemade Non-Greasy Whipped Body Butter Recipe
Homemade Non-Greasy Whipped Body Butter: Clouds in a Jar
If you have ever shied away from making your own body butter because you hate that heavy, greasy residue that leaves fingerprints on everything you touch, this recipe is going to change your mind completely. This Homemade Non-Greasy Whipped Body Butter is light, airy, and absorbs into the skin like magic. It looks and feels exactly like expensive store-bought whipped cream frosting, but it is packed with nourishing natural ingredients.
In this guide, we are tackling the biggest issue with DIY body butters: the grease factor. By using a specific ratio of hard butters to liquid oils and introducing a secret “dry touch” ingredient, we create a formula that provides deep hydration without the slick finish. We will also cover how to achieve that stunning piping-perfect texture that holds its shape in the jar. Whether you are making this for yourself or as beautiful handmade gifts, this pink, fluffy luxury is sure to impress.
The Secret to “Non-Greasy”
How do we get deep moisture without the oil slick? There are two main secrets:
- The “Dry” Ingredient: The game-changer here is Arrowroot Powder (or Tapioca Starch). This natural powder cuts the oily texture of the butters and helps the product absorb quickly into the skin, leaving a silky, matte finish rather than a shiny one.
- Fast-Absorbing Oils: Instead of heavy oils like castor or olive oil, we rely on lighter carrier oils like Grapeseed oil, Apricot Kernel oil, or Fractionated Coconut oil, which penetrate the skin barrier faster.
Homemade Non-Greasy Whipped Body Butter
Ingredients
Equipment
Method
- In a double boiler, melt Shea butter, Mango butter, and Coconut oil until completely liquid.
- Remove from heat and stir in the Jojoba oil and Vitamin E oil.
- Place the bowl in the freezer for 15-20 minutes until the mixture cools to a semi-solid, opaque mash (do not let it freeze solid).
- Using an electric mixer, whip the mixture on medium-high speed.
- As it becomes fluffy, add the Arrowroot powder, essential oils, and mica powder.
- Continue whipping for 5-10 minutes until stiff peaks form and volume doubles.
- Transfer to a piping bag and pipe into clean jars. Store in a cool place.
Notes
Ingredients You Will Need
To create those beautiful pink swirls, you need quality ingredients. Here is the breakdown:
The Base
- Shea Butter: The moisturizing powerhouse. Look for refined shea butter if you want a white base for coloring, or unrefined for a more natural nutty scent.
- Mango Butter: This is lighter and less greasy than shea butter, helping to balance the texture.
- Coconut Oil: Solid at room temperature, it helps the butter set but melts on contact with skin.
The Liquids & Extras
- Carrier Oil: Jojoba oil, Sweet Almond oil, or Grapeseed oil are excellent lightweight choices.
- Arrowroot Powder: The magic ingredient for that non-greasy feel.
- Vitamin E Oil: An antioxidant that is great for the skin and helps extend the shelf life of the oils.
- Mica Powder (Optional): A pinch of pink mica gives it that lovely pastel rose color.
- Fragrance/Essential Oils: Rose, vanilla, or lavender work beautifully with the pink aesthetic.
Step-by-Step Instructions
Phase 1: Melt and Mix
1. Double Boiler: Combine the Shea butter, Mango butter, and Coconut oil in a glass bowl over a pot of simmering water. Heat gently until completely melted. Remove from heat.
2. Add Oils: Stir in your liquid carrier oil (Almond/Jojoba) and Vitamin E oil.
Phase 2: The Cool Down (Crucial!)
3. Chill: Place the bowl in the freezer for 15-20 minutes, or the fridge for 30-45 minutes. You are not trying to solidify it completely! You want it to reach a semi-solid, opaque stage where it looks like soft slush. If you press your finger into it, it should leave an indent but not be liquid.
Phase 3: The Whip
4. Initial Whip: Using a hand mixer or stand mixer, start whipping the semi-solid mixture on low speed, gradually increasing to high. Whip for about 2-3 minutes until it starts to turn white and fluffy.
5. Add The Extras: Add the arrowroot powder, essential oils, and mica powder (if using). This is where the magic happens.
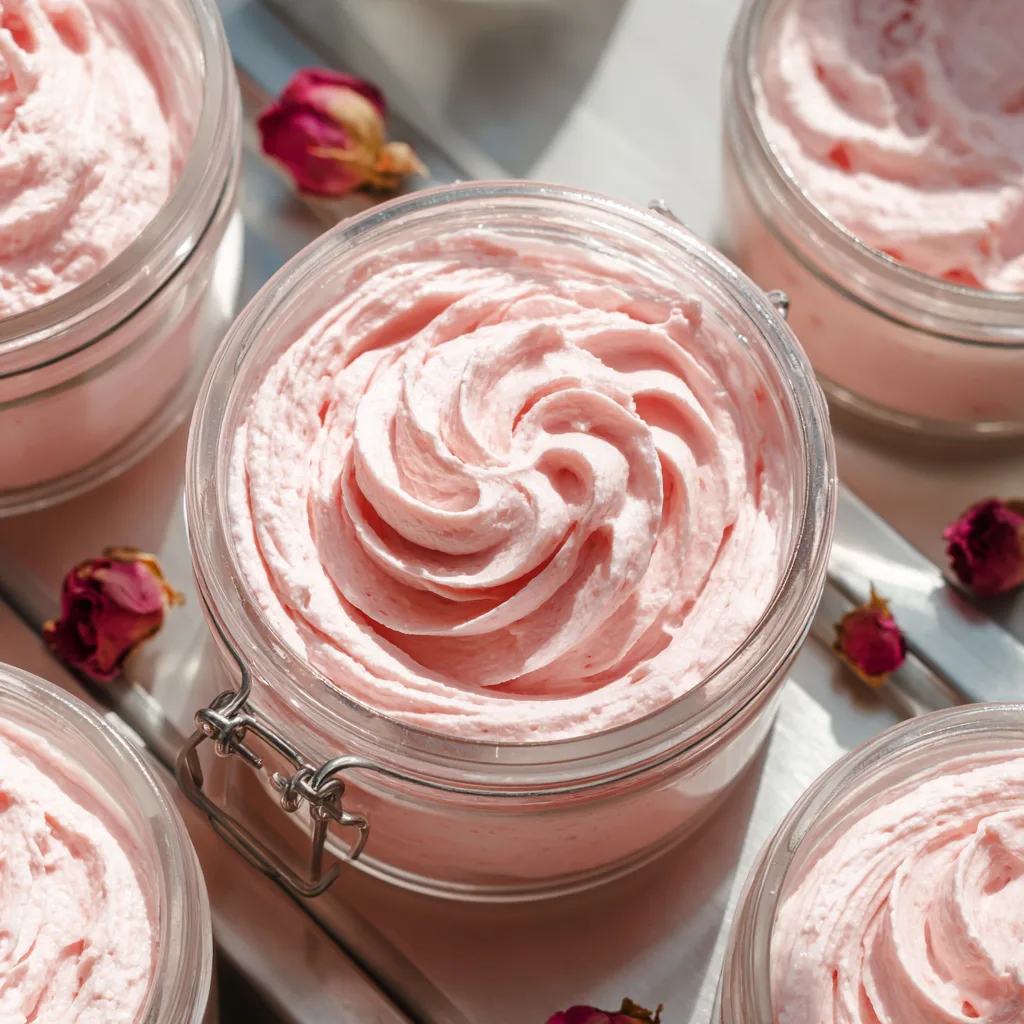
6. Whip to Peaks: Continue whipping on high speed for another 5-10 minutes. The volume should double, and the texture should transform into stiff, billowy clouds that look like frosting.
Phase 4: Pipe and Store
7. Piping: For that professional look, spoon the whipped butter into a piping bag with a large star tip. Pipe swirls into your jars.
8. Storage: Store in a cool, dry place. If your home gets very hot (above 75°F/24°C), the air bubbles might collapse slightly, but the butter will remain effective.
Troubleshooting Tips
- It’s too hard: You likely added too much cocoa butter or shea butter relative to the liquid oils, or your room is very cold. You can remelt and add a tablespoon more of liquid oil.
- It’s not whipping: The mixture is likely too warm. Put it back in the fridge for 10 minutes and try again. Temperature is everything!
- It’s grainy: This happens if the shea butter melts and cools too slowly or unevenly. To fix, melt it completely again and cool it rapidly in the freezer to prevent crystals from forming.
Conclusion
Making your own Non-Greasy Whipped Body Butter is a satisfying project that results in a high-end skincare product for a fraction of the cost. The texture is luscious and cloud-like, the scent is customizable, and best of all, you can type on your phone immediately after applying it without leaving smudges. Jar it up, tie a ribbon around it, and you have the perfect handmade gift—or keep it all for yourself for a daily spa experience.