Must-Try Philly Cheesesteak Bowls: The Ultimate Low-Carb Comfort Food
Must-Try Philly Cheesesteak Bowls: The Ultimate Low-Carb Comfort Food
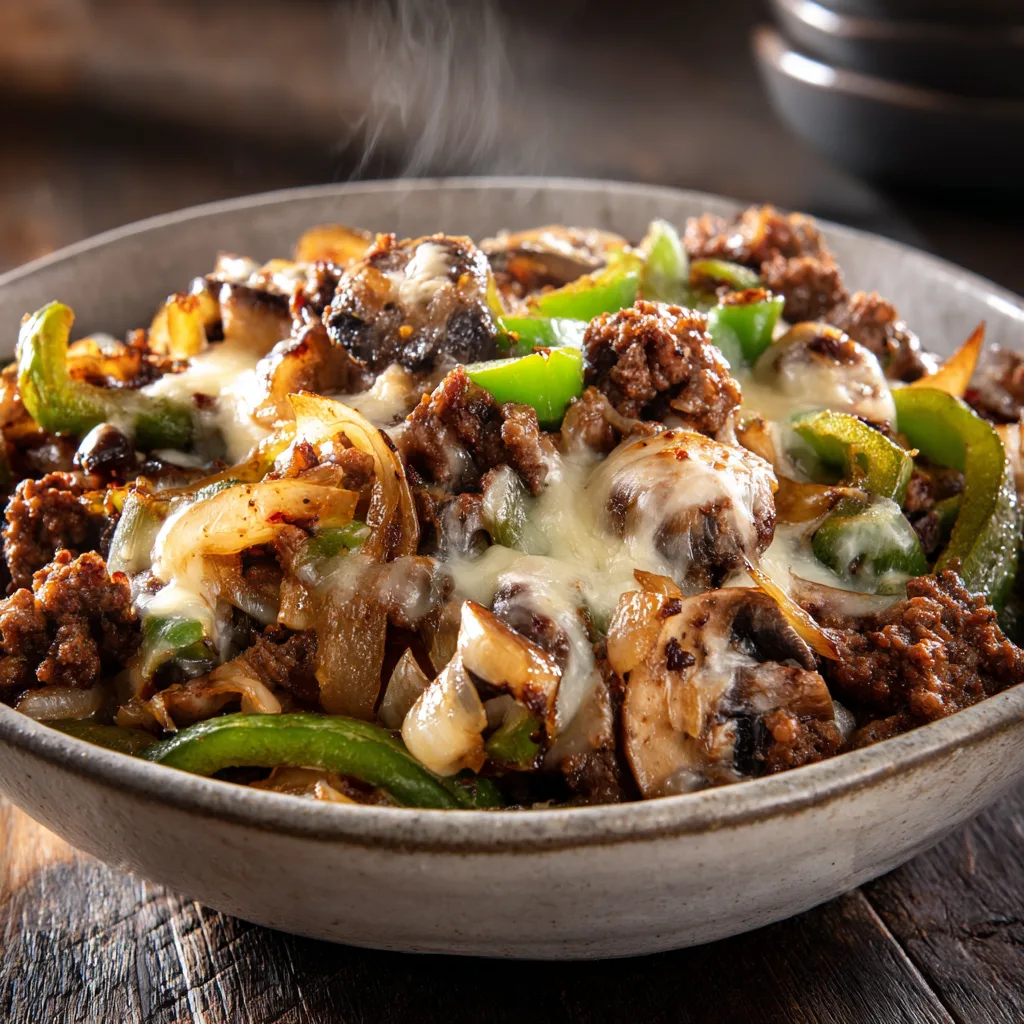
There is something undeniably magical about a classic Philadelphia cheesesteak. The combination of savory, thinly sliced beef, sweet caramelized onions, earthy green bell peppers, and a generous blanket of melty cheese stuffed into a soft, warm hoagie roll is the stuff of culinary legends. It is greasy, it is comforting, and it is a staple of American street food. However, as dietary preferences evolve and many of us look for ways to enjoy our favorite flavors without the heavy carbohydrate load of a massive sub roll, we are faced with a dilemma. How do you capture the soul of a cheesesteak without the bread? The answer is both brilliantly simple and incredibly delicious: the Philly Cheesesteak Bowl.
This deconstructed masterpiece takes everything you love about the iconic sandwich and transforms it into a hearty, fork-friendly meal that is perfect for a quick weeknight dinner, a satisfying meal prep lunch, or a keto-friendly feast. By swapping the traditional shaved ribeye for accessible, budget-friendly ground beef (or keeping it classic with shaved steak if you prefer), and maximizing the volume of fresh, colorful vegetables, this recipe delivers maximum flavor with minimal effort. In this comprehensive guide, we are diving deep into the art of the cheesesteak bowl, exploring the essential ingredients, the techniques for building deep flavors, and the secrets to achieving that picture-perfect melted cheese topping.
The Evolution of a Classic: Why Ditch the Bun?
The traditional Philly cheesesteak was invented in the early 20th century in South Philadelphia, originally starting as a hot dog stand creation before evolving into the beef-and-cheese behemoth we know today. While the bread—traditionally a crusty, chewy Amoroso roll—plays a crucial role in absorbing the juices of the meat in the sandwich version, it also adds a significant amount of refined carbohydrates and calories.
The transition to a “bowl” format is not just a trend; it is a smart culinary adaptation. First, it makes the dish inherently gluten-free and low-carb (keto-friendly), appealing to a wide range of dietary needs. Second, it allows the actual ingredients—the meat, the veggies, and the cheese—to shine. Without the bread masking the flavors, the quality of your sear, the sweetness of your onions, and the sharpness of your cheese become the stars of the show. Finally, eating it from a bowl allows you to significantly increase the vegetable-to-meat ratio. You can load up on bell peppers and mushrooms, turning what is traditionally a heavy “cheat meal” into a nutrient-dense, vegetable-forward dinner that still feels incredibly indulgent.
Why You Will Obsess Over These Cheesesteak Bowls
If the mouth-watering aroma wafting from your skillet isn’t enough to convince you, here are a few more reasons why this recipe will earn a permanent spot in your dinner rotation:
- Lightning Fast: Unlike roasting a whole chicken or simmering a stew for hours, this meal goes from fridge to table in under 30 minutes. It is the ultimate savior for busy weeknights when you are tempted to order takeout.
- Budget-Friendly: Traditional cheesesteaks require expensive cuts of beef like ribeye. This bowl utilizes lean ground beef, making it an incredibly economical way to feed a whole family while still delivering robust, beefy flavor.
- Incredibly Customizable: Not a fan of mushrooms? Leave them out. Prefer the bite of red onions over white? Make the swap. Want to use ground turkey or chicken? Go for it! The bowl format is a blank canvas.
- Meal Prep Perfection: This mixture reheats beautifully. You can make a massive batch on Sunday, portion it out into glass containers, and have a high-protein, satisfying lunch ready for the entire workweek.
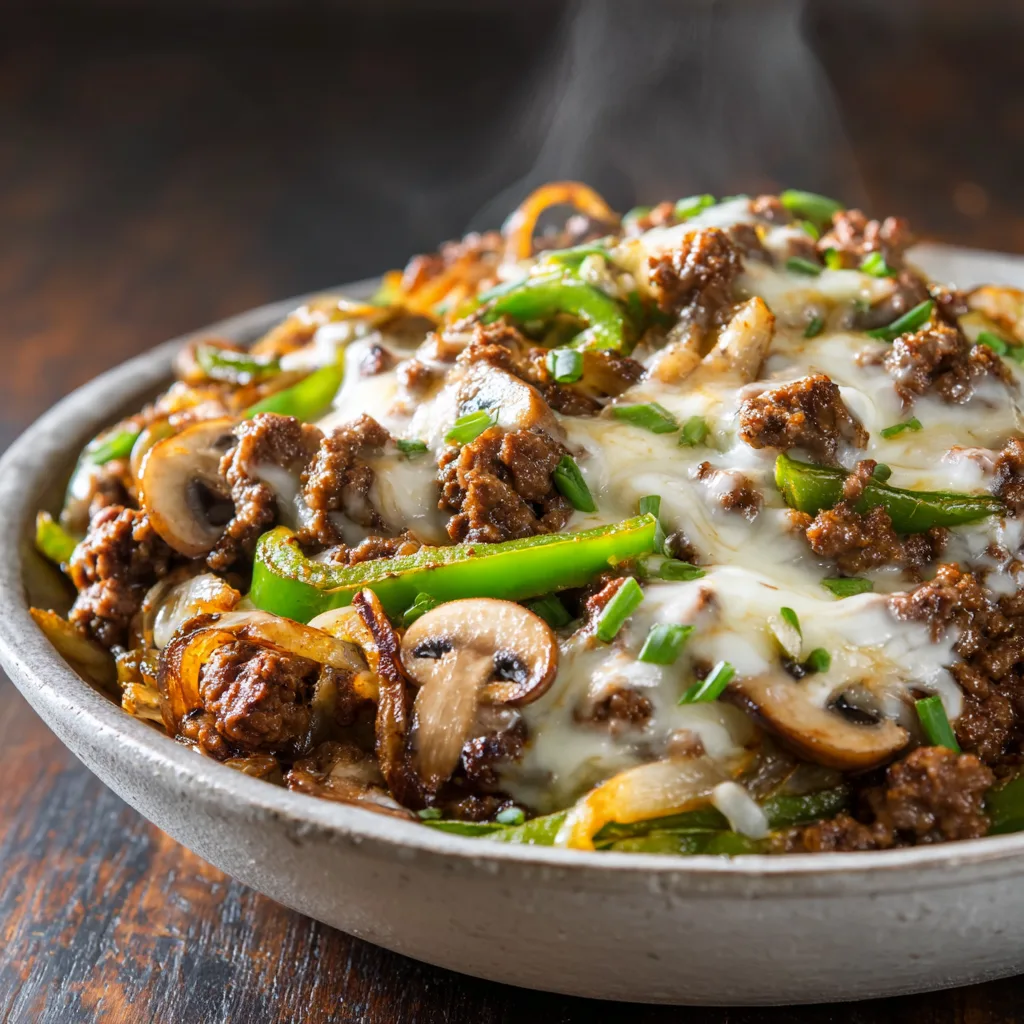
The Anatomy of the Perfect Cheesesteak Bowl: Ingredient Deep Dive
To create a truly spectacular bowl, you need to pay attention to the components. Since we are stripping away the bread, every ingredient needs to pull its weight.
The Meat
While purists will argue that a true cheesesteak demands thinly shaved ribeye, we are opting for lean ground beef (80/20 or 85/15) for this everyday bowl version. Ground beef is quick to cook, easy to brown, and highly accessible. The fat content in an 80/20 blend provides excellent flavor and keeps the meat juicy. As it browns, the Maillard reaction creates complex, savory crusts on the crumbles of beef, providing that deep, meaty foundation the dish requires.
The Vegetables
The “holy trinity” of a cheesesteak bowl consists of onions, bell peppers, and mushrooms. Onions: Yellow or white onions are best. When sautéed down, they release their natural sugars, becoming sweet and translucent, balancing the savory beef. Green Bell Peppers: They provide a distinct, slightly bitter, and deeply vegetal flavor that cuts through the richness of the meat and cheese. They also add a beautiful pop of vibrant color. Mushrooms: Cremini (baby bella) or standard white button mushrooms add exceptional earthiness and boost the umami profile of the dish. They act like little sponges, soaking up the beef drippings and seasonings.
The Flavor Enhancers
Because ground beef doesn’t naturally have the same robust flavor profile as a seared ribeye steak, we need to give it a little help. We use minced garlic for aromatic depth, and the secret weapon: Worcestershire sauce. Worcestershire is a fermented condiment packed with umami-rich ingredients like anchovies, molasses, and tamarind. A few dashes transform ordinary ground beef into something that tastes distinctly like a premium steakhouse cut.
The Cheese
The cheese is arguably the most important, and heavily debated, part of a cheesesteak. While Cheez Whiz is a Philadelphia classic, for a bowl format, you want a cheese that melts beautifully and creates a luxurious blanket over the hot meat. Provolone cheese is the sophisticated choice. It offers a mild, slightly tangy, and creamy profile with an exceptional “cheese pull” when melted. You can also use a high-moisture Mozzarella or a mild white cheddar if you prefer.
Ingredients List
- 1 lb (450g) lean ground beef (80/20 or 85/15 blend preferred)
- 1 large green bell pepper, sliced into thin strips
- 1 large yellow or white onion, sliced
- 8 oz (225g) fresh mushrooms (cremini or button), sliced
- 2 cloves garlic, finely minced
- 1 tablespoon olive oil or butter
- 2 tablespoons Worcestershire sauce
- 1/2 teaspoon salt (or to taste)
- 1/2 teaspoon freshly ground black pepper
- 4 to 6 slices of Provolone cheese (or shredded mozzarella)
Step-by-Step Instructions: Mastering the Skillet
The secret to building flavor in this dish is cooking the ingredients in stages so everything reaches its perfect texture without getting soggy or overcooked.
Philly Cheesesteak Bowls
Ingredients
Equipment
Method
- Heat olive oil in a large skillet over medium-high heat. Add sliced onions and green bell peppers. Sauté for 5-7 minutes until softened.
- Add the sliced mushrooms to the skillet. Cook for another 3-4 minutes until they have browned and released their moisture. Remove the vegetable mixture from the skillet and set aside.
- In the same skillet, add the ground beef over medium-high heat. Break it apart and cook until browned and no pink remains. Drain any excess fat.
- Reduce heat to medium. Stir in the minced garlic, Worcestershire sauce, salt, and pepper. Cook for 1 minute until fragrant.
- Return the cooked peppers, onions, and mushrooms to the skillet with the beef. Stir well to combine and heat through.
- Smooth the mixture into an even layer in the skillet. Top evenly with slices of Provolone cheese.
- Cover the skillet with a lid and let it sit on low heat for 2-3 minutes, just until the cheese is completely melted and bubbly.
- Remove from heat, scoop into bowls, and serve immediately hot.
Notes
- Sauté the Vegetables: Heat the olive oil (or butter) in a large, heavy-bottomed skillet (cast iron works brilliantly here) over medium-high heat. Add the sliced onions and green bell peppers. Sauté for about 5-7 minutes, stirring occasionally, until the onions are soft and translucent, and the peppers are tender with slightly blistered edges.
- Add the Mushrooms: Push the peppers and onions to the edges of the skillet. Add the sliced mushrooms to the center. Let them cook undisturbed for 2-3 minutes so they can brown, then stir them into the pepper and onion mixture. Cook for another 3 minutes until the mushrooms have released their moisture and shrunk in size. Remove the vegetable mixture from the skillet and set it aside on a plate.
- Brown the Beef: In the same skillet (do not wipe it clean; leave those flavorful vegetable bits!), add the ground beef over medium-high heat. Break the meat apart with a wooden spoon or spatula as it cooks. Let it sit undisturbed for a minute or two to develop a nice brown crust on the bottom before stirring.
- Season and Combine: Once the beef is fully browned and no pink remains, drain off any excess grease if necessary. Reduce the heat to medium. Add the minced garlic to the beef and cook for 30 seconds until fragrant. Pour in the Worcestershire sauce, salt, and black pepper. Stir well to coat the meat evenly.
- Bring It Together: Return the cooked peppers, onions, and mushrooms to the skillet with the seasoned beef. Stir everything together until well combined and heated through completely. Taste the mixture and adjust the salt and pepper if needed.
- The Cheese Melt: Smooth the top of the meat and vegetable mixture in the skillet using your spatula to create an even layer. Lay the slices of Provolone cheese evenly over the top, covering as much surface area as possible.
- Melt to Perfection: Turn the heat down to low and cover the skillet with a tight-fitting lid. Let it sit for 2 to 3 minutes, or just until the cheese is completely melted, bubbly, and gooey. If you are using an oven-safe skillet, you can also place it under the broiler for 1-2 minutes for a slightly browned, bubbly cheese crust.
- Serve and Enjoy: Remove from heat immediately. Use a large spoon to scoop the cheesy, meaty mixture directly into shallow serving bowls. Enjoy while piping hot!
Pro Tips for the Ultimate Cheesesteak Experience
To elevate this from a simple weeknight meal to a dish you will crave constantly, keep these professional kitchen tips in mind:
Do Not Crowd the Pan: When cooking the mushrooms and peppers, make sure your skillet is large enough. If you pile the vegetables too high, they will steam in their own juices rather than caramelize and brown. Color equals flavor, so give them room to breathe.
The Broiler Trick: For a truly restaurant-quality finish, if you are using an oven-safe cast iron or stainless steel skillet, skip the lid for melting the cheese. Instead, pop the whole skillet under the broiler on high for 60-90 seconds. The intense top-down heat will melt the cheese rapidly and create those irresistible, slightly toasted brown spots on the Provolone.
Deglaze for Extra Flavor: Before adding the beef back in, if you notice brown, sticky bits stuck to the bottom of the pan after cooking the veggies (this is called the fond), pour a splash of beef broth or water into the hot pan and scrape it up with a wooden spoon. This packs a massive punch of flavor and incorporates right into the final dish.
Creative Variations to Spice Things Up
The beauty of a bowl recipe is its inherent flexibility. Here are some fantastic ways to switch up the flavor profile depending on your mood or pantry stock:
- The Chicken Philly: Not eating red meat? Swap the ground beef for ground chicken or thinly sliced chicken breast. You may want to add a pinch of smoked paprika to boost the savory flavor of the poultry.
- Make it Spicy: If you love heat, add a diced jalapeño or some sliced hot cherry peppers to the skillet when you are sautéing the bell peppers and onions. A dash of hot sauce right before serving is also a welcome addition.
- The “Loaded” Bowl: Treat this like a loaded baked potato without the potato. Top your finished cheesy bowl with a dollop of sour cream, some chopped crispy bacon, and a sprinkle of fresh green onions.
- Serve Over a Base: If you aren’t strictly keto or low-carb, this mixture is absolutely phenomenal served over a bed of fluffy white rice, quinoa, or roasted potatoes to soak up all those incredible savory juices. For a keto base, try serving it over cauliflower rice.
Storage, Freezing, and Reheating Instructions
As mentioned, this recipe is a meal-prep champion. Here is how to keep it tasting fresh all week.
Refrigeration: Allow the leftovers to cool completely to room temperature. Store in an airtight container in the refrigerator for up to 4 days. If you are meal-prepping, divide the mixture into individual glass containers *before* adding the cheese. You can add a fresh slice of cheese on top when you are ready to reheat.
Freezing: The meat and vegetable mixture freezes incredibly well. Store it in a freezer-safe ziplock bag or container for up to 3 months. Note: Do not freeze the cheese, as dairy can separate and become grainy when frozen and thawed. Thaw the meat mixture overnight in the fridge before reheating.
Reheating: The microwave is perfect for this. Heat on high for 1.5 to 2 minutes until hot. If you haven’t added the cheese yet, place a slice of provolone on top during the last 30 seconds of microwaving.
Conclusion
Ditching the hoagie roll does not mean you have to sacrifice the incredible, comforting flavors of a Philadelphia classic. By focusing on high-quality ingredients, proper cooking techniques to maximize caramelization and umami, and a generous layer of perfectly melted cheese, you can create a low-carb masterpiece right in your own kitchen. These Philly Cheesesteak Bowls are fast, deeply satisfying, and completely customizable. Grab your skillet, gather your ingredients, and get ready to experience your new favorite weeknight dinner!