Old-Fashioned Iced Oatmeal Cookies
The Ultimate Old-Fashioned Iced Oatmeal Cookies: A Nostalgic Classic Reimagined
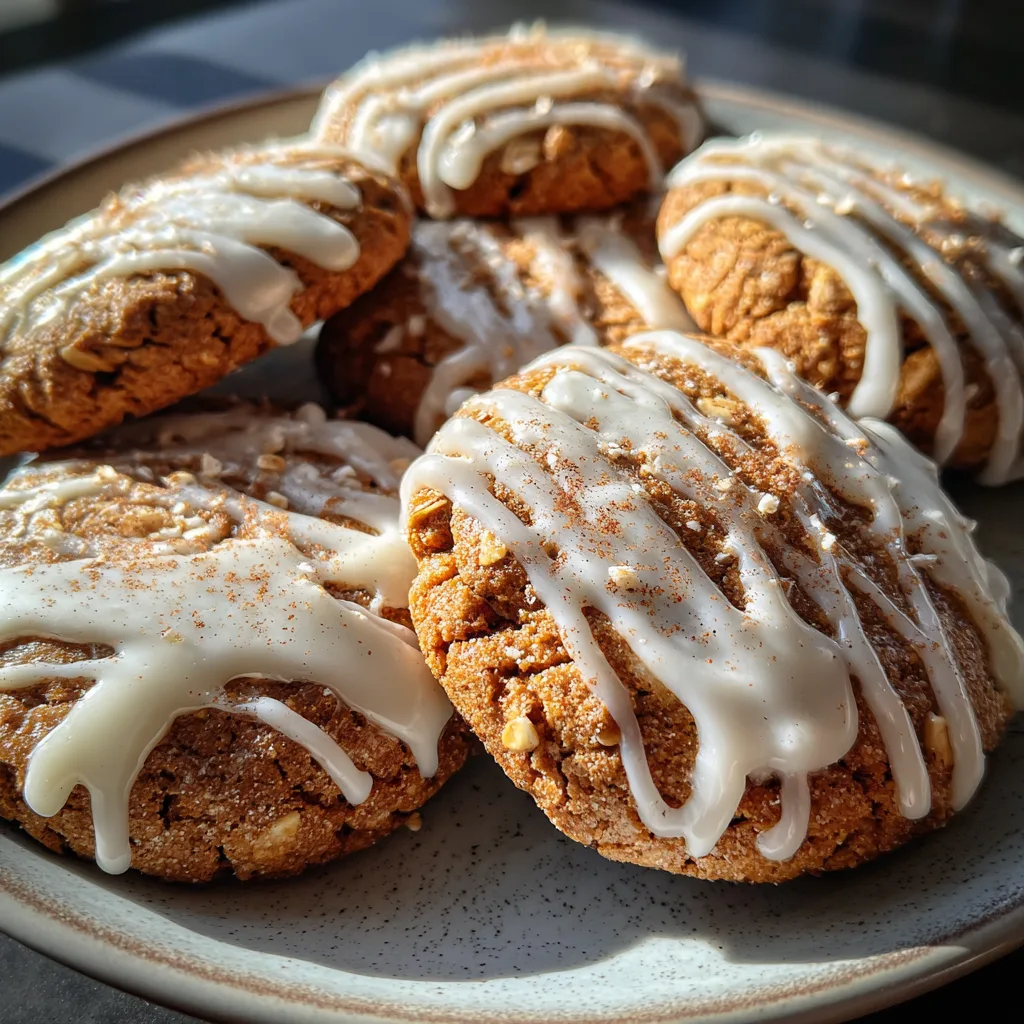
There are few things in the culinary world that evoke the same level of deep-seated nostalgia as a classic Old-Fashioned Iced Oatmeal Cookie. For many of us, the memory is tied to those hard, store-bought cookies sold in crinkly plastic bags—the ones with the rock-hard icing that you had to dunk in milk just to soften up. But today, we are elevating that memory. We are taking the flavor profile of that childhood classic and transforming it into a homemade masterpiece that is soft, chewy, perfectly spiced, and topped with a luscious vanilla glaze that cracks when you bite into it.
This recipe is not just about mixing ingredients; it is about crafting an experience. These cookies feature deeply caramelized edges, a soft and tender center, and a texture that balances the heartiness of oats with the delicacy of a buttery crumb. Whether you are baking for a holiday cookie exchange, a cozy autumn afternoon, or simply to fill your cookie jar with love, this guide will walk you through every step to perfection.
Why This Recipe Is the Best You Will Ever Bake
You might be wondering, what makes this specific recipe stand out in a sea of oatmeal cookie recipes? The answer lies in the technique and the texture. Most oatmeal cookies can be too chunky or, conversely, too cakey. This recipe bridges the gap. By pulsing the oats before adding them to the dough, we create a refined texture that spreads evenly, creating that signature craggy surface that holds the icing so beautifully.
Furthermore, the spice blend here is key. We aren’t just using cinnamon; we are layering warm spices to complement the nutty flavor of the oats and the richness of the brown sugar. The result is a cookie that tastes like a warm hug. The icing isn’t just a sweet addition; it provides a creamy contrast to the spices, drying to a perfect finish that allows for stacking and gifting.
The Science of the Perfect Oatmeal Cookie
Baking is a science, and understanding your ingredients is half the battle. Let’s break down why we use what we use in this recipe:
- Old-Fashioned Rolled Oats: Unlike instant oats, which can turn into mush, rolled oats hold their structure. However, in this recipe, we give them a quick pulse in the food processor. This creates a flour-like consistency with some larger pieces remaining, resulting in a chewier, more cohesive cookie.
- Molasses and Brown Sugar: This recipe relies heavily on brown sugar (which contains molasses) and often a touch of added molasses. This acidity reacts with the baking soda to create lift, while the hygroscopic nature of brown sugar ensures the cookies stay soft and moist for days.
- Butter Temperature: Using room temperature butter is crucial for creaming. It traps air bubbles which expand during baking, giving the cookie its lift. If your butter is melted, your cookies will spread too thin and become greasy.
- The Glaze: The icing is a simple mixture of powdered sugar and milk, but the ratio is vital. It needs to be thick enough to coat the ridges of the cookie without running off completely, yet thin enough to settle into the cracks.
Ingredients Checklist
Before you turn on your mixer, ensure you have the following ingredients ready. Mise en place (everything in its place) is the secret to stress-free baking.
Old Fashioned Iced Oatmeal Cookies
Ingredients
Equipment
Method
- Preheat oven to 350°F (175°C) and line baking sheets with parchment paper.
- Pulse oats in a food processor 8-10 times until they resemble a coarse flour. Do not grind into fine powder.
- In a medium bowl, whisk together pulsed oats, flour, baking powder, baking soda, salt, cinnamon, and nutmeg.
- In a large bowl or stand mixer, cream softened butter, brown sugar, and granulated sugar until light and fluffy (approx. 2-3 mins).
- Add eggs one at a time, mixing well after each. Stir in vanilla extract.
- Gradually mix in the dry ingredients on low speed until just combined. Do not overmix.
- Scoop dough (approx 2 tbsp) onto baking sheets, spacing them 2 inches apart.
- Bake for 10-12 minutes until edges are golden. Centers may look slightly soft. Cool on pan for 5 minutes, then transfer to wire rack to cool completely.
- Whisk powdered sugar, milk, and vanilla until smooth and thick. Dip the tops of cooled cookies into icing or drizzle generously.
- Allow icing to set and harden before serving or storing.
Notes
Step-by-Step Instructions
Follow these numbered instructions carefully to achieve the bakery-style look and taste shown in the photos.
Phase 1: Preparing the Dry Goods
- Preheat and Prep: Begin by preheating your oven to 350°F (175°C). Line two large baking sheets with parchment paper or silicone baking mats. This prevents sticking and ensures the bottoms don’t brown too quickly.
- Process the Oats: Place your old-fashioned rolled oats into a food processor. Pulse them about 8 to 10 times. You aren’t trying to make fine flour; you want a mix of oat flour and coarse oat pieces. This texture is the secret to the “old-fashioned” look.
- Whisk Dry Ingredients: In a medium mixing bowl, combine the processed oats, all-purpose flour, baking soda, baking powder, salt, cinnamon, and nutmeg. Whisk vigorously to ensure the spices and leavening agents are evenly distributed throughout the flour. Set this bowl aside.
Phase 2: The Wet Mixture
- Cream Butter and Sugars: In the bowl of a stand mixer fitted with the paddle attachment (or using a large bowl and an electric hand mixer), beat the softened butter, dark brown sugar, and granulated sugar on medium-high speed. Do this for about 2-3 minutes until the mixture is pale, creamy, and aerated.
- Add Liquids: Scrape down the sides of the bowl. Add the eggs one at a time, beating well after each addition. Pour in the vanilla extract and the molasses (if using). Mix until combined and smooth.
Phase 3: The Dough Assembly
- Combine: Turn the mixer to low speed. Gradually add the dry ingredient mixture to the wet ingredients. Mix only until you no longer see streaks of white flour. Do not overmix, as this creates gluten and leads to tough cookies.
- Scoop: Using a medium cookie scoop (about 2 tablespoons), scoop the dough onto your prepared baking sheets. Space them about 2 inches apart to allow for spreading.
- Bake: Bake in the preheated oven for 10-12 minutes. The edges should be golden brown and set, but the centers should still look slightly soft and underbaked.
- Cool: Remove from the oven. Let the cookies sit on the hot baking sheet for 5 minutes—they will continue to cook and firm up during this time. Afterwards, transfer them to a wire rack to cool completely. You cannot glaze a warm cookie, or the icing will melt.
Phase 4: The Glazing Technique
- Make the Icing: While the cookies cool, whisk together the powdered sugar, vanilla, and 3 tablespoons of milk in a small bowl. The consistency should be very thick, like heavy glue. If it is too stiff, add more milk one teaspoon at a time. If it’s too runny, add more sugar.
- The Dip Method: Take a cooled cookie and lightly dip the top surface into the icing, or hold the cookie and use a spoon to drizzle/spread the icing over the top, allowing it to settle into the nooks and crannies.
- Set: Place the glazed cookies back on the wire rack and let them sit for at least 20 minutes until the icing hardens and forms a shell.
Expert Tips for Success
Even the best recipes can be improved with a few professional tricks. Here is how to ensure your batch is flawless:
Measure Flour Correctly: The most common mistake in baking is packing the flour cup. Use a kitchen scale for accuracy (120g per cup) or use the “spoon and level” method: fluff the flour, spoon it into the cup, and level it off with a knife.
Don’t Skip the Chill (Optional): If your kitchen is very warm, your dough might be too soft. If the cookies spread too much in the first batch, chill the remaining dough for 30 minutes in the refrigerator before baking the rest.
The Spice Factor: For a more complex flavor profile, add a pinch of ground cloves or ginger. Cardamom also pairs beautifully with oats if you want a Scandinavian twist.
Uniformity Matters: Using a cookie scoop isn’t just about speed; it ensures all cookies are the same size, meaning they bake at the same rate. This prevents having some burnt cookies while others are raw in the middle.
Storage and Freezing Instructions
One of the best things about Iced Oatmeal Cookies is that they have an excellent shelf life.
Room Temperature: Store the cookies in an airtight container at room temperature. Because of the icing, it is best to place a sheet of wax paper or parchment paper between layers to keep them from sticking together. They will stay fresh for up to 5 days.
Freezing the Dough: You can freeze the dough balls before baking. Scoop them onto a tray, freeze until solid, then transfer to a ziplock bag. Bake from frozen, adding an extra 1-2 minutes to the bake time.
Freezing Baked Cookies: You can freeze the baked cookies (glazed or unglazed) for up to 3 months. Thaw them on the counter for an hour before serving.
Variations to Try
While the classic version is hard to beat, creativity in the kitchen is always encouraged. Here are a few twists on the classic:
- Chocolate Dipped: Instead of vanilla glaze, dip half the cookie in melted dark chocolate for a rich treat.
- Raisin Walnut: Stir in ½ cup of chopped walnuts and ½ cup of raisins for a chunkier, heartier texture.
- Maple Glaze: Substitute the vanilla extract in the icing with maple extract, or use maple syrup in place of the milk for a distinct fall flavor.
- Gluten-Free: Substitute the all-purpose flour with a high-quality 1:1 Gluten-Free Flour blend. Ensure your oats are certified gluten-free as well.
Frequently Asked Questions
Why did my cookies spread too much?
This is usually due to butter that was too warm (melted) or not enough flour. Ensure your butter is cool-room-temperature, meaning it dents slightly when pressed but doesn’t squish.
Can I use instant oats?
It is not recommended. Instant oats are processed to cook very quickly and absorb moisture rapidly, which can result in a gummy, dry cookie. Old-fashioned rolled oats provide the necessary chew.
How do I get the cracks in the icing?
The cracks come from the texture of the cookie itself. Because the surface of the oatmeal cookie is bumpy and uneven, the icing settles in different depths. As it dries, it naturally highlights these ridges.
Conclusion
There is a profound satisfaction in pulling a tray of these Old-Fashioned Iced Oatmeal Cookies out of the oven. The smell of cinnamon and toasted oats filling the kitchen is enough to warm the coldest of days. Unlike their store-bought counterparts, these cookies offer a depth of flavor and a texture that is truly gourmet. They are crisp on the edges, chewy in the center, and the sweet crackle of the glaze provides the perfect finish.
Whether you are a seasoned baker or a novice in the kitchen, this recipe is forgiving, fun, and guaranteed to yield delicious results. So grab your oats, preheat your oven, and get ready to make a batch of cookies that will disappear from the jar faster than you can say “bon appétit.”