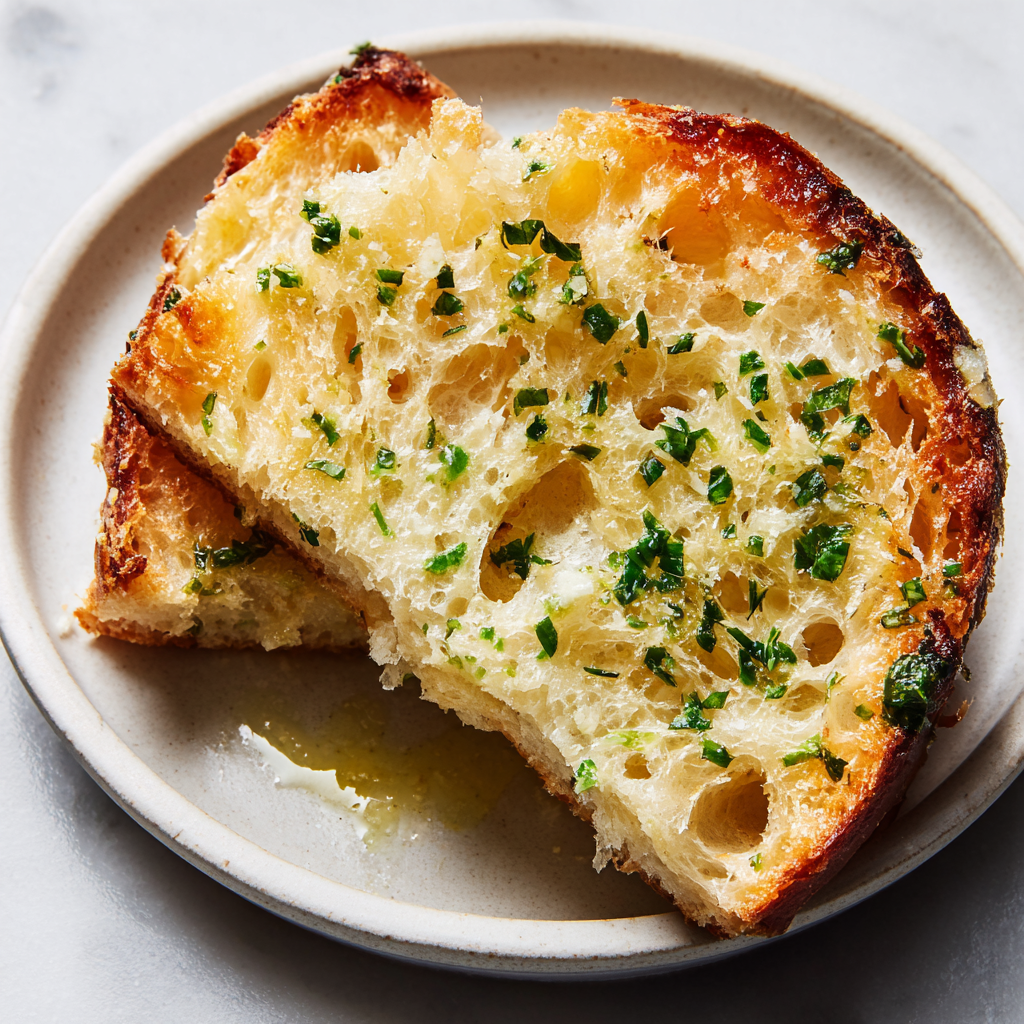
Parmesan Garlic Artisan Bread
Crusty Perfection: The Ultimate Guide to Homemade Parmesan Garlic Artisan Bread
The scent of baking bread is one of the most comforting aromas in the world, and when you combine that with the savory punch of fresh garlic and the salty, umami depth of Parmesan cheese, you’ve transcended comfort and reached culinary bliss. Forget the store-bought loaves; making your own Parmesan Garlic Artisan Bread at home is easier than you think and yields a deeply satisfying reward: a gorgeous, rustic loaf with an audibly crusty exterior and an unbelievably soft, airy interior. This isn’t just bread; it’s the centerpiece of any meal, perfect for dipping in olive oil, serving alongside a rich pasta dish, or simply devouring slice by slice.
This recipe is built upon the popular no-knead bread method, a technique that allows time, rather than brute force, to develop the gluten. This simplicity means even a novice baker can achieve that coveted open, holey crumb structure, often referred to as the “alveoli” of artisan bread. The long, slow fermentation process not only develops the gluten structure but also builds incredible depth of flavor. The addition of freshly minced garlic and aromatic herbs like rosemary or thyme, coupled with a generous amount of Parmesan cheese, transforms this simple bread into an intensely savory experience. Get ready to bake a loaf so good, your kitchen will smell like a professional Italian bakery.
The Magic of No-Knead Bread: Flavor and Texture Secrets
The secret to this bread’s incredible texture—that light, chewy crumb and shatteringly crisp crust—lies in the hydration level and the long, slow fermentation. Artisan bread often uses a high ratio of water to flour, which results in a very sticky, wet dough. While this can be intimidating at first, this high moisture content is what creates the steam necessary in the oven to achieve those beautiful, large air pockets and the thin, crackling crust.
When you don’t knead the dough, you’re relying on the natural activity of the yeast and the passage of time (usually 12-18 hours) to do the work. As the dough sits, the gluten strands naturally align and strengthen themselves in a process called autolysis. This minimal-effort technique not only frees up your time but also produces complex flavor compounds that you just can’t get from a quickly-risen loaf. The flavor is slightly tangy, perfectly yeasty, and beautifully balanced by the savory additions. By infusing the dough with garlic and Parmesan right from the start, those flavors permeate every single strand of the dough as it slowly rises, resulting in a depth of flavor that is truly intoxicating.
Essential Equipment for Artisan Success
While the ingredients are simple, having the right equipment is key to achieving that authentic rustic crust. The most critical piece of equipment is a Dutch oven or a heavy-bottomed, oven-safe pot with a tight-fitting lid. The Dutch oven acts like a miniature, steamy oven for your dough. When you bake the bread inside a preheated, covered Dutch oven, the trapped steam keeps the crust soft initially, allowing the dough to expand to its maximum potential (the “oven spring”). Then, removing the lid for the last part of the bake allows the moist, softened crust to dry out and crisp up to a deep golden-brown perfection.
Other essential tools are minimal: a large mixing bowl for the initial mix and rise, a plastic spatula or wooden spoon (since the dough is too sticky to mix with your hands), a piece of parchment paper to help lift the dough, and a sharp knife or lame for scoring the top. Scoring is not just for aesthetics; it controls where the loaf expands, allowing for the best oven spring and preventing the bread from bursting in an uncontrolled, unsightly way. For a savory loaf like this, a few parallel slashes or a simple “X” will do the trick and reveal that beautiful, cheesy, herby interior as it bakes.
The Recipe: Parmesan Garlic Artisan Bread
This recipe is incredibly straightforward, requiring only a few minutes of active preparation time across two days. The payoff is a bakery-quality loaf of bread.
Ingredients

For the Dough:
- 3 cups all-purpose flour (or bread flour for a chewier result)
- 1 ½ teaspoons coarse sea salt
- ¾ teaspoon instant or active dry yeast
- 1 ½ cups lukewarm water
- 2 tablespoons olive oil
For the Flavor Infusion:
- 4-5 cloves fresh garlic, minced finely
- ½ cup grated Parmesan cheese (freshly grated is best)
- 2 tablespoons fresh rosemary and/or thyme, finely chopped
- 1 tablespoon extra virgin olive oil (for coating/garnish)
Instructions
- Mix the Dough: In a large mixing bowl, whisk together the flour, salt, and yeast. Add the 1 ½ cups of lukewarm water and 2 tablespoons of olive oil. Using a wooden spoon or spatula, mix until a shaggy, very sticky dough forms. Do not overmix; just ensure all the flour is hydrated.
- Add Savory Ingredients: Fold in the minced garlic, chopped fresh herbs, and all of the grated Parmesan cheese until evenly distributed throughout the sticky dough.
- First Rise (Bulk Fermentation): Cover the bowl tightly with plastic wrap and let it sit at room temperature for 12 to 18 hours. The dough will more than double in size, become bubbly, and look loose and shaggy. This long, slow rise is essential for flavor and texture.
- Shape the Dough: After the long rise, dust a clean countertop generously with flour. Scrape the dough out onto the floured surface (it will be very sticky). Dust the top of the dough lightly with flour and gently fold the dough over itself 3 or 4 times to form a rough ball. Do not deflate it completely.
- Second Rise (Proofing): Place the dough ball on a large sheet of parchment paper. Cover it loosely with a clean kitchen towel and let it rest (proof) for another 30 minutes while the oven preheats.
- Preheat the Oven and Dutch Oven: Place a 5-to-6-quart Dutch oven (with the lid on) into the cold oven. Preheat the oven to 450°F (232°C). Allow the Dutch oven to preheat for at least 30 minutes to ensure it’s scorching hot.
- Bake Covered: Carefully remove the hot Dutch oven from the oven. Using the edges of the parchment paper, lift the dough and gently place it, still on the paper, into the hot Dutch oven. Lightly brush the top with the remaining 1 tablespoon of olive oil, and optionally sprinkle with a tiny bit more Parmesan and herbs. Score the top of the dough with a sharp knife. Cover the Dutch oven and return it to the oven. Bake for 30 minutes.
- Bake Uncovered: After 30 minutes, remove the lid. Continue baking for an additional 15 to 20 minutes, or until the crust is a deep, rustic golden brown and sounds hollow when tapped. The internal temperature should register 200∘F to 210∘F (93∘C to 99∘C).
- Cool Completely: Carefully remove the bread from the Dutch oven and place it on a wire rack. This step is crucial: you must let the bread cool completely—ideally for at least 1 hour—before slicing. This allows the internal starches to set, preventing a gummy texture. Slice, share, and enjoy your perfect homemade Parmesan Garlic Artisan Bread!
Perfect Pairings: Elevating Your Bread Experience
This savory artisan loaf is delicious enough to be eaten on its own, but its robust flavor profile makes it a fantastic accompaniment to a variety of dishes. To truly celebrate its garlic and Parmesan notes, consider these pairings:
- Soups and Stews: A thick slice of this crusty bread is the ideal companion for hearty fall and winter soups. Think a creamy Tomato Basil Soup, a rich French Onion Soup (where the Parmesan and garlic can only enhance the cheesy topping), or a traditional Italian Wedding Soup. The crunchy crust holds up beautifully to dipping without becoming immediately soggy.
- Pasta Dishes: This bread is non-negotiable next to a classic Italian pasta. Its savory complexity perfectly complements red-sauce dishes like Spaghetti and Meatballs or a simple Penne with Marinara. It’s also magnificent with creamy sauces like a Fettuccine Alfredo or a Cacio e Pepe, where the salty Parmesan notes are echoed in the bread.
- Simple Dippers: Sometimes, less is more. Serve the bread with a high-quality extra virgin olive oil for dipping, perhaps seasoned with a pinch of red pepper flakes and a splash of balsamic vinegar. It’s also heavenly with a simple spread of softened butter mixed with a little smoked paprika or a homemade roasted garlic spread. The bread’s chewy crumb absorbs the oil beautifully.
- Charcuterie and Cheese Boards: The bread’s rustic look and strong flavor make it a perfect addition to a sophisticated charcuterie board. Pair it with salty cured meats like prosciutto and salami, and sharp, hard cheeses like Pecorino Romano, or a creamy, slightly tangy goat cheese. The herbal notes of rosemary and thyme embedded in the crust will tie everything together.
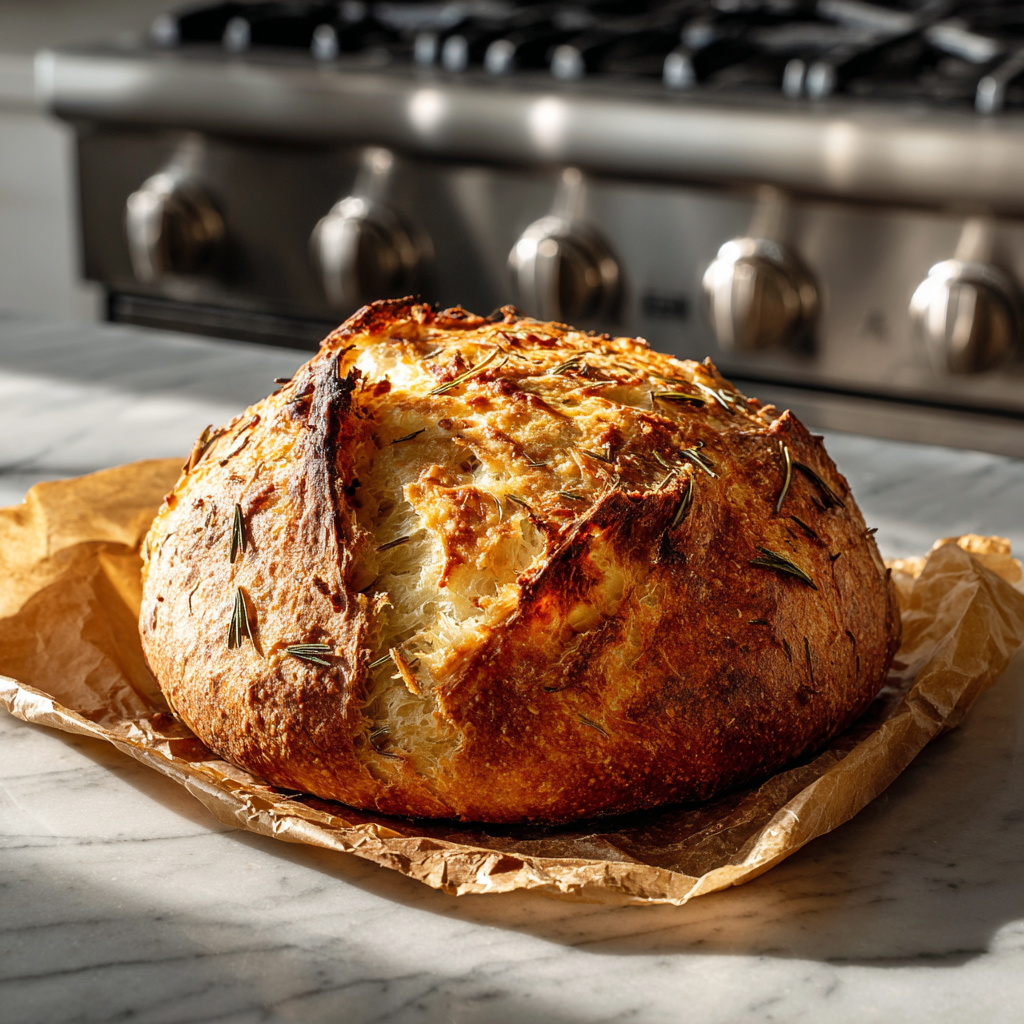
Troubleshooting the Artisan Crust: Why Wasn’t Mine Crusty?
Achieving that signature audibly crisp crust is often the biggest hurdle for new no-knead bakers. If your loaf came out with a softer, chewier crust than you hoped, it usually comes down to one thing: steam.
The Dutch oven technique is designed to maximize steam. By covering the pot, you trap the moisture released from the dough as it bakes. This moisture surrounds the dough, keeping the outer layer soft and extensible, which allows it to stretch and rise to its maximum volume. This is key for that massive oven spring and the light, airy crumb structure. If you remove the lid too early, the crust will set too quickly, inhibiting the full rise.
A few tips for maximizing the crust:
- Ensure the Dutch oven is HOT: Preheat it for a full 30 minutes at 450∘F (232∘C). A hotter surface means immediate, massive steam generation.
- No Peeking: Resist the urge to lift the lid during the initial covered bake. Every time you open the lid, you let the precious steam escape.
- Long Uncovered Bake: Once the lid comes off, you need to bake for at least 15-20 minutes to fully dry out the crust. If it’s not brown enough after this time, give it another 5-10 minutes. The deeper the color, the better the flavor and the crunchier the crust will be.
- Cooling is Crucial: Always cool the bread on a wire rack. If you leave it on a solid surface, steam will condense, and the bottom crust will quickly become soggy.
Master these steam-centric steps, and you’ll be pulling out loaves with a crust so shatteringly crisp it practically sings.
Final Thoughts on Your Homemade Masterpiece
Baking Parmesan Garlic Artisan Bread is an immensely rewarding endeavor. It’s a process that is both simple in its technique and spectacular in its results. You’ve taken simple, humble ingredients—flour, water, yeast, and salt—and transformed them into a beautiful, rustic, and complex loaf of bread, infused with the bold, aromatic flavors of garlic, fragrant herbs, and sharp Parmesan cheese. This is a recipe that proves that the best things in life often require just a little patience and a lot of passion. From the first intoxicating whiff as it bakes to the final, satisfying crunch of the crust, this homemade artisan loaf will undoubtedly become a staple in your kitchen. Enjoy the fruits of your labor!