Viral Hot Italian Grinder Sliders
The Ultimate Viral Hot Italian Grinder Sliders: A Flavor Explosion
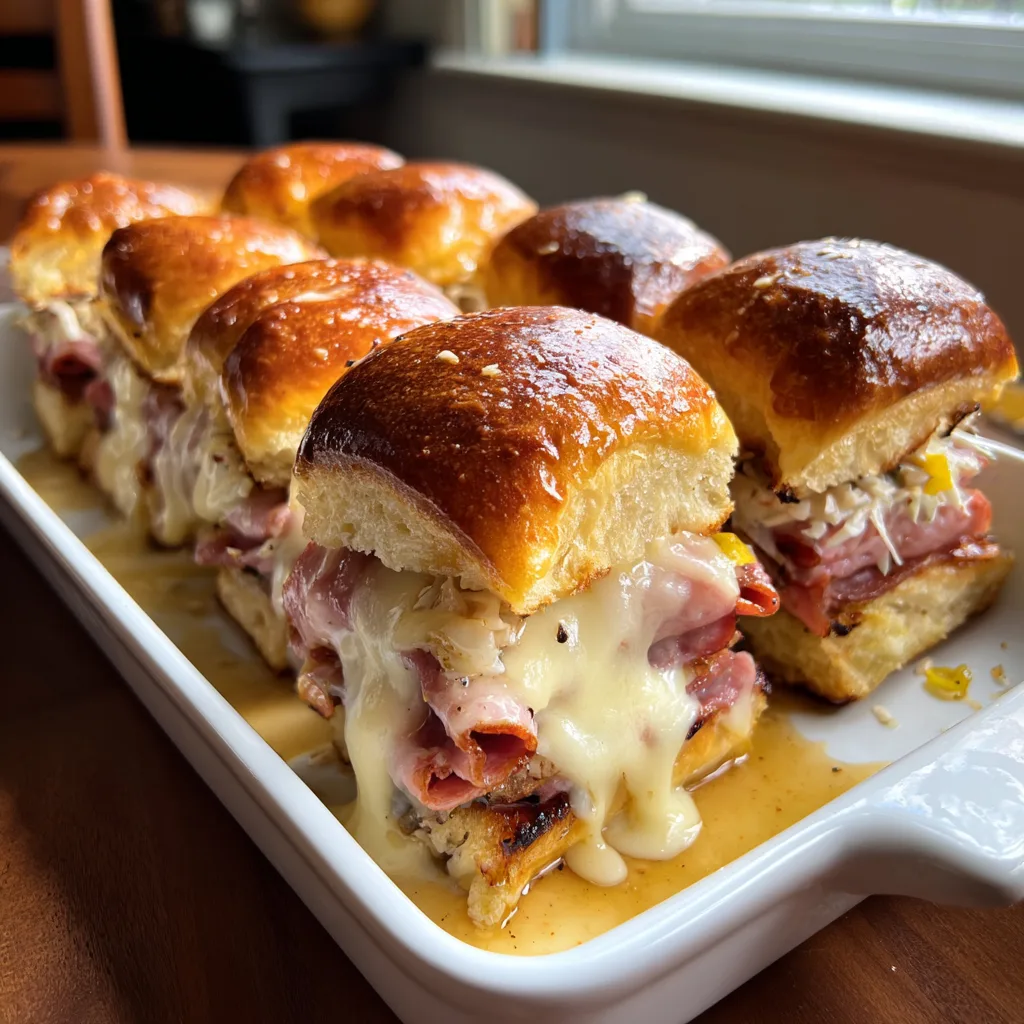
Stop scrolling and start preheating your oven. If you were anywhere near social media in the last year, you saw the “Italian Grinder Sandwich” take the internet by storm. We have taken that viral sensation and transformed it into the ultimate shareable comfort food: Hot Italian Grinder Sliders. These aren’t just sandwiches; they are savory, buttery, cheesy bite-sized bombs of flavor that will disappear from your table in seconds.
Imagine the soft sweetness of Hawaiian rolls, brushed with a garlic-herb butter glaze, filled with layers of savory cured meats and melted provolone. But the real secret weapon? The “Grinder Salad”—a creamy, tangy, crunchy slaw packed with iceberg lettuce, banana peppers, and a zesty vinaigrette dressing that cuts through the richness of the meat and cheese. It is a textural masterpiece.
Why You Will Love This Recipe
There is a reason this recipe has captivated millions. It strikes the perfect balance between hot, melted comfort food and crisp, fresh salad. Here is why this will become your new go-to recipe for parties, game days, or Friday night dinner:
- Flavor Contrast: The hot, salty meats and gooey cheese contrast perfectly with the cold, creamy, and crunchy slaw.
- Crowd Pleaser: Making 12 sliders at once is just as easy as making one sandwich. It is the ultimate efficiency hack for feeding a crowd.
- Customizable: Don’t like salami? Swap it. Love spice? Add jalapeños. These sliders are incredibly forgiving and versatile.
- The “Soggy” Factor: Many people worry about slider buns getting soggy. We have perfected the assembly method to ensure your bottom buns stay sturdy while the tops get golden and buttery.
Ingredients Checklist
To make the best Italian Grinder Sliders, you need quality deli meats and fresh produce. Here is what you will need to grab from the grocery store:
The Sliders Base
- Hawaiian Sweet Rolls – One 12-count package. Do not separate the rolls individually; keep them as a slab.
- Genoa Salami – Thinly sliced. This adds a nice fatty richness.
- Pepperoni – Large sandwich-style slices cover better, but standard pizza pepperoni works too.
- Black Forest Ham or Turkey – Adds a sweeter, leaner meat to balance the salty cured meats.
- Provolone Cheese – Mild and melts beautifully. Mozzarella is a good substitute.
- Parmesan Cheese – Grated, for the topping.
The Viral “Grinder” Salad Slaw
- Iceberg Lettuce – Shredded very thinly. It must be iceberg for that signature crunch.
- Mayonnaise – The base of the creamy dressing.
- Red Wine Vinegar – Provides the necessary acid to cut the fat.
- Banana Peppers or Pepperoncini – Sliced. These add the signature “tang.”
- Red Onion – Finely thinly sliced for a bite of sharpness.
- Garlic – Freshly minced is best.
- Seasonings – Dried oregano, red pepper flakes (for heat), salt, and black pepper.
The Garlic Butter Glaze
- Unsalted Butter – Melted.
- Garlic Powder & Dried Parsley – Or fresh parsley if you have it.
- Parmesan Cheese – To create a crust on top of the buns.
Step-by-Step Instructions
Follow these steps closely to ensure your sliders are crispy on the outside and juicy on the inside.
Hot Italian Grinder Sliders
Ingredients
Equipment
Method
- Preheat oven to 350°F (175°C). Lightly grease a 9×13 baking dish.
- Slice the entire slab of rolls in half horizontally. Place the bottom slab in the baking dish.
- Layer half the provolone cheese, followed by ham, salami, pepperoni, and the remaining cheese.
- Bake the bottom half (open-faced) for 10-12 minutes until cheese is bubbly and meat is hot.
- While baking, whisk mayo, vinegar, garlic, and spices in a bowl. Toss with lettuce, onion, and peppers to make the slaw.
- Remove sliders from oven. Top the melted cheese/meat immediately with the cold grinder slaw.
- Place the top bun slab on the sliders. Mix melted butter with garlic powder and parsley.
- Brush the tops generously with the butter mixture and sprinkle with parmesan cheese.
- Return to oven for 3-5 minutes just to toast the tops (don’t overcook the lettuce). Serve hot.
Notes
1. Preheat and Prep
Preheat your oven to 350°F (175°C). Take your slab of Hawaiian rolls and, using a large serrated bread knife, slice the entire slab in half horizontally. You should have one large sheet of “tops” and one large sheet of “bottoms.” Place the bottom slab into a 9×13 inch baking dish.
2. Layer the Meats and Cheese
Place half of the provolone cheese slices on the bottom buns. This creates a barrier that prevents the bread from getting soggy from the meat juices. Layer on the ham, then the salami, then the pepperoni. Finish with the remaining slices of provolone cheese.
Tip: Fluff the meat slightly as you layer it; don’t lay it perfectly flat. This creates pockets for heat and texture.
3. The First Bake
Here is where we deviate from standard slider recipes. Do not put the top buns on yet. Place the bottom half (bread + meat + cheese) in the oven for about 10-12 minutes. You want the cheese to melt and the meat to get hot and slightly crispy on the edges.
4. Make the Grinder Salad
While the meat is baking, whisk together the mayonnaise, red wine vinegar, minced garlic, oregano, red pepper flakes, salt, and pepper in a medium bowl. Once combined, toss in the shredded lettuce, thinly sliced onions, and banana peppers. Mix until everything is evenly coated in the creamy dressing.
5. Assembly
Remove the bottom half from the oven. The cheese should be bubbly. Immediately pile the cold Grinder Salad on top of the hot melted cheese and meat. It will seem like a lot of salad, but it compresses. Place the slab of top buns over the salad.
6. The Glaze and Final Bake
Mix the melted butter, garlic powder, parsley, and parmesan cheese. Brush this generously over the top buns. Ensure you get the sides of the buns too! Pop the whole tray back into the oven for just 3-5 minutes—just enough to toast the tops and warm the bread. Do not overbake at this stage, or the hot lettuce will wilt too much. You want warm bread, hot meat, and cool/crisp salad.
Tips for the Perfect Grinder Sliders
The “Hot vs. Cold” Debate:
Authentic Grinder sandwiches rely on the contrast between hot meat and cold salad. By baking the meat first and adding the salad right before the final short toast, you preserve the crunch of the lettuce. If you bake the lettuce for 20 minutes, it turns into a soupy mess. Stick to the split-baking method detailed above.
Drain Your Peppers:
Banana peppers and pepperoncini are packed in brine. Pat them dry with a paper towel before adding them to the salad. Excess brine will dilute your mayo dressing and make the buns soggy.
Cheese Barrier:
Always put cheese directly on the bread before the meat. As the cheese melts, it seals the pores of the bread, preventing the grease from the pepperoni from soaking into the bun bottom.
Variations to Try
- Spicy Version: Swap the banana peppers for hot pickled jalapeños and use Pepper Jack cheese instead of Provolone. Add an extra pinch of chili flakes to the dressing.
- The “Turkey Club” Grinder: Use only turkey and crispy bacon instead of Italian cured meats. Use cheddar cheese and add some diced tomatoes to the salad mix.
- Vegetarian Option: Load up on roasted red peppers, artichoke hearts, grilled eggplant, and extra cheese. Use a plant-based mayo for the slaw.
Serving Suggestions
These Hot Italian Grinder Sliders are rich and filling, so they pair best with lighter sides or classic pub fare:
- Chips: Kettle-cooked potato chips (sea salt and vinegar) are the perfect crunch companion.
- Soup: A small cup of tomato basil soup for dipping is divine.
- Fries: Garlic parmesan fries or sweet potato fries.
- Pickles: A side of whole dill pickles cleanses the palate.
Frequently Asked Questions
Can I make these ahead of time?
You can prep the components ahead of time (slice the buns, mix the dressing base, shred the lettuce), but do not assemble the full slider until you are ready to bake. The vinegar in the slaw will break down the bread if it sits for hours.
How do I store leftovers?
These are best eaten fresh. However, if you have leftovers, store them in an airtight container in the fridge for up to 2 days. The lettuce will lose its crunch. To reheat, wrap loosely in foil and bake at 350°F for 10 minutes. The microwave will make them chewy.
What is a “Grinder”?
A “Grinder” is a New England term for a submarine sandwich (sub, hoagie, hero). The name allegedly comes from the tough crust of the Italian bread used, which required “grinding” your teeth to get through, or from the Italian-American slang for dock workers who ate them.
Ready to eat? These Hot Italian Grinder Sliders are waiting to become your new favorite meal. The combination of warm, garlic-buttered bread, savory meats, and that zesty, creamy, crunchy slaw is simply unbeatable. Gather your ingredients and let’s get cooking!