Crème Brûlée Cheesecake Cupcakes
Crème Brûlée Cheesecake Cupcakes
Introduction
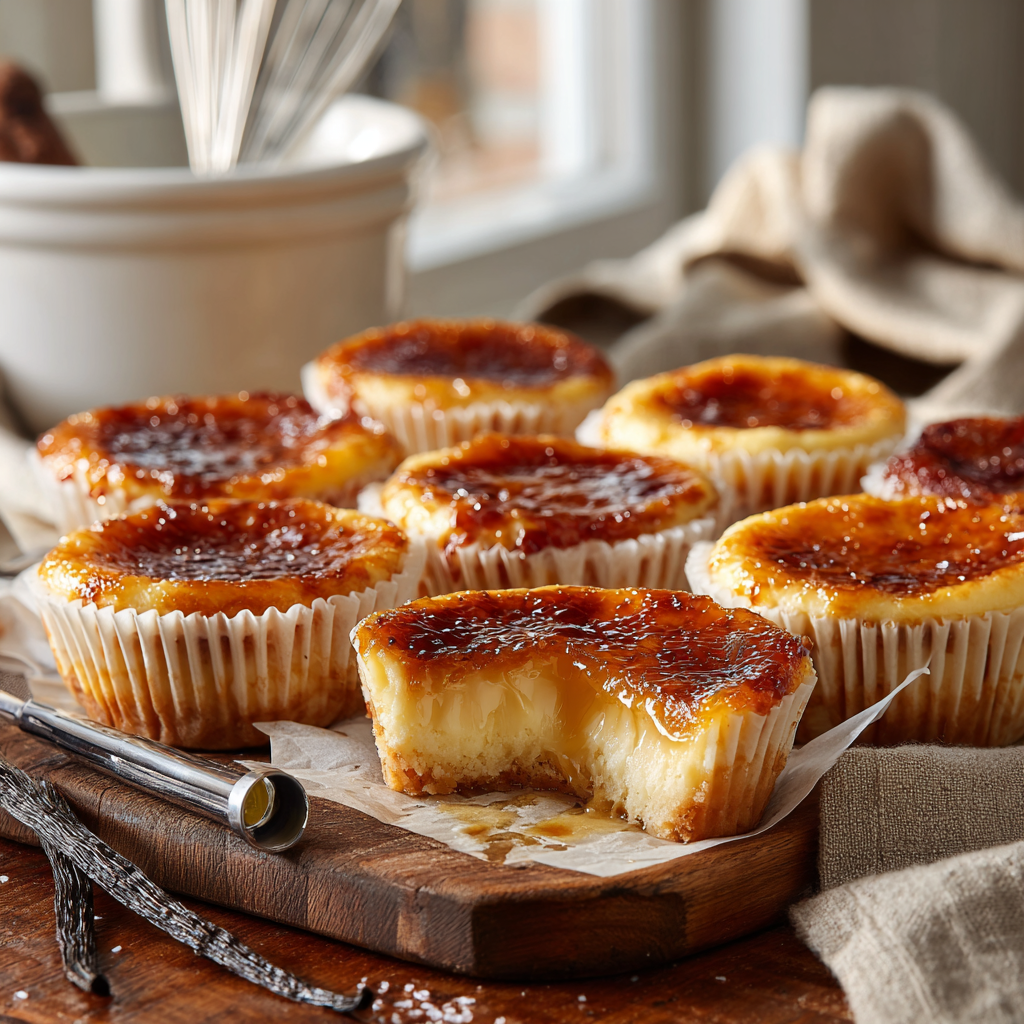
Crème Brûlée Cheesecake Cupcakes are a dessert lover’s dream come true — the perfect fusion between the silky elegance of crème brûlée and the creamy richness of classic cheesecake. Each cupcake-sized treat is topped with a crisp caramelized sugar shell that cracks beautifully with every bite, revealing a luscious, tangy-sweet cheesecake center. They’re elegant enough for dinner parties yet simple enough for a weekend treat.
In this recipe, you’ll learn how to make these indulgent cupcakes step-by-step — from preparing the velvety cheesecake batter to achieving that signature glassy caramel top. No fancy equipment needed, just patience, love, and a small kitchen torch for that finishing touch.
Ingredients
For the Cheesecake Base:
- 1 ½ cups graham cracker crumbs
- ¼ cup melted unsalted butter
- 2 tablespoons granulated sugar
For the Cheesecake Filling:
- 16 oz cream cheese, softened
- ½ cup granulated sugar
- 2 large eggs
- 1 teaspoon vanilla extract
- ½ cup sour cream
- 1 tablespoon all-purpose flour
- Pinch of salt
For the Crème Brûlée Topping:
- ½ cup granulated sugar (for torching)
- Optional: pinch of sea salt or vanilla sugar for extra flavor
Instructions
Step 1: Prepare the Crust
Preheat your oven to 325°F (160°C). Line a muffin tin with paper liners. In a small bowl, mix the graham cracker crumbs, melted butter, and sugar until evenly combined. Spoon about 1 tablespoon of crust mixture into each liner and press down firmly to form the base. Bake for 5 minutes, then let cool.
Step 2: Make the Cheesecake Batter
In a large mixing bowl, beat the softened cream cheese with sugar until smooth and fluffy. Add eggs one at a time, beating well after each addition. Mix in vanilla extract, sour cream, flour, and a pinch of salt. Beat until the mixture is velvety and lump-free.
Step 3: Fill and Bake
Pour the cheesecake filling evenly into the prepared muffin liners, filling each about ¾ full. Tap the pan gently on the counter to release air bubbles. Bake for 18–20 minutes, or until the centers are set but still slightly jiggly. Allow them to cool completely, then refrigerate for at least 2 hours (overnight for best results).
Step 4: Caramelize the Sugar
Once the cheesecakes are chilled, sprinkle about 1 teaspoon of granulated sugar on top of each cupcake. Using a kitchen torch, carefully melt and caramelize the sugar until it forms a crisp golden-brown crust. Let the sugar harden before serving.
Step 5: Serve and Enjoy
Serve your Crème Brûlée Cheesecake Cupcakes chilled, with a cup of coffee or espresso. When you break through that caramel shell, you’ll discover the smooth, decadent cheesecake beneath — creamy, tangy, and lightly sweet.
💡 Pro Tips
- Use full-fat cream cheese for the best texture.
- Chill thoroughly before torching to avoid melting the cheesecake.
- If you don’t have a kitchen torch, you can broil them briefly under high heat — but watch closely!
- Add a few fresh berries on top for color and freshness.
🍮 Why You’ll Love This Recipe
- Combines two iconic desserts into one irresistible bite.
- No water bath needed — just mix, bake, chill, and torch.
- Easy to make ahead for events or gatherings.
- Looks stunning on dessert platters and brunch tables.
🕒 Storage & Make-Ahead
Store leftover cupcakes in an airtight container in the refrigerator for up to 4 days. To restore the caramel crunch, torch a thin new layer of sugar before serving. These also freeze beautifully (without the topping) for up to 2 months.
🥄 Variations
- Salted Caramel Version: Sprinkle a few flakes of sea salt after torching.
- Chocolate Crust Twist: Replace graham crackers with crushed Oreos.
- Espresso Swirl: Add 1 teaspoon instant espresso powder to the batter.
✨ Conclusion
Crème Brûlée Cheesecake Cupcakes offer everything you love about crème brûlée — the delicate crack of sugar and silky smooth custard — reimagined in the form of creamy, handheld cheesecake perfection. Whether you’re impressing guests or treating yourself to a little luxury, this recipe guarantees pure dessert bliss with every bite.