Indulgent No-Bake Chocolate Chip Cookie Dough Cups
Indulgent No-Bake Chocolate Chip Cookie Dough Cups
There is a universal truth known to home bakers everywhere: the cookie dough is often better than the actual cookie. We have all been there, hovering over the mixing bowl, sneaking spoonfuls of buttery, sugary goodness before it hits the oven, risking a slap on the hand or a stern warning about raw eggs. But what if you didn’t have to sneak? What if the dough was the dessert? Enter the Chocolate Chip Cookie Dough Cup.
This recipe takes the nostalgia of licking the spoon and elevates it into a sophisticated, gourmet-style treat that looks like it came from a high-end chocolatier but is made right in your own kitchen. Imagine a thick, crisp shell of high-quality semi-sweet chocolate acting as the perfect vessel for a generous mound of soft, safe-to-eat cookie dough. These cups are the ultimate no-bake dessert, perfect for hot summer days when you can’t bear to turn on the oven, or for holiday gift boxes where you want to impress without the stress of perfect baking times.
In this comprehensive guide, we will walk you through exactly how to make these drool-worthy treats. We will cover everything from the science of heat-treating flour (a crucial safety step!) to choosing the right chocolate for that satisfying “snap.” Whether you are a seasoned baker or a complete novice, these Chocolate Chip Cookie Dough Cups are foolproof, fun, and utterly addictive.
Why You Will Love This Recipe
- No Oven Required: Aside from a quick 2-minute heat treatment for the flour, this is a completely no-bake recipe. It keeps your kitchen cool and your sweet tooth satisfied.
- Safety First: Unlike raw dough from the tube, this recipe uses no eggs and heat-treated flour, making it 100% safe to eat raw. You can indulge without worry.
- Texture Contrast: The magic of this dessert lies in the texture. You get the hard, cold snap of the chocolate shell followed immediately by the soft, yielding, gritty-sweet texture of the brown sugar dough.
- Highly Customizable: While we are using classic chocolate chips, you can easily swap in peanut butter chips, sprinkles, nuts, or dried fruit to match any occasion or holiday.
The Secret to Safe Edible Cookie Dough: Heat-Treating Flour
Before we dive into the ingredients, we need to address the most common question regarding edible cookie dough: “Can I just use raw flour?” The short answer is no. While many people worry about raw eggs (salmonella), raw flour can actually harbor harmful bacteria like E. coli. Because flour is a raw agricultural product, it hasn’t been treated to kill these germs.
To make your flour safe for these cups, you must heat-treat it. This process is simple and takes only minutes, but it is essential for food safety.
Chocolate Chip Cookie Dough Cups
Ingredients
Equipment
Method
- Heat treat the flour: Microwave flour in a bowl for 60-90 seconds until it reaches 160°F. Let cool completely.
- Prepare the cups: Melt the 2 cups of chocolate chips and coconut oil in the microwave in 30-second intervals until smooth.
- Line a muffin tin with paper liners. Spoon 1-2 teaspoons of melted chocolate into each, coating the bottom and halfway up the sides. Freeze for 10 minutes.
- Make the dough: Beat softened butter, brown sugar, and granulated sugar until fluffy (approx 2 mins).
- Add milk, vanilla, and salt. Mix until combined.
- Mix in the cooled flour until a dough forms. Fold in the mini chocolate chips.
- Assemble: Scoop mounds of dough into the hardened chocolate cups. Press down gently.
- Top with extra chocolate chips if desired. Refrigerate for 20 minutes before serving.
Notes
Method 1: The Microwave (Fastest)
Place your flour in a microwave-safe bowl. Microwave on high for 30-second intervals, stirring in between, until the flour reaches a temperature of 160°F (71°C). This usually takes about 1 minute to 1 minute and 30 seconds total.
Method 2: The Oven (Best for Large Batches)
Preheat your oven to 350°F (175°C). Spread the flour onto a rimmed baking sheet lined with parchment paper. Bake for 5-7 minutes. Let it cool completely before using. Pro Tip: Heat-treated flour can sometimes clump up. Always sift your flour after heating it to ensure your cookie dough is smooth and lump-free.
Ingredients Overview
The beauty of this recipe is that it uses pantry staples. Here is what you need to gather to create these masterpieces:
For the Chocolate Shells
- Semi-Sweet Chocolate Chips or Bar: High-quality chocolate melts better. Brands like Ghirardelli or Guittard are excellent choices. You can also use milk chocolate if you have a massive sweet tooth, or dark chocolate (60% cocoa or higher) to balance the sweetness of the dough.
- Coconut Oil: Just a teaspoon or two helps thin the chocolate for easier coating and gives the finished shell a beautiful, glossy shine. It also helps the chocolate harden with a slightly softer bite, so it doesn’t shatter aggressively when you bite into it.
For the Edible Cookie Dough Filling
- Unsalted Butter: Softened to room temperature. Using unsalted allows you to control the sodium level. If you only have salted butter, omit the added salt in the recipe.
- Light Brown Sugar: Packed. This provides that classic caramel/toffee flavor and moisture associated with chocolate chip cookies.
- Granulated Sugar: A small amount adds the necessary grit and sweetness.
- Milk or Heavy Cream: Since there are no eggs, we need liquid to bring the dough together. Cream makes it richer; milk makes it lighter.
- Vanilla Extract: Use pure vanilla extract for the best flavor profile.
- All-Purpose Flour: Heat-treated (as described above) and cooled.
- Salt: Essential to balance the sugar and enhance the chocolate flavor.
- Mini Chocolate Chips: Mini chips are superior for this recipe because they distribute more evenly throughout the small cups. Regular chips can be too bulky for the filling.
Step-by-Step Instructions
Phase 1: Preparing the Chocolate Cups
- Prepare the Pan: Line a standard muffin tin with 12 cupcake liners. If you prefer smaller, bite-sized treats, you can use a mini-muffin tin (this will yield about 24 mini cups).
- Melt the Chocolate: In a microwave-safe bowl, combine 1.5 cups of chocolate chips with 1 tablespoon of coconut oil. Microwave in 30-second intervals, stirring vigorously in between, until completely smooth and glossy. Do not overheat, or the chocolate will seize.
- Create the Base: Spoon about 1 to 2 teaspoons of melted chocolate into the bottom of each muffin liner. Use the back of a spoon or a pastry brush to coat the bottom and push the chocolate halfway up the sides of the liner. You want a thick enough layer to hold the dough, but not so thick that it’s hard to bite.
- Chill: Place the muffin tin in the freezer for 10-15 minutes to let the chocolate set completely. Keep the remaining melted chocolate warm (you may need it later if you want to cap the tops, though the classic style is open-faced).

Phase 2: Making the Cookie Dough
- Cream Butter and Sugars: In a large mixing bowl (or stand mixer fitted with the paddle attachment), beat the softened butter, brown sugar, and granulated sugar together until the mixture is light, fluffy, and pale in color. This usually takes about 2-3 minutes.
- Add Liquids: Mix in the vanilla extract and salt. Slowly add the milk (or cream) one tablespoon at a time. Beat until fully incorporated.
- Add Dry Ingredients: Gradually add the heat-treated, cooled flour. Mix on low speed just until the flour disappears and a dough forms. The texture should look like standard cookie dough. If it is too crumbly, add another teaspoon of milk. If it is too sticky, add a teaspoon of flour.
- Fold in Chips: Gently fold in the mini chocolate chips by hand using a spatula.
Phase 3: Assembly
- Fill the Cups: Remove the muffin tin from the freezer. Using a small cookie scoop or a spoon, roll balls of cookie dough and place them into the hardened chocolate cups. Press down gently to adhere the dough to the chocolate base.
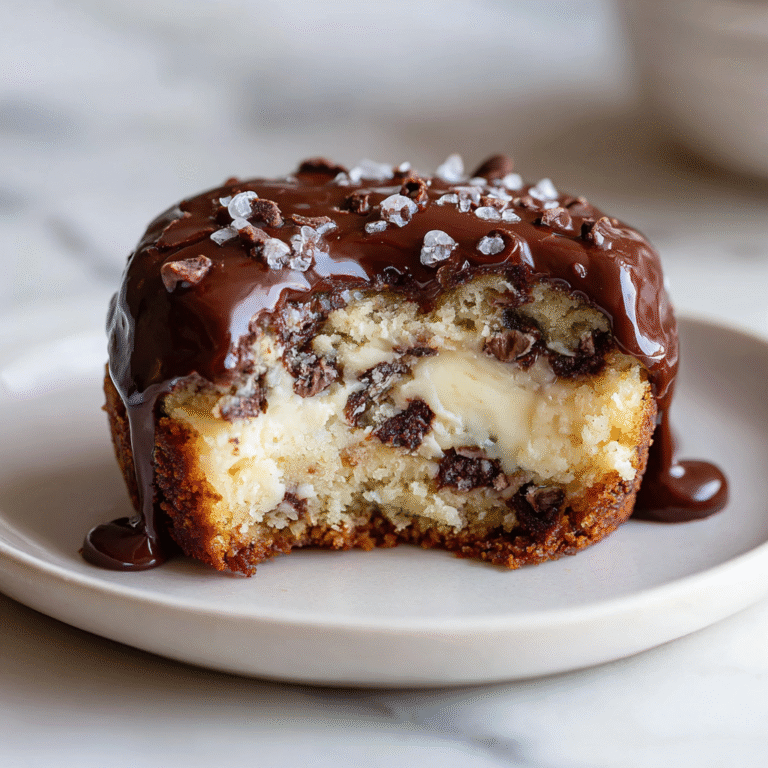
- Top It Off: For the look in the photo, you want the dough to be mounded high above the rim of the chocolate cup. Press a few extra chocolate chips onto the top of the dough for visual appeal.
- Final Chill: Place the cups back in the refrigerator for at least 20 minutes to firm up the dough and ensure the chocolate is crisp.
- Serve: Peel away the paper liners and enjoy!
Expert Tips for Success
Temperature Matters: Ensure your heat-treated flour is completely cool before adding it to the butter mixture. If the flour is hot, it will melt the butter, resulting in a greasy, runny dough rather than a fluffy one.
The “Snap” Factor: If you want a more professional, shiny finish to your chocolate (and you have the time), consider tempering your chocolate instead of just melting it with coconut oil. Tempered chocolate is stable at room temperature and has a sharper snap. However, for a quick home treat, the coconut oil method is perfectly delicious.
Portion Control: These are rich! Using a mini-muffin tin is often the better route for parties, as a full-sized muffin cup of cookie dough can be a heavy dessert for one person.
Variations to Try
Once you master the base recipe, the sky is the limit. Try these fun twists:
- Peanut Butter Lover: Swap half the butter in the dough for creamy peanut butter. Use peanut butter chips instead of chocolate chips.
- Birthday Cake: Omit the chocolate chips and use white chocolate chips and rainbow sprinkles in the dough. Use white chocolate for the outer cup shell.
- Double Chocolate: Add 2 tablespoons of cocoa powder to the flour mixture for a dark chocolate dough base.
- S’mores: Mix mini marshmallows and graham cracker crumbs into the dough.
- Salted Caramel: Drizzle caramel sauce over the dough before chilling and top with flakey sea salt.
Storage and Freezing
Refrigerator: Store leftover Cookie Dough Cups in an airtight container in the fridge for up to 1 week. The chocolate may “sweat” slightly if your kitchen is humid, but they will taste perfect.
Freezer: These treats freeze exceptionally well. Place them in a freezer-safe bag or container and freeze for up to 3 months. You can eat them frozen (the dough won’t freeze rock-hard due to the sugar content) or let them thaw on the counter for 10 minutes before eating.
Common Questions (FAQ)
Q: Can I use almond flour?
A: Yes! You can substitute the all-purpose flour with almond flour for a gluten-free version. Almond flour is safe to eat raw, so you can skip the heat-treating step, though toasting it slightly adds great flavor.
Q: Why is my chocolate shell melting in my hands?
A: If you used coconut oil, the melting point of the chocolate is lower. These are best kept chilled until right before serving. If you need them to sit out at a party, use candy melts or tempered chocolate which are more stable.
Q: Can I bake these?
A: No. Because there are no eggs and no leavening agents like baking soda (in the amounts needed for rising), baking these would result in a puddle of butter and sugar inside a burnt chocolate cup. Enjoy them raw!
Whether you are making these for a movie night, a potluck, or just a Tuesday night craving, these Chocolate Chip Cookie Dough Cups satisfy that primal urge for raw dough in the most elegant way possible. Happy “no-baking”!