Salted Caramel Butter Bars
Irresistible Salted Caramel Butter Bars: The Ultimate Gooey Indulgence
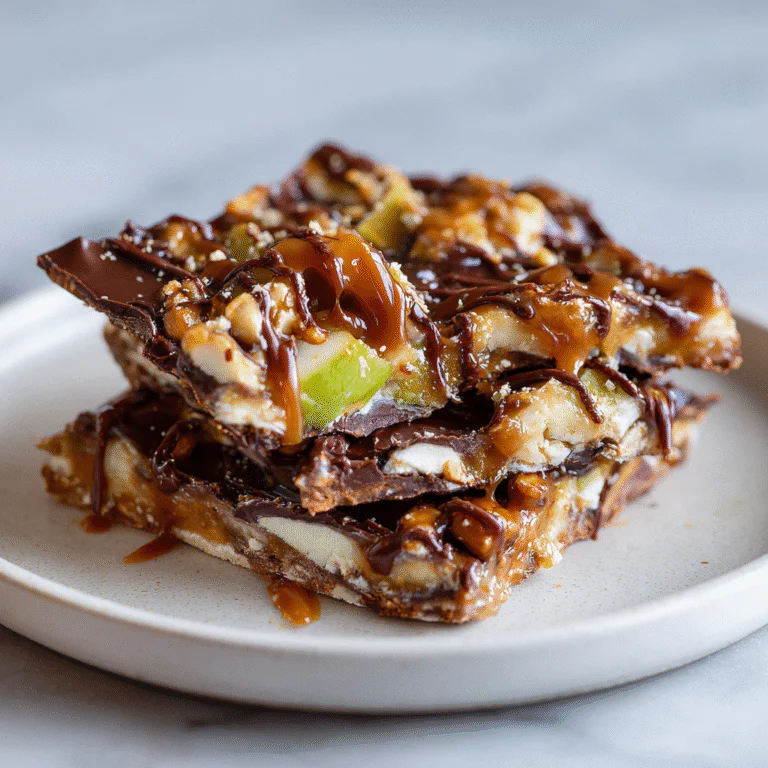
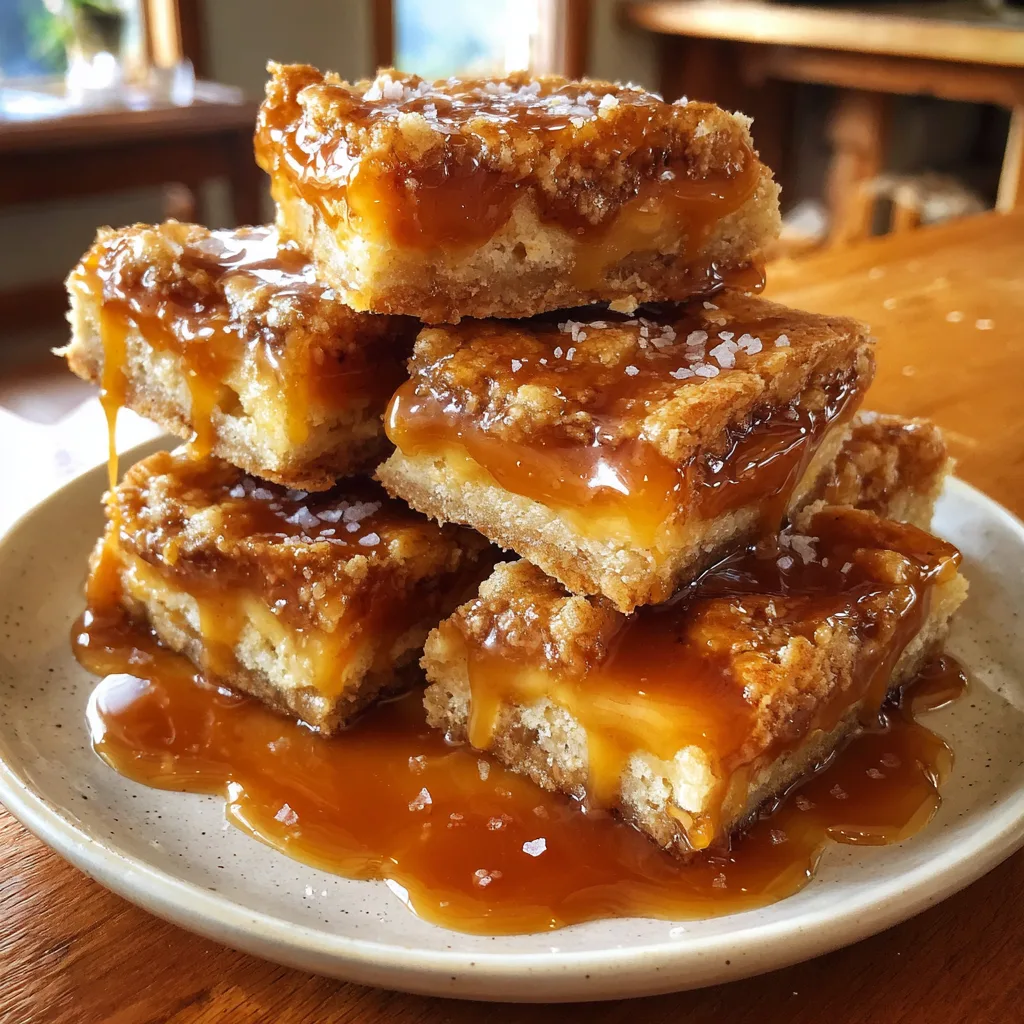
If there is one language that is universally understood, it is the language of butter and sugar. Specifically, the combination of a tender, melt-in-your-mouth shortbread crust and a thick, gooey layer of salted caramel. These Irresistible Salted Caramel Butter Bars are not just a dessert; they are a textural masterpiece. Imagine the crunch of a buttery cookie base, followed immediately by the chew of rich amber caramel, all finished with the sharp, savory bite of flaky sea salt. It is a flavor profile that hits every single pleasure point on the palate.
These bars are the answer to the question, “What should I bring to the potluck that will make everyone ask for the recipe?” They are deceptively easy to make, requiring no fancy equipment—just a bowl, a mixer, and a pan. Unlike complex layer cakes or finicky pastries, these bars are forgiving, rustic, and designed to look messy and delicious. The “butter” in the title is no accident; the richness here is unapologetic. It is the kind of treat where one square satisfies you, but you will inevitably reach for a second.
In this comprehensive guide, we are going to break down the secrets to achieving that perfect “gooey but stable” consistency, how to prevent your caramel from burning, and why the type of salt you use actually matters. Get your apron ready; your kitchen is about to smell like a caramel factory.
The Magic of the “Butter Bar”
The term “butter bar” often refers to St. Louis-style gooey butter cake, but in the context of this recipe, it refers to the high ratio of butter in the shortbread dough. This dough does double duty: it serves as the sturdy base and the crumble topping.
What makes this specific recipe “irresistible” is the contrast. Sweet desserts can often be one-note, simply tasting of sugar. By introducing a heavy hand of butter and a generous sprinkling of sea salt, we create complexity. The salt doesn’t just make things salty; it suppresses the bitterness of the caramelization and enhances the sweetness, making the caramel taste more like caramel than just burnt sugar.
Why You Will Love This Recipe
- Double Duty Dough: You only have to make one dough mixture. Two-thirds get pressed into the pan for the base, and the rest is crumbled on top. It saves time and cleanup.
- Scalable: This recipe fits perfectly in a 9×13 pan for a crowd, or can be halved for an 8×8 pan for a smaller family treat.
- Texture Heaven: The interplay between the crisp, sandy shortbread and the sticky, elastic caramel is undeniably satisfying.
- Make-Ahead Friendly: These bars actually taste better the next day after the caramel has had time to set and the flavors have melded.
Ingredients Overview
The beauty of this recipe lies in its simplicity. You likely have most of these ingredients in your pantry right now.
Irresistible Salted Caramel Butter Bars
Ingredients
Equipment
Method
- Preheat oven to 325°F (163°C). Line a 9×13 baking pan with parchment paper and grease lightly.
- In a large bowl, cream together softened butter, granulated sugar, and powdered sugar until smooth.
- Mix in 1 tablespoon vanilla extract. Gradually add flour and mix until a soft dough forms.
- Press 2/3 of the dough into the bottom of the prepared pan. Refrigerate the remaining 1/3 dough.
- Bake the crust for 20 minutes until edges are barely golden.
- While crust bakes, combine caramels and heavy cream in a microwave-safe bowl. Microwave in 30-second intervals, stirring until smooth.
- Stir vanilla into the caramel. Pour over the hot crust. Sprinkle with half the flaky sea salt.
- Crumble the reserved refrigerated dough over the caramel layer.
- Bake for another 25-30 minutes until topping is golden brown. Sprinkle with remaining sea salt immediately.
- Cool completely in pan before cutting into squares.
Notes
For the Shortbread Base & Topping:
- Unsalted Butter (2 cups / 450g): Yes, that is four sticks. It needs to be softened to room temperature so it creams easily with the sugar. Do not use margarine; the water content is too high and will make the bars soggy.
- Granulated White Sugar (1 cup / 200g): Sweetens the shortbread and helps create a crisp texture.
- Powdered Sugar (1 ½ cups / 180g): Also known as confectioners’ sugar. This contains a small amount of cornstarch which helps keep the shortbread tender and “melt-in-your-mouth” rather than hard.
- Vanilla Extract (1 tbsp): Use pure vanilla extract for the best flavor.
- All-Purpose Flour (4 cups / 500g): The structural backbone. Measure by spooning and leveling to avoid packing it down, which leads to dry bars.
For the Caramel Filling:
- Soft Caramels (1 bag / 11 oz / 310g): You can use Kraft caramels or similar melting caramel squares. Unwrap them before use.
- Heavy Cream (⅓ cup / 80ml): This thins the caramel just enough so it stays soft even after baking.
- Vanilla Extract (1 tsp): Enhances the caramel flavor.
- Flaky Sea Salt (1 tbsp): Maldon salt or fleur de sel is ideal. Do not use table salt for the topping—it is too harsh and salty. You want the crunch and the burst of salinity that only flakes provide.
Instructions
Follow these steps for the perfect golden bars.
Step 1: Preparation
- Preheat your oven to 325°F (163°C). This lower temperature ensures the thick shortbread bakes through without burning the bottom.
- Line a 9×13 inch baking pan with parchment paper or aluminum foil. Leave an overhang on the sides so you can easily lift the bars out later. Spray the lining lightly with non-stick cooking spray.
Step 2: Make the Shortbread Dough
- In a large mixing bowl or stand mixer fitted with the paddle attachment, cream together the softened butter, granulated sugar, and powdered sugar until smooth and creamy. You don’t need to whip it until fluffy, just until well combined.
- Mix in the vanilla extract.
- Gradually add the flour on low speed. Mix until a soft dough forms. It might look crumbly at first, but keep mixing until it comes together.
Step 3: The Base Layer
- Take about two-thirds of the dough and press it evenly into the bottom of your prepared pan. You can use the bottom of a measuring cup to press it down firmly to create a flat surface.
- Place the pan in the preheated oven and bake for 20 minutes. The edges should be barely golden.
- While the base bakes, place the remaining one-third of the dough in the fridge. Chilling it makes it easier to crumble later.
Step 4: The Caramel Layer
- While the crust is baking, prepare the filling. In a microwave-safe bowl, combine the unwrapped caramels and the heavy cream.
- Microwave in 30-second intervals, stirring vigorously in between, until the mixture is completely smooth and melted. This usually takes about 2–3 minutes total.
- Stir in the vanilla extract.
- Remove the crust from the oven (keep the oven on). Pour the hot caramel mixture over the hot crust, spreading it to within ¼ inch of the edges. Leaving a small gap helps prevent the caramel from bubbling over and sticking to the foil.
- Sprinkle roughly half of your flaky sea salt over the caramel layer now.
Step 5: The Topping and Final Bake
- Take the chilled reserved dough from the fridge. Crumble it into small pieces with your fingers and scatter it evenly over the caramel layer. You want some caramel peeking through.
- Return the pan to the oven and bake for another 25–30 minutes. The top crumbles should be golden brown, and the caramel should be bubbling.
- Remove from the oven and immediately sprinkle the remaining flaky sea salt over the top while the caramel is still molten.
Step 6: The Hardest Part (Waiting)
- Allow the bars to cool completely in the pan on a wire rack. This is non-negotiable. If you cut them while warm, the caramel will run everywhere, and the bars will fall apart.
- For the cleanest cuts, refrigerate the pan for an hour once it has reached room temperature.
- Lift the bars out using the parchment overhang, place on a cutting board, and cut into squares.
Tips for Perfection
Use Quality Butter: Since butter is the primary flavor carrier in the shortbread, use a brand you enjoy eating. European-style butters with higher fat content work exceptionally well here.
Don’t Skimp on the Parchment: Caramel is notoriously sticky. If you bake this directly in a greased pan without parchment, you may never get the bars out intact. The “sling” method (parchment overhanging two sides) is a lifesaver.
Customizing the Caramel: If you prefer to make your own caramel sauce from scratch using sugar, butter, and cream, you absolutely can. Just ensure you cook it to the “soft ball” stage so it sets up firmly enough to be sliced. However, the melted caramel method listed above is foolproof and guarantees the perfect consistency.
The Salt Factor: If you only have fine table salt, mix ½ teaspoon into the dough and ¼ teaspoon into the caramel sauce, but skip the sprinkling on top. Table salt is too salty and lacks the texture required for the garnish.
Variations
Once you master the base recipe, try these twists:
Turtle Bars: Sprinkle ½ cup of chopped pecans and ½ cup of chocolate chips over the caramel layer before adding the crumb topping.
Espresso Caramel: Add 1 teaspoon of instant espresso powder to the heavy cream before melting it with the caramels. This adds a sophisticated coffee depth that cuts the sweetness.
Spiced: Add ½ teaspoon of cinnamon to the flour mixture for a Snickerdoodle-style crust.
Storage and Freezing
These bars store beautifully, making them great for gifting.
- Room Temperature: Store in an airtight container for up to 3 days. If it’s hot in your kitchen, the caramel may get soft, so keep them in a cool spot.
- Refrigerator: Store for up to 1 week. Let them sit at room temperature for 15 minutes before eating to soften the caramel slightly.
- Freezer: Wrap individual bars in plastic wrap and then place them in a ziplock bag. Freeze for up to 3 months. Thaw on the counter for an hour before serving.
Nutritional Note
These bars are rich. There is no getting around it. They are high in sugar and fats, which is exactly what makes them so delicious. One small square is usually enough to satisfy a craving. Serve them alongside fresh berries or a strong cup of black coffee to balance the richness.
Frequently Asked Questions
Why is my crust crumbly?
If your dough was too dry, it won’t hold together. This usually happens if there was too much flour (packed into the cup). You can add a tablespoon of milk to help bind it if it looks like sand.
Can I use salted butter?
Yes. If you use salted butter, omit the extra pinch of salt in the dough, but still use the flaky salt on top for the texture and flavor pop.
My caramel is too hard to bite!
This means the caramel was overcooked or didn’t have enough cream. If using the melting method, ensure you added the heavy cream. If you made homemade caramel, you likely took the temperature too high.
Enjoy baking these Irresistible Salted Caramel Butter Bars! They are a true crowd-pleaser and a testament to the power of simple, high-quality ingredients coming together to create something magical.