Salted Caramel Skillet Brownie Sundae
There are desserts that are simply “good,” and then there are desserts that stop conversation, widen eyes, and create memories. This Salted Caramel Skillet Brownie Sundae falls squarely into the latter category. Imagine the edges of a chewy, crisp brownie, but with a center that remains impossibly fudgy and molten, all kept warm by the heat retention of a cast-iron skillet. Now, top that with the thermal contrast of cold, creamy vanilla bean ice cream and a drizzle of rich hot fudge and salted caramel. It isn’t just a recipe; it is a sensory experience.
If you have been searching for the perfect dessert to end a dinner party, a romantic date night, or simply a cozy Friday evening in, look no further. This “Pizookie” style dessert (a pizza-cookie hybrid) combines the ease of a one-bowl batter with the sophisticated presentation of restaurant-quality sweets.
In this comprehensive guide, we will walk through exactly how to achieve that perfect crackly top, the science behind baking in cast iron, and why sea salt is the secret weapon that elevates chocolate to new heights.
Why Cast Iron Changes the Game 🍳
You might be wondering, “Can’t I just bake this in a regular cake pan?” Technically, yes. But spiritually? No. The magic of this recipe relies heavily on the vessel in which it is cooked: the cast iron skillet.
Cast iron is famous for its heat retention. When you bake a brownie batter in a pre-heated or room-temperature skillet, the edges crisp up beautifully because the iron gets hot and stays hot. This creates a delightful crust—almost like the edge of a chewy cookie—while the heat slowly penetrates the center.
Because the pan stays warm long after you pull it from the oven, serving the dessert directly in the skillet keeps the brownie warm while you eat it. This warmth interacts with the ice cream, melting it slowly into a crème anglaise-like sauce that mingles with the chocolate. It is a textural interplay that a standard glass baking dish simply cannot replicate.
The Secret to the “Fudgy” Texture
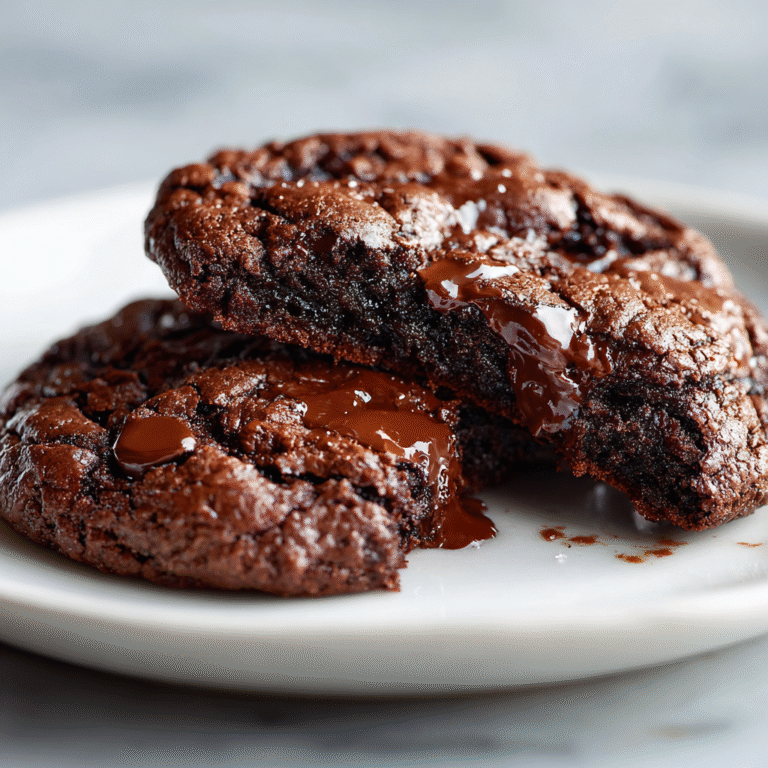
The debate between cakey brownies and fudgy brownies is eternal, but for a skillet sundae, fudgy is the only way to go. A cakey texture will dry out too quickly when served hot. To achieve that dense, decadent texture seen in the photos, we rely on a high fat-to-flour ratio.
We use melted butter rather than creamed butter. Creaming butter introduces air, which leads to lift and a cake-like crumb. Melted butter, however, ensures density. Furthermore, we rely heavily on brown sugar. The molasses content in brown sugar adds moisture and chewiness that white sugar alone cannot provide.
Ingredients
Here is everything you need to assemble this decadent treat. We focus on quality basics to create a luxurious result.
Ultimate Salted Caramel Skillet Brownie
Ingredients
Equipment
Method
- Preheat oven to 350°F (175°C). Lightly grease a 10-inch cast iron skillet.
- In a medium bowl, whisk melted butter and sugar until smooth.
- Add eggs and vanilla extract, beating well until combined.
- Stir in flour, cocoa powder, and salt until just combined. Fold in chocolate chips.
- Pour batter into the skillet and spread evenly.
- Bake for 20-25 minutes. The center should still be slightly soft.
- Remove from oven and let cool for 5 minutes.
- Top with generous scoops of vanilla ice cream, hot fudge sauce, and sea salt. Serve warm immediately.
Notes
- — Unsalted Butter (Melted and slightly cooled)
- — Granulated Sugar (For the crackly top)
- — Light Brown Sugar (Packed, for moisture and chew)
- — Large Eggs (Room temperature is best)
- — Pure Vanilla Extract (Don’t skimp on this!)
- — All-Purpose Flour (Measured correctly)
- — Unsweetened Cocoa Powder (Dutch-processed serves best for a darker color)
- — Salt (To balance the sweet)
- — Semi-Sweet Chocolate Chips or Chunks (For pools of melted chocolate)
- — Vanilla Bean Ice Cream (For topping)
- — Hot Fudge Sauce (Homemade or high-quality store-bought)
- — Flaky Sea Salt (The finishing touch, like Maldon)
Instructions
Follow these numbered steps for a foolproof molten brownie skillet.
- Preheat and Prep: Preheat your oven to 350°F (175°C). Lightly grease a 10-inch cast-iron skillet with a little butter or cooking spray.
- Mix Wet Ingredients: In a large mixing bowl, whisk together the melted warm butter, granulated sugar, and brown sugar vigorously. You want to whisk for about 2 minutes until the mixture looks glossy; this helps create that shiny crust.
- Add Eggs and Vanilla: Beat in the eggs one at a time, followed by the vanilla extract. Whisk until fully combined and smooth.
- Incorporate Dry Ingredients: Sift the flour, cocoa powder, and salt directly into the wet ingredients. Using a spatula, gently fold the dry ingredients into the wet. Do not overmix! Stop as soon as the flour streaks disappear.
- Add Chocolate: Fold in 3/4 cup of the chocolate chips. Reserve the rest for the top.
- Transfer to Skillet: Pour the batter into the prepared skillet and spread it into an even layer. Sprinkle the remaining chocolate chips on top.
- Bake: Bake for 22–28 minutes. Crucial Step: The center should still be slightly jiggly! A toothpick inserted into the edge should come out clean, but the center should look slightly underdone. It will continue to cook in the hot pan.
- Cool Slightly: Let the skillet sit for 5–10 minutes. This allows the brownie to set just enough to hold the ice cream without collapsing immediately.
- Assemble the Sundae: While warm, top with two or three large scoops of vanilla ice cream. Drizzle generously with hot fudge sauce and caramel sauce.
- Garnish: Sprinkle flaky sea salt over the chocolate and ice cream. Serve immediately with spoons for everyone to share.

Choosing the Right Cocoa Powder 🍫
You may notice the deep, dark color of the brownie in the image. This is often achieved using Dutch-process cocoa powder. Unlike natural cocoa powder, which is acidic and lighter in color, Dutch-process cocoa has been treated with an alkalizing agent to neutralize the acidity.
This process gives the cocoa a smoother, mellower flavor and a significantly darker, richer color. If you only have natural cocoa powder (like standard Hershey’s), the recipe will still work perfectly, but your brownie will be lighter brown and have a slightly tangier chocolate profile.
The Art of the Topping: Thermal Shock
The “Thermal Shock” is a culinary term often used to describe the pleasant sensation of eating hot and cold food simultaneously. In this dish, it is the star of the show.
To maximize this experience, ensure your ice cream is very cold and hard when you scoop it. If the ice cream is already soft, it will turn into soup the moment it hits the hot brownie. You want the ice cream to hold its shape for the first few minutes of serving, allowing the eater to get a spoonful that contains hot cake, cold solid cream, and warm sauce.
Top Tip: Pre-scoop your ice cream balls and freeze them on a plate for 30 minutes before serving. This hardens the outer shell of the ice cream, giving you more time to present the dish at the table before the “melt-down” begins.
Variations to Try
While the classic chocolate and vanilla combo is unbeatable, here are a few ways to twist this recipe:
- The Peanut Butter Lover: Swirl a ¼ cup of creamy peanut butter into the batter before baking. Top with peanut butter cup ice cream and chopped roasted peanuts.
- S’mores Skillet: In the last 2 minutes of baking, top the skillet with large marshmallows and broil until toasted. Sprinkle with graham cracker crumbs.
- Salted Caramel Pecan: Mix chopped pecans into the batter. Top with butter pecan ice cream and double the salted caramel drizzle.
- Berry Dark Chocolate: Add fresh raspberries to the batter (they cut the richness). Serve with strawberry ice cream and shavings of dark chocolate.
Storage and Reheating
If, by some miracle, you have leftovers, this skillet brownie stores surprisingly well. However, do not store it with the ice cream on top (it will make the brownie soggy).
To Store: Scoop the remaining brownie out of the skillet and into an airtight container. Keep at room temperature for up to 3 days or in the fridge for 5 days.
To Reheat: This is essential. The brownie is meant to be eaten warm. Microwave a portion for 15-20 seconds until the chocolate chips are melty again. If you want to crisp the edges back up, pop it in a toaster oven or air fryer at 300°F for 3 minutes.
Conclusion
The Salted Caramel Skillet Brownie is more than just a dessert; it’s a centerpiece. It brings people together, grabbing spoons and fighting over the gooey center bite or the crusty edge piece. It’s rustic, unpretentious, yet undeniably elegant in its decadence.
Whether you are a novice baker or a seasoned pro, the forgiveness of the cast iron pan makes this a low-stress recipe with a high-reward payout. So, grab your skillet, melt that butter, and prepare for a chocolate coma that is absolutely worth it.