The Ultimate Guide to Making Orange Creamsicle Truffles
There is something undeniably magical about the combination of bright, zesty orange and smooth, creamy vanilla. It is a flavor pairing that instantly transports many of us back to warm summer days, chasing the local ice cream truck down the neighborhood street just to get our hands on that iconic frozen treat on a stick. Today, we are capturing that exact nostalgic essence and elevating it into a bite-sized, decadent, and incredibly easy-to-make dessert: Orange Creamsicle Truffles. If you have been searching for a dessert that is visually stunning, packed with flavor, and requires absolutely no baking, you have found your new favorite recipe.
These truffles feature a rich, melt-in-your-mouth white chocolate and cream cheese center infused with the perfect amount of pure orange extract and fresh zest. This creamy core is then enrobed in a vibrant, sweet orange candy coating that provides a satisfying snap before giving way to the luscious filling. Whether you are preparing for a summer barbecue, a baby shower, a holiday cookie exchange, or simply satisfying a midnight sweet tooth, these Orange Creamsicle Truffles are guaranteed to be the star of the dessert table.
Why You Will Completely Fall in Love With This Recipe
If the striking bright orange color and the promise of childhood nostalgia aren’t enough to convince you, there are countless functional reasons why this recipe is an absolute must-try for home cooks of all skill levels.
First and foremost, this is a completely no-bake dessert. During the hot months when you cannot fathom turning on your oven, or during the busy holiday season when oven space is at a premium, no-bake recipes are a lifesaver. You only need a microwave to melt the chocolate and candy coatings, and your refrigerator does the rest of the heavy lifting.
Secondly, these truffles are highly customizable. While the classic creamsicle flavor is the star here, the base recipe is incredibly versatile. You can easily scale this recipe up to feed a massive crowd, or halve it for a small weekend treat. Furthermore, they are fantastic for making ahead of time. In fact, these truffles often taste better on the second or third day, as the orange zest and vanilla flavors have time to beautifully meld together inside the creamy white chocolate ganache center.

Key Ingredients You Will Need
To achieve the perfect texture and flavor, it is important to gather high-quality ingredients. Here is exactly what you need to create these little bites of sunshine:
- – 8 oz Cream Cheese (Full-fat, softened to room temperature for smooth blending)
- – 1/4 cup Powdered Sugar (Sifted to prevent any unwanted lumps in your filling)
- – 1 teaspoon Pure Vanilla Extract (To provide that classic ice cream interior flavor)
- – 1 teaspoon Pure Orange Extract (For a concentrated burst of citrus)
- – 1 tablespoon Fresh Orange Zest (Adds natural oils and a slight tartness to balance the sweet)
- – 2 cups High-Quality White Chocolate Chips (Used for the structure and sweetness of the truffle filling)
- – 12 oz Orange Candy Melts (For the smooth, snappy, vibrant outer shell)
- – 1 tablespoon Coconut Oil (Optional, but helps thin the candy melts for an easier, smoother dipping experience)
- – White and Yellow Sprinkles or sanding sugar (For the final decorative garnish)
Detailed Step-by-Step Instructions
Follow these simple steps to achieve truffle perfection. Remember, patience during the chilling process is the key to perfectly round, easily dippable truffles.
- Prepare your workspace: Line a large baking sheet with parchment paper or a silicone baking mat. Set this aside, as it will be the resting place for your rolled and dipped truffles.
- Melt the white chocolate: Place the white chocolate chips in a microwave-safe bowl. Heat in the microwave at 50% power in 30-second increments. Stir vigorously after each interval until the chocolate is completely smooth and melted. Set aside to cool slightly.
- Mix the creamy base: In a medium mixing bowl, use an electric hand mixer or a stand mixer to beat the softened cream cheese until it is light, fluffy, and completely free of lumps. This usually takes about 2 minutes on medium speed.
- Combine the flavors: Add the sifted powdered sugar, vanilla extract, orange extract, and fresh orange zest to the cream cheese. Beat again on low speed until everything is well incorporated.
- Fold in the chocolate: Pour the slightly cooled, melted white chocolate into the cream cheese mixture. Using a rubber spatula, gently fold the mixture together until you have a uniform, thick truffle batter.
- First Chill: Cover the bowl tightly with plastic wrap and place it in the refrigerator for at least 2 hours. The mixture needs to be firm enough to scoop and roll into balls without sticking excessively to your hands.
- Roll the truffles: Once chilled, use a small cookie scoop or a melon baller to portion out the mixture. Roll each portion between your palms to form a smooth, 1-inch ball. Place the rolled balls onto your prepared baking sheet.
- Second Chill: Place the baking sheet with the rolled truffles into the freezer for 30 minutes. Firm truffles are much easier to dip in warm candy melts without losing their shape or melting into the bowl.
- Prepare the outer coating: In a deep, microwave-safe bowl or measuring cup, melt the orange candy melts. Heat them in 30-second bursts at 50% power, stirring in between. If the melts seem too thick, stir in the coconut oil to thin it out to a silky, dipping consistency.
- Dip the truffles: Remove the truffles from the freezer. Using a dipping tool or a simple fork, submerge one truffle at a time into the melted orange coating. Tap the fork gently against the side of the bowl to allow excess coating to drip off, then carefully slide the coated truffle back onto the parchment paper.
- Garnish immediately: Before the candy coating sets (which happens quickly on the cold truffles!), sprinkle the tops with your white and yellow sprinkles or extra orange zest.
- Final Set: Allow the coated truffles to sit at room temperature for about 15 minutes, or until the orange shell has completely hardened. Serve and enjoy!
Orange Creamsicle Truffles
Ingredients
Equipment
Method
- Line a baking sheet with parchment paper and set aside.
- In a microwave-safe bowl, melt the white chocolate chips in 30-second increments at 50% power, stirring until smooth. Set aside to cool slightly.
- In a medium bowl, use an electric mixer to beat the softened cream cheese until smooth and fluffy.
- Add the powdered sugar, vanilla extract, orange extract, and orange zest to the cream cheese. Mix until well combined.
- Gently fold the melted white chocolate into the cream cheese mixture until completely incorporated.
- Cover the bowl and chill in the refrigerator for at least 2 hours until firm enough to roll.
- Scoop out the chilled mixture and roll into 1-inch balls. Place them on the prepared baking sheet.
- Place the baking sheet with the rolled truffles into the freezer for 30 minutes to firm up.
- Melt the orange candy melts (with coconut oil, if using) in the microwave in 30-second intervals until smooth.
- Dip each chilled truffle into the melted orange coating, tapping off the excess, and place back on the parchment paper.
- Immediately garnish with sprinkles or extra zest before the candy shell sets.
- Allow to set completely at room temperature before serving or storing in the refrigerator.
Notes
Expert Tips for the Perfect Truffle
Making truffles at home is straightforward, but there are a few culinary secrets that can elevate your final product from good to bakery-quality.
Room Temperature Ingredients: Ensuring your cream cheese is completely at room temperature is non-negotiable. If it is too cold, it will not blend smoothly with the melted white chocolate, leading to a lumpy filling instead of a silky, velvety center.
Melting Chocolate Correctly: White chocolate is notoriously finicky and prone to seizing if it gets too hot or comes into contact with water. Always melt it slowly on half power. If you prefer to avoid the microwave, use a double boiler on the stove over low, simmering heat, ensuring the bottom of the bowl does not touch the water.
The Art of Dipping: When dipping your chilled truffles, use a fork rather than a spoon. A spoon will trap a pool of thick candy coating at the bottom of your truffle, creating an unappealing “foot.” A fork allows the excess to drip gracefully back into the bowl. Additionally, if your candy melts start to cool and thicken while you are dipping, just pop the bowl back into the microwave for 10 to 15 seconds to loosen it up again.
Flavor Variations and Customizations
Once you master this basic recipe, you can use the same technique to create a whole rainbow of dessert shop-worthy treats.
Lemon Meringue Truffles: Swap the orange extract for lemon extract, use lemon zest, and coat the truffles in bright yellow candy melts. Top with crushed graham crackers for a pie-like finish.
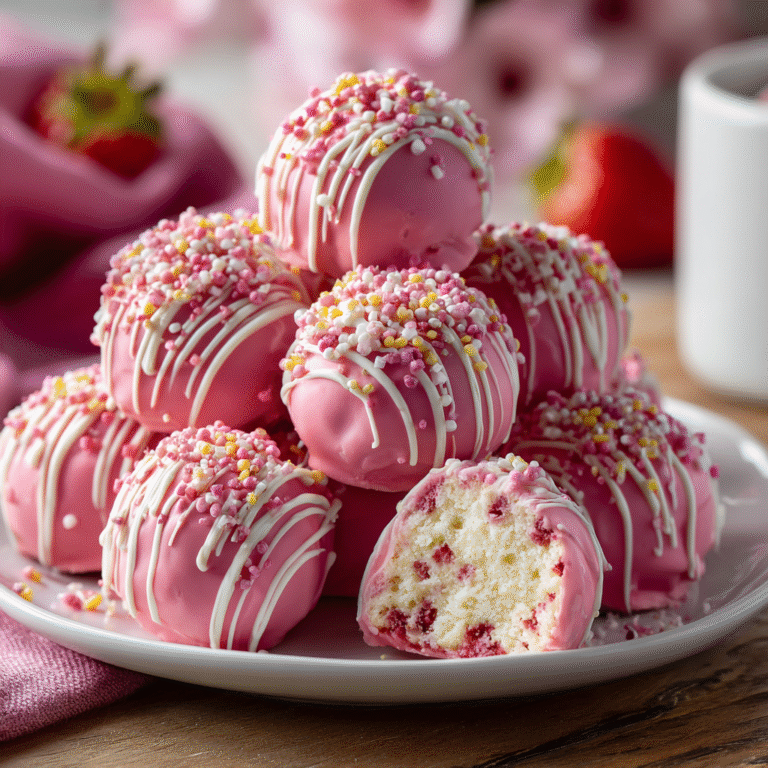
Strawberry Creamsicle: Use strawberry extract and freeze-dried strawberry powder in the center mixture. Coat in pink candy melts for a lovely springtime treat.
Dark Chocolate Orange: If you find white chocolate and candy melts too sweet, you can coat these orange-infused centers in a high-quality, rich dark chocolate (60% cacao or higher). The bitterness of the dark chocolate pairs magnificently with the sweet citrus interior, creating a more mature, sophisticated flavor profile.
Serving Suggestions and Presentation
Because these truffles are so visually striking, presentation is half the fun. Serve them piled high on a vintage platter or a bright, patterned plate to contrast the vivid orange color. They look beautiful placed inside individual mini cupcake liners, which also makes them easier for guests to pick up at a party without smudging the glossy candy shell.
If you are hosting a summer garden party, consider serving these alongside a tray of fresh citrus wedges and a pitcher of homemade iced tea. The crispness of the tea cuts through the rich, creamy sweetness of the truffle perfectly.
How to Store and Freeze Your Truffles
Because these truffles contain cream cheese, they must be stored properly to maintain freshness and food safety.
Refrigerator: Store the finished, completely set truffles in an airtight container in the refrigerator for up to two weeks. The candy shell acts as a protective barrier, keeping the soft interior perfectly moist. Let them sit at room temperature for about 5-10 minutes before eating for the best texture.
Freezer: These freeze exceptionally well! Place them in a single layer in a freezer-safe, airtight container. Separate layers with parchment paper if you need to stack them. They will keep in the freezer for up to 3 months. When you are ready to enjoy them, simply transfer the container to the refrigerator overnight to thaw gently. Do not thaw them rapidly at room temperature, as this can cause condensation to build up on the candy coating, making them sticky and ruining their beautiful glossy finish.
Fun Facts About the Creamsicle
Did you know that the original concept of putting ice cream on a stick was patented by Frank Epperson in 1923? He originally invented the Popsicle (a fruit juice ice pop) and later, the brand expanded to include the “Creamsicle,” which featured a vanilla ice cream core coated in a layer of frozen fruit juice, most famously orange. The flavor combination has since become an iconic piece of American culinary pop culture, inspiring everything from sodas and cocktails to cakes and, of course, these delightful homemade truffles.
Frequently Asked Questions
Can I use real orange juice instead of orange extract?
It is not recommended. The truffle filling requires a thick, stable consistency to roll into balls. Adding fresh orange juice introduces too much liquid, which will make the ganache too soft to hold its shape. Pure orange extract provides a potent burst of flavor without altering the structural integrity of the dessert.
What if I can’t find orange candy melts?
If you cannot find pre-colored orange candy melts, you can use regular white chocolate or white candy melts and dye them yourself. However, you MUST use oil-based candy coloring. Standard liquid food coloring is water-based and will immediately cause the melted chocolate or candy coating to seize into a hard, unusable lump.
Why are my truffles cracking out of the freezer?
If you leave the truffles in the freezer for too long, they will expand slightly as they freeze completely. Then, when you dip them in the warm candy coating, the extreme temperature difference can cause the candy shell to crack as the truffle underneath begins to thaw and expand further. Only freeze them for about 30 minutes—just long enough to firm them up for dipping.
Conclusion
These Orange Creamsicle Truffles are more than just a dessert; they are a delightful, bite-sized experience that brings a touch of sunshine to any occasion. With their crisp, vibrant candy shell and luscious, citrus-infused creamy center, they offer a textural contrast and a flavor profile that is completely irresistible. The best part is how achievable they are for home cooks. No ovens, no complicated pastry techniques—just a few simple ingredients, a little bit of mixing, and a whole lot of delicious nostalgia. Gather your ingredients, clear some space in your fridge, and get ready to create a sweet treat that your friends and family will be requesting for years to come.