Decadent No-Bake Tiramisu Truffles: A Bite-Sized Italian Masterpiece
Decadent No-Bake Tiramisu Truffles: A Bite-Sized Italian Masterpiece
There are few desserts in the world as universally beloved as classic Italian tiramisu. The delicate balance of robust espresso, airy and rich mascarpone cheese, tender ladyfingers, and a generous dusting of bitter cocoa powder creates a symphony of flavors that is truly unparalleled. However, traditional tiramisu requires patience. It requires meticulous layering, a delicate touch so the ladyfingers don’t become completely soggy, and hours—sometimes overnight—of chilling time in the refrigerator to set properly. What if you could capture every single one of those iconic flavor notes in a portable, bite-sized treat that requires no baking and significantly less assembly time? Enter the ultimate dessert revelation: Tiramisu Truffles.
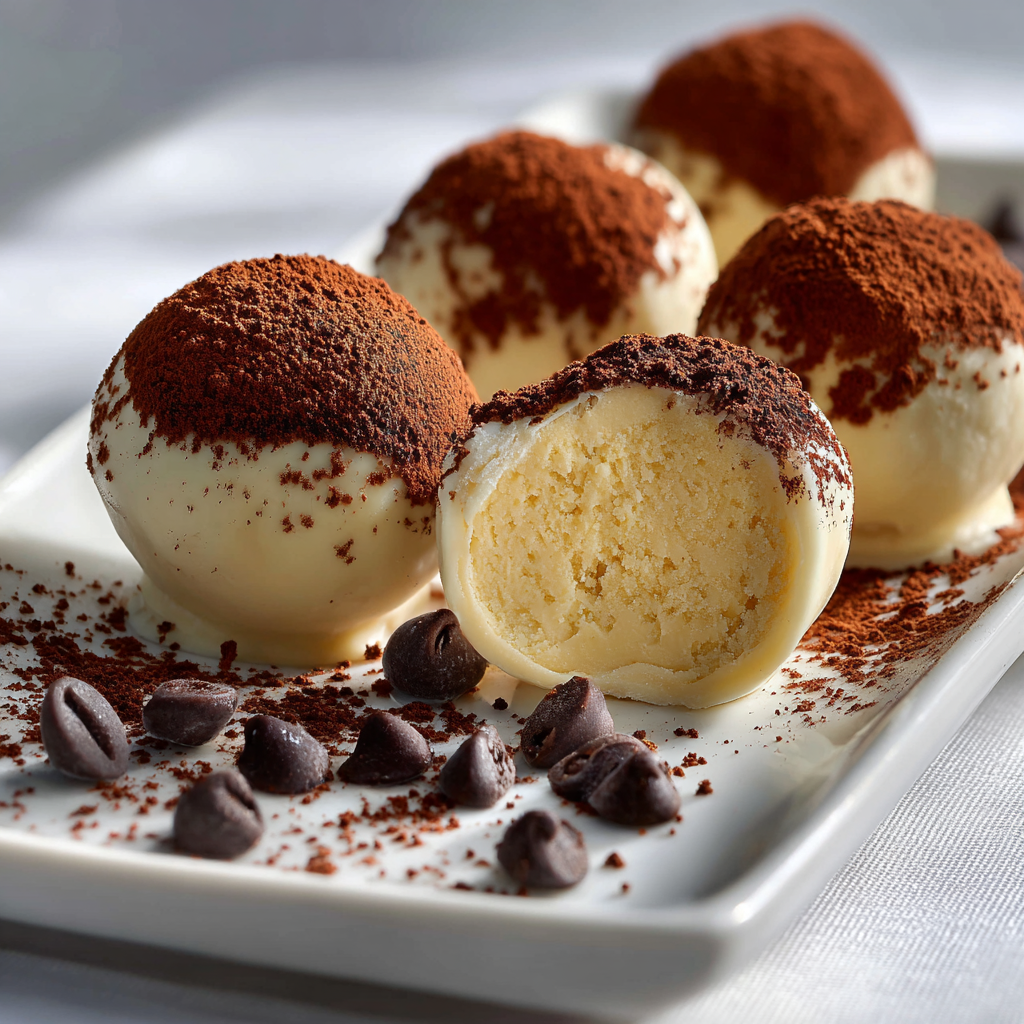
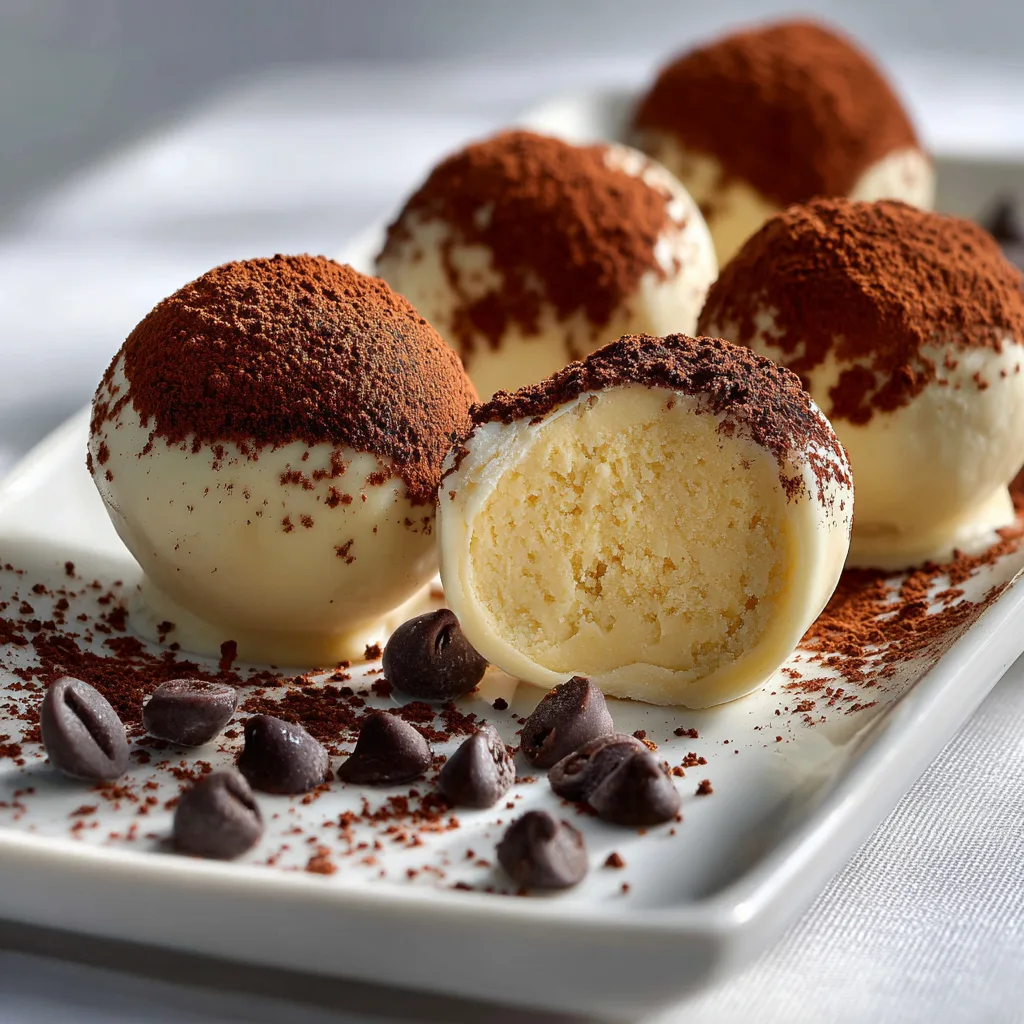
These elegant little confections are the perfect solution for when you crave the sophisticated taste of a high-end Italian dessert but need something quick, manageable, and effortlessly shareable. By blending crushed ladyfingers with rich mascarpone, a splash of strong espresso, and a hint of sweetness, you create a truffle center that mimics the exact texture and taste of a perfectly soaked tiramisu layer. Enrobed in a crisp white chocolate shell and finished with the requisite dusting of cocoa powder, these truffles are guaranteed to steal the show at any dinner party, holiday gathering, or casual weeknight treat-yourself moment. They are elegant enough for a wedding dessert table, yet simple enough to whip up on a rainy Tuesday afternoon.
Why You Will Love This No-Bake Recipe
If you are on the fence about making your own confections at home, let these Tiramisu Truffles change your mind. Here is exactly why this recipe will become a permanent fixture in your dessert repertoire:
- No Oven Required: As a completely no-bake dessert, these are perfect for warm summer months when you refuse to turn on the oven, or during chaotic holidays when oven space is strictly reserved for the main course.
- Authentic Flavor Profile: We do not cut corners on the flavor. By using authentic Savoiardi (crisp ladyfingers) and real mascarpone cheese, the taste is virtually indistinguishable from a slice of traditional tiramisu.
- Perfectly Portion-Controlled: A full pan of tiramisu can be dangerous to have sitting in the fridge. These truffles offer the perfect, satisfying bite of sweetness without the temptation to slice “just one more little piece.”
- Incredibly Giftable: Packaged in a beautiful little box with mini cupcake liners, these truffles make an exceptional, thoughtful, and impressive homemade gift for Valentine’s Day, Christmas, or hostess gifts.
- Make-Ahead Magic: Like many truffle recipes, these actually taste better after a day or two in the fridge, allowing the espresso and vanilla notes to deeply infuse the ladyfinger crumbs.
A Bite-Sized History of Tiramisu
To understand the magic of a tiramisu truffle, it helps to appreciate the dessert that inspired it. The word “tiramisu” literally translates to “pick me up” or “cheer me up” in Italian. This is, of course, a direct reference to the two caffeinated components of the dish: robust espresso and cocoa. While its exact origins are fiercely debated among Italian culinary historians—with several regions claiming its invention—most agree that the modern version of tiramisu was born in the Veneto region of Italy (specifically the city of Treviso) in the 1960s or 1970s.
Originally, it was a restorative dish. Legend has it that it was served to pregnant women and nursing mothers, or to exhausted patrons of local establishments late at night, to provide a burst of energy. The traditional recipe relies on a zabaglione—a light custard made of egg yolks, sugar, and Marsala wine—whipped together with mascarpone cheese. This airy cream is then layered with crisp ladyfinger cookies (Savoiardi) that have been briefly dunked in strong espresso. Over the decades, tiramisu has evolved into countless forms: cakes, cheesecakes, ice creams, and now, these spectacular truffles.
By transforming this layered dessert into a truffle, we are paying homage to the original flavor profile while modernizing the presentation and accessibility. It is the ultimate fusion of old-world Italian tradition and contemporary dessert convenience.
Deep Dive: The Essential Ingredients
With a recipe this simple, the quality of your ingredients dictates the success of your final product. Do not be tempted to make substitutions for the core components, as they are essential for achieving that authentic tiramisu flavor and texture.
1. Ladyfingers (Savoiardi)
You must use hard, crisp Italian ladyfingers (Savoiardi), not the soft, sponge-cake-like ladyfingers sometimes found in the bakery section. The hard ladyfingers act as the dry foundation of our truffle. When pulsed into crumbs, they absorb the espresso and the moisture from the mascarpone perfectly, transforming into a dense, cake-like center without becoming a soggy mess.
2. Mascarpone Cheese
This is the soul of any tiramisu. Mascarpone is a soft Italian double or triple-cream cheese. It has a high butterfat content (often between 60% and 75%), which gives it a remarkably rich, buttery, and slightly sweet flavor profile. Crucial Note: Do not substitute standard American cream cheese. Cream cheese has a pronounced tanginess and lower fat content that will make your truffles taste like a cheesecake bite rather than a tiramisu truffle. Mascarpone is mellow and luxurious.
3. Strong Espresso or Coffee
The “pick me up” element. If you have an espresso machine, pull a fresh, strong shot and let it cool. If you do not have an espresso machine, you can use very strongly brewed coffee, or mix high-quality instant espresso powder with a small amount of hot water. The coffee must be robust enough to cut through the rich mascarpone and white chocolate.
4. Powdered Sugar and Vanilla Extract
Because mascarpone is only subtly sweet, and the espresso is bitter, we need a touch of powdered sugar to balance the truffle center. We use powdered (confectioners’) sugar rather than granulated sugar to ensure the filling remains perfectly smooth and free of any gritty texture. A splash of pure vanilla extract enhances all the other flavors.
5. High-Quality White Chocolate
The exterior shell provides a necessary textural contrast—a satisfying snap before yielding to the soft center. Use high-quality white chocolate baking bars or premium white chocolate chips. Lower-quality white chips often contain excess waxes and oils that refuse to melt smoothly and can result in a clumpy, unappealing coating.
6. Unsweetened Cocoa Powder
The crowning glory. A generous dusting of dark, unsweetened cocoa powder (preferably Dutch-processed for a smoother, deeper chocolate flavor) replicates the top layer of a traditional tiramisu. The bitterness of the cocoa perfectly counteracts the sweetness of the white chocolate shell.
The Anatomy of a Perfect Truffle Texture
Creating the perfect truffle center is a delicate balancing act of moisture. If your mixture is too dry, it will crumble when you try to roll it. If it is too wet, it will be impossibly sticky and will flatten out into puddles rather than staying in neat, round spheres.
The ladyfinger crumbs are your dry variable, and the mascarpone and espresso are your wet variables. Because different brands of mascarpone have varying levels of moisture, and humidity can affect your cookies, you must rely on feel. When you mix the dough, it should resemble wet sand that holds its shape perfectly when squeezed in your palm. If it feels too tacky, let it sit for 5 minutes so the cookies can absorb more moisture, or add a tablespoon more of crushed ladyfingers. If it refuses to hold together, add a tiny dollop more of mascarpone or a drop of espresso.
Essential Equipment for Success
You do not need a professional pastry kitchen to make these, but a few key tools will make the process significantly easier and yield more professional-looking results:
- Food Processor: The easiest and most efficient way to turn your hard ladyfingers into fine, even crumbs. If you do not have one, a large zip-top bag and a heavy rolling pin will work, but it requires a bit more elbow grease to get the crumbs fine enough.
- Small Cookie Scoop: A 1-tablespoon spring-loaded cookie scoop is the secret to perfectly uniform truffles. Uniform truffles not only look better, but they also chill at the same rate.
- Melting Pot or Double Boiler: White chocolate is notoriously finicky and prone to seizing if overheated. A double boiler allows for gentle, indirect heat. A microwave works too, but requires very short bursts of heat and frequent stirring.
- Dipping Tools: A specialized chocolate dipping fork (with thin tines) is ideal for allowing excess chocolate to drip off. A standard kitchen fork also works well in a pinch.
Step-by-Step Instructions: Crafting the Truffles
- Crush the Ladyfingers: Place the crisp ladyfingers into the bowl of a food processor. Pulse continuously until they are reduced to a fine, sandy crumb. You want to avoid any large chunks, as they will make your truffles lumpy and hard to roll.
- Create the Dough: In a medium mixing bowl, combine the ladyfinger crumbs, room-temperature mascarpone cheese, powdered sugar, brewed espresso (make sure it has cooled!), and vanilla extract. Use a sturdy silicone spatula to mix and mash the ingredients together until a cohesive, slightly sticky dough forms.
- Scoop and Roll: Line a baking sheet with parchment paper or a silicone baking mat. Using your small cookie scoop, portion out the dough. Roll each portion between your palms to create a smooth, round ball. Place them on the prepared baking sheet.
- The Crucial Chill: Place the baking sheet into the refrigerator for at least 1 to 2 hours, or in the freezer for 30 minutes. The truffles must be very firm before dipping; otherwise, they will fall apart and melt into the warm white chocolate.
- Melt the Chocolate: While the truffles are finishing their chill, gently melt the white chocolate. If using a microwave, heat in 20-second increments at 50% power, stirring vigorously between each interval until smooth. If the chocolate seems too thick, you can stir in 1/2 teaspoon of neutral oil (like vegetable or coconut) or shortening to thin it out for easier dipping.
- Dip and Set: Remove the chilled truffles from the fridge. Drop one truffle at a time into the melted white chocolate. Use a fork to roll it around until completely coated. Lift the truffle with the fork, tapping the handle gently on the side of the bowl to encourage excess chocolate to drip off. Slide the truffle back onto the parchment paper.
- The Final Dusting: While the chocolate is still wet and tacky, use a small, fine-mesh sieve to generously dust the tops of the truffles with unsweetened cocoa powder. Allow the chocolate to set completely at room temperature or in the fridge.
Pro Tips for Flawless Truffles
Even simple recipes benefit from insider knowledge. Keep these tips in mind to avoid common pitfalls:
- Room Temperature Mascarpone: Let your mascarpone sit out for about 20-30 minutes before mixing. If it is fridge-cold, it will be difficult to blend smoothly with the crumbs, leading to over-mixing which can cause the cheese to separate and become grainy.
- Avoid Seizing the Chocolate: White chocolate seizes (turns into a grainy, solid paste) if even a single drop of water touches it, or if it is overheated. Ensure all your bowls and utensils are bone-dry.
- The “Toothpick Trick”: If you find dipping with a fork too messy, you can insert a toothpick into the chilled truffle, dip it into the chocolate, and stick the toothpick into a block of styrofoam to dry. Once set, remove the toothpick and dab a tiny bit of melted chocolate over the hole before dusting with cocoa.
Delicious Variations and Upgrades
While this recipe is a purist’s dream, the truffle format allows for some incredibly fun variations. Here are a few ways to customize your batch:
- The Boozy Bite: Traditional tiramisu often features a splash of alcohol. Add 1 tablespoon of Kahlua (coffee liqueur), dark rum, or Marsala wine to the truffle mixture along with the espresso. You may need an extra tablespoon of cookie crumbs to offset the extra liquid.
- Dark Chocolate Enrobed: If you find white chocolate too sweet, swap it out entirely for a high-quality dark chocolate (60% cacao or higher). The bitterness of the dark chocolate pairs beautifully with the sweet mascarpone center.
- Nutty Tiramisu: Finely chop toasted hazelnuts or almonds and fold them into the truffle mixture for an added textural crunch that complements the coffee flavor beautifully.
- Matcha Tiramisu Truffles: A modern twist! Swap the espresso for strongly brewed matcha green tea, and replace the exterior cocoa powder dusting with culinary-grade matcha powder for a stunning, vibrant green dessert.
Storage and Freezing Instructions
Because these truffles contain dairy (mascarpone), they must be stored properly to maintain their freshness and safety.
Refrigerator Storage: Place the fully set truffles in an airtight container, separating layers with parchment paper or wax paper. They will keep perfectly in the refrigerator for up to 5 to 7 days. In fact, they often taste better on day two or three as the flavors meld. Serve them straight from the fridge or let them sit at room temperature for 10 minutes for a softer bite.
Freezer Storage: Tiramisu truffles freeze exceptionally well! Place the set truffles in a freezer-safe, airtight container, again separating layers with parchment. Freeze for up to 2 months. When you are ready to enjoy them, simply transfer the container to the refrigerator overnight to thaw. We do not recommend thawing them quickly at room temperature, as condensation can form on the white chocolate shell and ruin the cocoa powder dusting.
Conclusion
Transforming a labor-intensive, classic Italian dessert into a simple, no-bake confection is the ultimate culinary life hack. These Decadent No-Bake Tiramisu Truffles deliver all the sophisticated, bold flavors of espresso, cocoa, and sweet mascarpone in an elegant, irresistible package. Whether you are meal-prepping desserts for the week, creating edible holiday gifts, or just satisfying a sudden sweet tooth, this recipe is guaranteed to become a cherished favorite. Gather your ingredients, prepare for some wonderfully messy cocoa dusting, and enjoy the ultimate bite-sized indulgence.
Tiramisu Truffles
Ingredients
Equipment
Method
- Place the ladyfingers in a food processor and pulse until they form fine crumbs. Transfer to a medium mixing bowl.
- Add the softened mascarpone cheese, powdered sugar, cooled espresso, and vanilla extract to the bowl with the crumbs.
- Using a spatula, mix everything together until a cohesive, thick dough forms. It should hold its shape when pressed.
- Using a small cookie scoop (about 1 tablespoon), scoop the dough and roll it between your hands to form smooth balls. Place on a parchment-lined baking sheet.
- Chill the truffles in the refrigerator for at least 1 hour, or in the freezer for 30 minutes, until very firm.
- Once chilled, melt the white chocolate in a double boiler over gently simmering water, or in the microwave in 20-second bursts at 50% power, stirring until smooth. Stir in coconut oil if the chocolate is too thick.
- Using a fork, dip each chilled truffle into the melted white chocolate, tapping off any excess. Return the coated truffle to the parchment paper.
- While the white chocolate is still wet, generously dust the tops of the truffles with cocoa powder using a fine-mesh sieve.
- Allow the chocolate to set completely before serving. Store leftovers in an airtight container in the refrigerator.